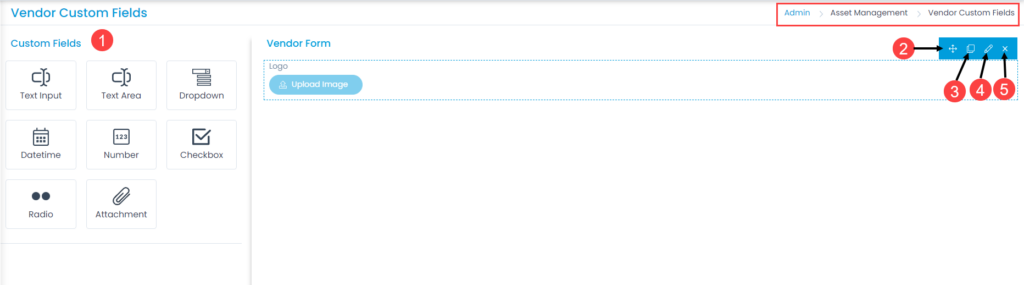
Motadata Docs

Vendor Form

The layout of asset management has all the fields required to manage the vendors of an organization. However, to meet the organization’s needs, you can modify the default template and add new fields. The fields can later be used in the automation settings also.

To view the Vendor Custom Fields, navigate to Admin > Asset Management > Vendor Custom Fields and the below page appears.

Vendor Form
Vendor Form

Here, you can customize the form using the below options:

  1. Field Pallet: You can drag and drop the fields from the pallet to add into the form.
  2. Re-Order: You can drag and drop the fields to change the order of the form.
  3. Duplicate: You can create duplicate fields from the custom fields.
  4. Edit: You can edit the fields, make them mandatory, or change their characteristics.
  5. Remove: You can delete the custom fields.

Example Scenario: Every Vendor in an organization requires to upload its LOGO for simpler and smoother contracts. This field will help the admin to let the vendor upload the Logo in the form of an attachment.

Adding Custom Field in the Vendor Form

Enter the below details:

  • Name: Enter the name of the field.
  • Button Text: Enter the text to appear on the button.
  • Required: Enable to make the field mandatory in the form.

Once done, click Add. You can then re-arrange its location, create a duplicate field, edit, or delete it if required. Similarly, you can add other custom fields. For more details on other fields, refer to the link Request Form.

On this Page