Motadata Docs

How to Create Request Using REST API

A REST API defines a set of functions which developers can perform requests and receive responses via HTTP protocol such as GET and POST. {Product} allows third party clients to create Requests using REST API.

Prerequisite

Before using REST API, you have to create an API Client.

Creating a Request?

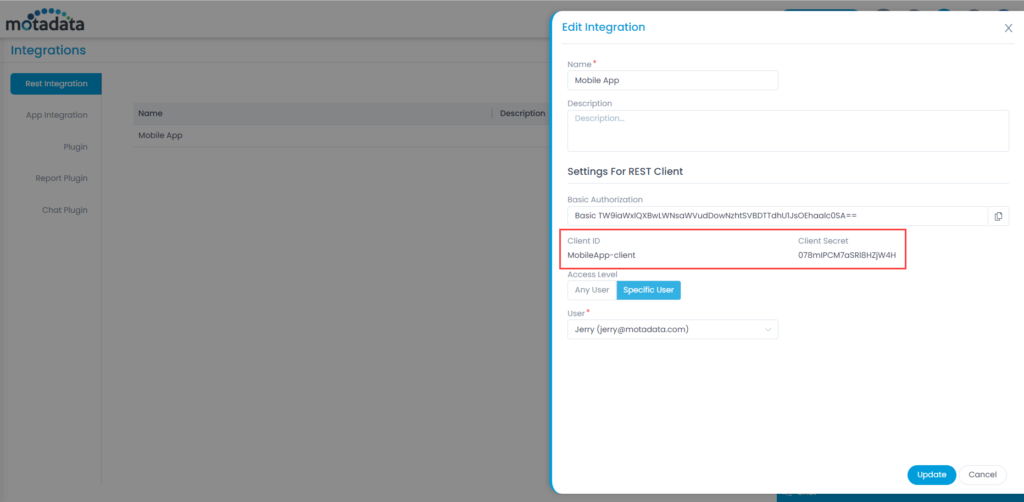
  • Go to Admin > Automation > Integrations > Rest Integration.
  • Copy Client ID and Client Secret from the Integration page as shown in the below:
Client ID and Secret Key
  • Use the credentials (Client ID and Secret) to acquire the access token. The user credentials are required, if the Access Level is selected as Specific User.
  • If the Access Level is selected as Any User, any technician registered in the system can use the REST API.
  • You will receive an access token from the server as shown below:
Access Token
Access Token
  • Now you can create an request using the API path. Below is the API path for creating a request.

    APIhttp://{{server-url}}/api/v1/request

    HTTP Method: POST

    Header:

    Key: Authorization

    Value: Bearer {access_token}

Keys Value Type Description
subject* String Subject of the ticket.
categoryName String Category Name of a Request. Set to ‘Request’ as it is default to ‘Service Request’
requesterEmail* String Email address of the user registered for the client.
ccEmailSet String Array Email Address of People to whom notification is to be sent for certain events on Request
tags String Array These are additional identifiers attached to a ticket. Its a list that can contain n number of STRINGS.
impactName String Describes the effect of the Request. Possible values: Low, On User , On department, Or On Business
priorityName String Shows the importance of the Request. Possible values: Low, Medium, High or Urgent
urgencyName String Marks the request as urgent. Possible values: Low, Medium, High or Urgent
departmentName String Additional information about the ticket.
locationName String Name of the Location where Request happened. Note that Location Must Exist with same name
supportLevel String Describes the level of the provisioned support. Possible Values: Tier1, Tier2, Tier3 or Tier 4
spam Boolean Possible Values are True or False
source String It shows the origin of the ticket. The Source can be either Support Portal or the Technician portal. Default source for Rest API is ‘External’.
fileAttachments Object Array Reference File Name of attachments for a Request. For example:[ { “refFileName” : “abc”, “realName” : “xyz.pdf” } ]
statusName String Possible values are Open, In Progress, Pending, Resolved, Closed
linkAssetIds Object Array Add asset id with model name. For example :”linkAssetIds”: [{“assetModel”: “asset_hardware”,”assetId”: 1}]
customField MAP:{key: STRING, value: OBJECT} This key is related to custom fields. Example “customField”: {“New Dropdown”: “1”, “New Number”: 110.1,”New Text Area”: “a11”, “New Text Input”: “111”}
Note: Here, User refers to the one registered with the Client.

Request

{
"requesterEmail": "a@b.com",
"ccEmailSet": [
"a@b.com"
],
"subject": "asdasd",
"impactName": "Low",
"priorityName": "Low",
"statusName": "Open",
"urgencyName": "Low",
"departmentName":"IT",
"spam":false,
"supportLevel":"tier2",
"customField": {
"New Dropdown": "1",
"New Number": 110.1,
"New Text Area": "a11",
"New Text Input": "111"
},
"name": "INC-1",
"tags": ["asdasd"]
}

Response

{
"id": 1,
"createdTime": 1584699527485,
"updatedTime": 1584699528033,
"requesterEmail": "a@b.com",
"requesterName": "utsav",
"ccEmailSet": [
"a@b.com"
],
"subject": "asdasd",
"impactName": "Low",
"priorityName": "Low",
"statusName": "Open",
"urgencyName": "Low",
"tags": [],
"customField": {},
"source": "Technician Portal",
"spam": false,
"departmentName": "IT",
"supportLevel": "tier1",
"name": "INC-1"
}

  • Your Request is created on returning success.