Motadata Docs

Create SLA

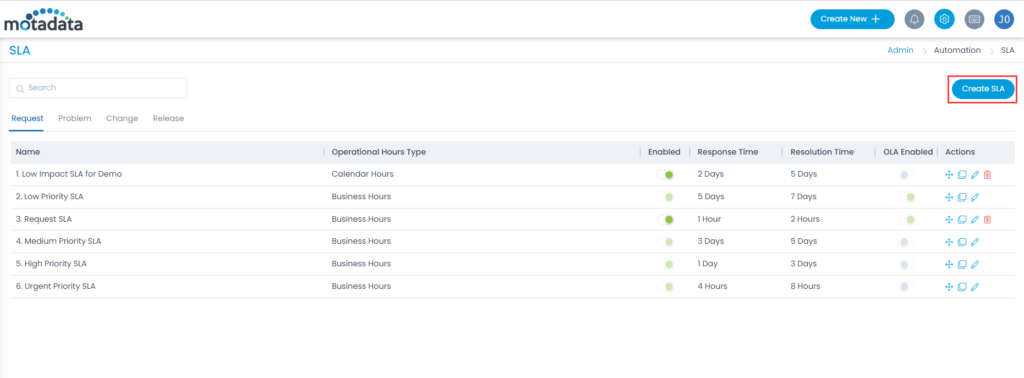
The create page helps you to create an SLA with custom conditions and rules. To create an SLA, on the list page, click the Create SLA button on the top-right corner, and the page appears.

Create SLA button
Create SLA button
Create SLA Page
Create SLA Page

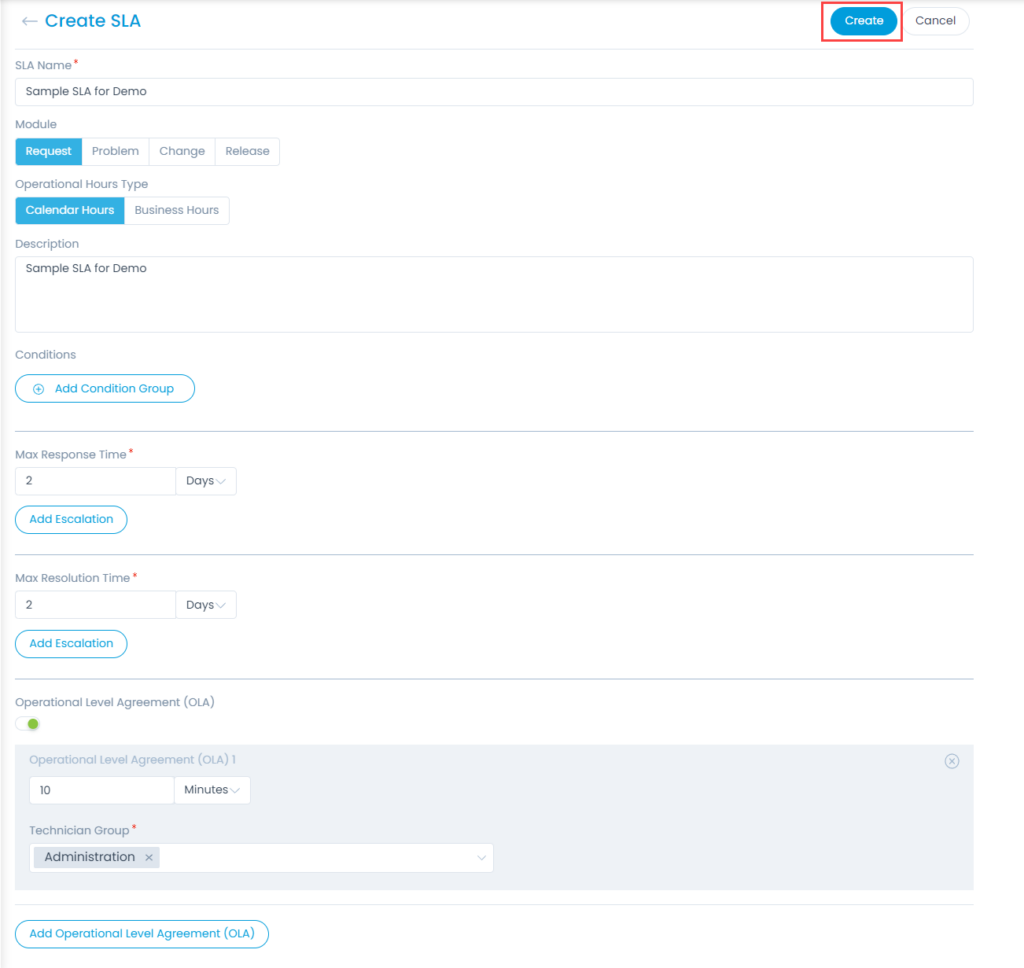
Enter the following details:

  • SLA Name: Enter the SLA name.
  • Module: Select the module on which the SLA should work. The options are: Request, Problem, Change, and Release.
  • Operational Hours Type: Select the operational hours based on which the SLA will be calculated. The options are:
    • Calendar Hours: The SLA takes 24×7 as the working hours.
    • Business Hours: The SLA uses the settings from business hours section.
  • Description: Enter the detailed description about the SLA. This field helps other people to know exactly what is the SLA about and what could be its implications.
  • Conditions: Define the conditions here that will be evaluated in the request to apply the SLA. You can define multiple conditions here. All the conditions work in AND form. It means the SLA is applicable only when all the conditions are true.
Adding Conditions in SLA
    • Condition Parameter: Select a condition parameter from the dropdown list.
    • Operator: Select the operator: In/Not In from the dropdown list.
    • Value: Select the value for condition. You can select multiple values of which the first value will be displayed in full, followed by the count of all additional values selected.

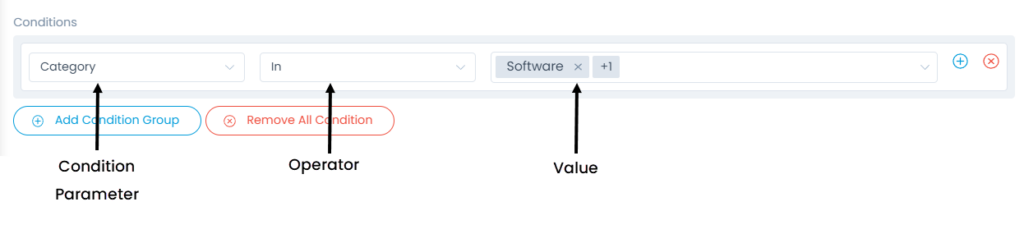
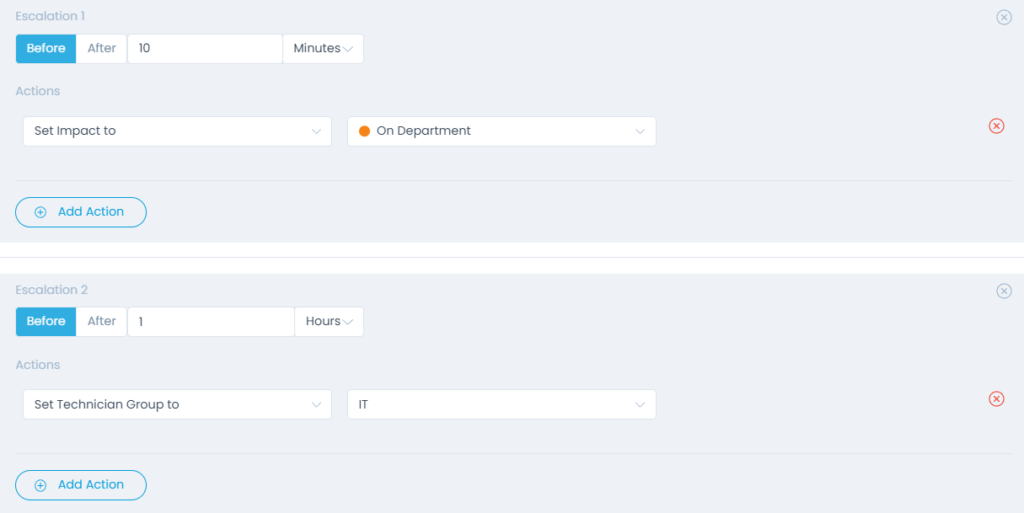
You can also click the Add Condition Group button to add more conditions in the SLA. Click on Remove All Conditions to remove all the conditions of the SLA.
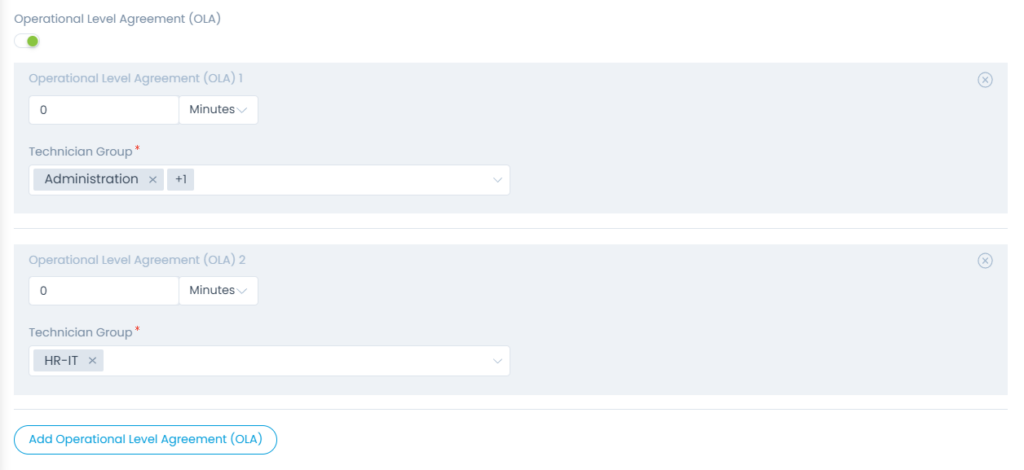
  • Max Response Time: Enter or select the maximum response time and unit for the technician to respond. The values can be whole numbers only. The units can be minutes, hours, and days. In case minutes is selected, the response time must be 5 or more.
    • Add Escalation in Response Time: When someone fails to give a response in the SLA defined time frame, the escalation rule will apply. You can add only 1 level of escalation.
Response Escalation
Response Escalation
    • Before/After: Select the time when the escalation should take place. For example: In the above figure, the escalation will take place before 5 minutes of response due date time.
    • Actions: Select the actions from the given list. In the above figure, the priority of the request will set to High and Impact to On Users.
  • Max Resolution Time: Select the maximum resolution time value and unit. Values can be whole numbers only. The units can be minutes, hours, and days. The resolution time is always equal to or higher than response time. In case of minutes unit, the value must be 5 or more.
  • Add Escalation in Resolution Time: When someone fails to resolve the request in the SLA defined time frame, the escalation rule will apply. You can add up to 5 levels of escalation.
Resolution Escalation
  • Before/After: Select the time when the escalation should take place. For example: In the above figure, the 1st escalation will take place after 10 minutes of resolution due date time. The 2nd escalation will take place after the time of first level escalation is over.
  • Actions: Select the actions from the given list. In the above figure, the impact of the request will set to On Department. In 2nd escalation, the technician group will be set to IT.
Operational Level Agreement (OLA)
  • Operational Level Agreement (OLA): OLA defines the timeline for each individual technician group. It is defined per SLA and is optional. It works similar to SLA but includes only the working hours of the technician group. OLA time should be less than or equal to the Max Resolution Time.

To configure OLA,

  1. Enable the OLA option.
  2. Click the Add Operational Level Agreement button and specify the time. Values can be whole numbers only. The units can be minutes, hours, and days. In case of minutes unit, the value must be 5 or more.
  3. Select the Technician Groups to whom you want to apply the OLA rule. You can select multiple groups.
  4. You can click the Add Operational Level Agreement (OLA) button to add more OLAs in the SLA. You can add up to 5 levels of OLAs.

Once all the details are filled, click Create, and the SLA gets created. By default, it is enabled.

On this Page