Motadata Docs

Requesters

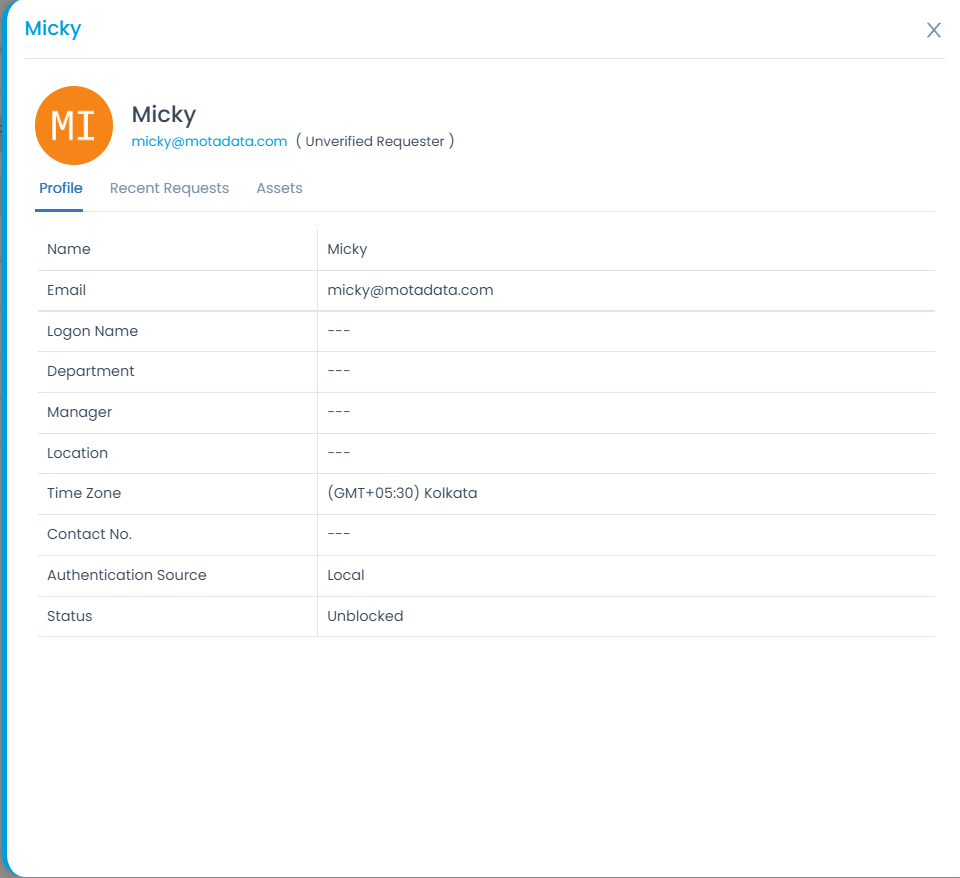
Requesters are the end-users who access the portal to create and seek information regarding their requests. They have access only to the request management, knowledge, and approval management sections. They can also view the changes and assets assigned to them based on the assigned permissions.

List Page

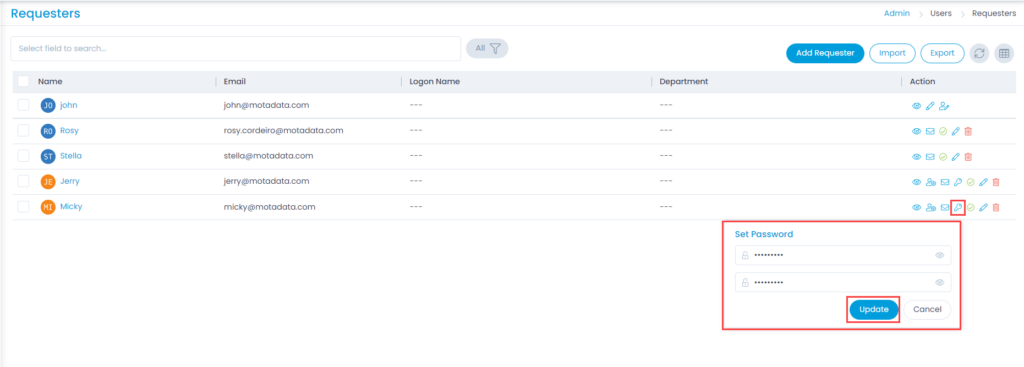
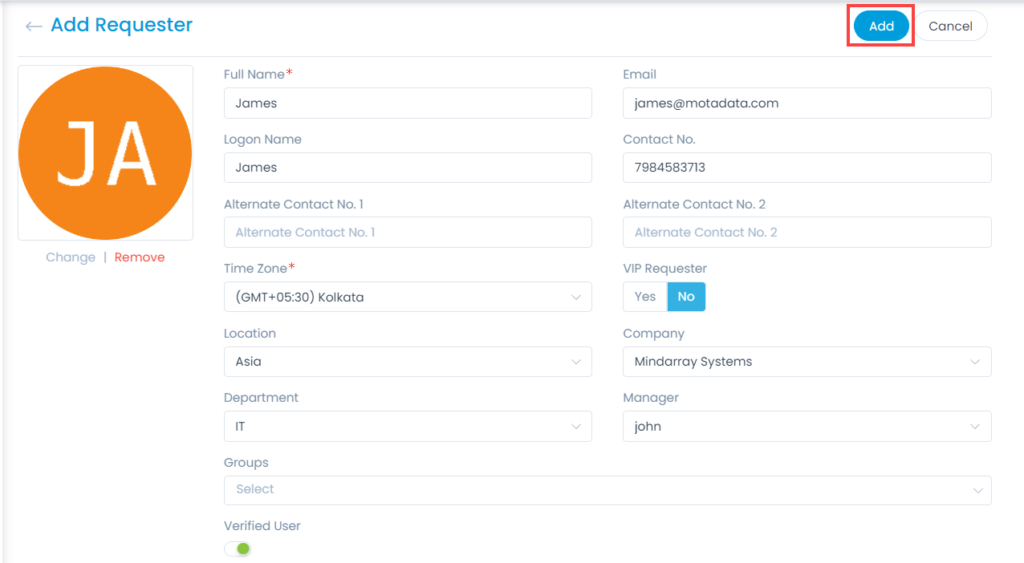
The list page displays all the requesters (including technicians) along with their details. Also, you can perform various operations like convert requester to technician, block requester, import, export, etc.

Requesters List Page
  1. Search: You can look for a specific requester by searching them. The search is a faceted search and allows you to find with specific criteria. You can find more details in the search section.
  2. Filter: You can filter the requesters list by selecting the desired option. The options are: All, Verified, Unverified, and Archived. If Verified is selected, all the requesters whose email addresses are verified will appear.
  3. Add Requester: You can add a requester.
  4. Import: You can import a list of requesters in one go.  The steps to import requesters is same as technicians. For more details, refer to the Technicians page.
  5. Export: You can export a list of requesters in CSV or Excel format.  The steps to export requesters is same as technicians. For more details, refer to the Technicians page.
  6. Refresh: You can refresh the requesters list. This is useful when multiple people are working on the requester page and contents are updated frequently.
  7. Column Selection: You can select the columns that you want to be visible in the grid.
    To select the columns, click the Column Selection icon, select the desired columns, and click Apply. The columns will become visible in the grid.
  8. Bulk Archive: You can archive the selected or all requesters in bulk. For more details, refer to the Technicians page.
  9. Grid: You can view the details of the requesters as per the columns selected.
  10. Edit: You can view and edit the requester details.
  11. Change Super Admin: You can change the super admin user. For more details, refer to the Technicians page.
  12. View: You can view the details of the requester by clicking the eye icon as shown below.
View Requester Details
  1. Send an Email to Verify the User: You can send an email to verify the requester user. The email contains the link using which the requester can verify and activate the account.
  2. Set Password: You can set the password of the requester.
    To set the password, click the key icon, enter the password, confirm it, and click Update as shown below. Once done, a confirmation message will appear.
Set Password for Requester
  1. Block Requester: You can block the desired requester in the same way as a technician. For more details, refer to the Technicians page.
  2. Edit: You can edit the details of the required requester.
  3. Delete: You can delete the requester if no longer needed.

Add Requester

To add a requester,
Click the Add Requester button and the page appears.

Adding Requester
Adding Requester

Enter the following details:

Parameter Description
Select Image You can select an image to set the profile picture of the requester. If not set, it automatically takes the first two letters of the name. You can change the image using the Change link below the square box.
Full Name Enter the full name of the requester.
Email Enter the email address of the requester.
Logon Name Enter the logon name of the requester. You can use this to login instead of the email address.
Contact No. Enter the contact number of the requester.
Alternate Contact No. 1 Enter the first alternate contact number.
Alternate Contact No. 2 Enter the second alternate contact number.
Time Zone Select the time zone.
VIP Requester Select whether the requester is a VIP person or not.
Location Select the location. To create custom locations, click here.
Company Select the company to which you want to associate the requester. To create companies, click here.

Note: This field is available only if Managed Services Provider feature is enabled.
Department Select the department in which the requester belongs. To create custom departments, click here.
Manager Select the manager to which the requester reports.
Groups Select the groups to which the requester belongs.
Verified User Select whether the requester is a verified user or not. Enable if the requester is verified via email.

Once done, click Add and the requester gets created.

On this Page