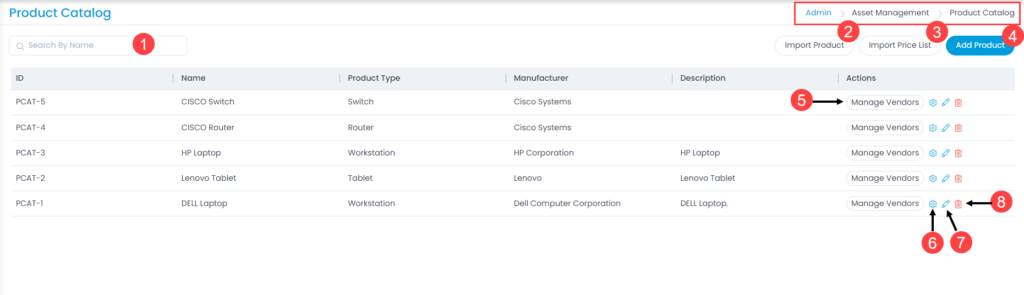
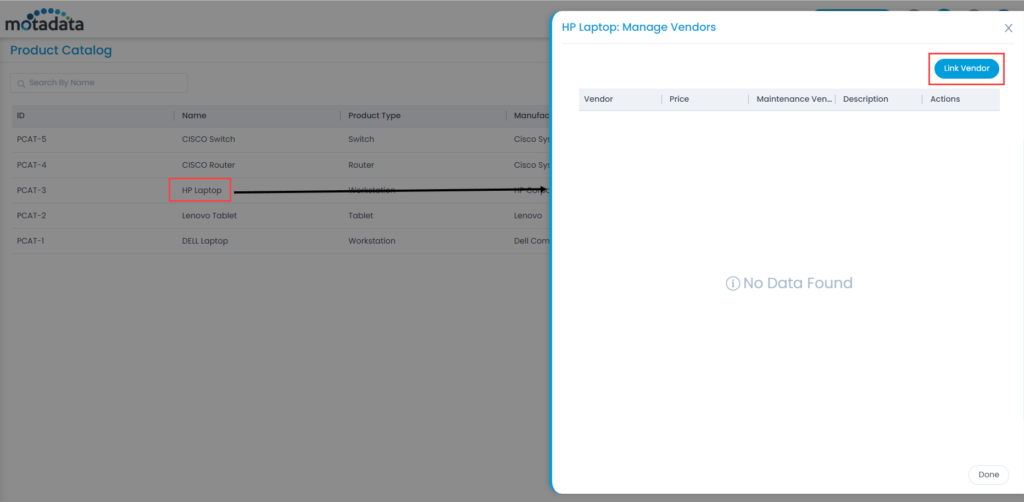
Motadata Docs

Product Catalog

Every Asset is an instance of a Product. For example: A Windows workstation could be an instance of a Product called HP Desktop JP78. A single Product can have multiple instances in the Database.

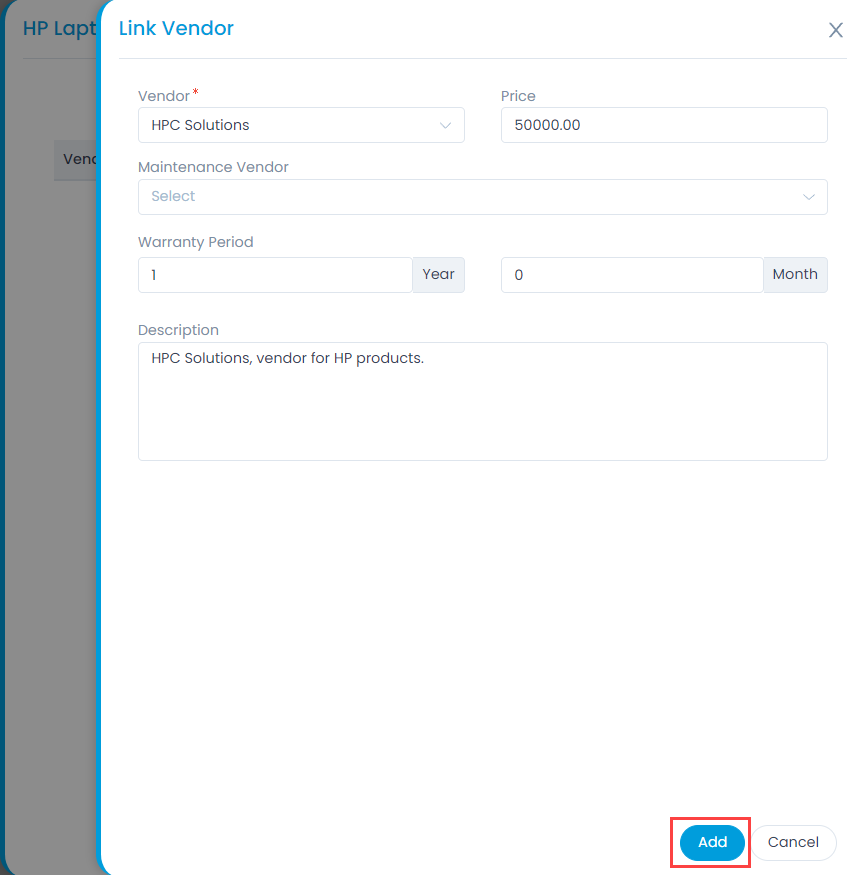
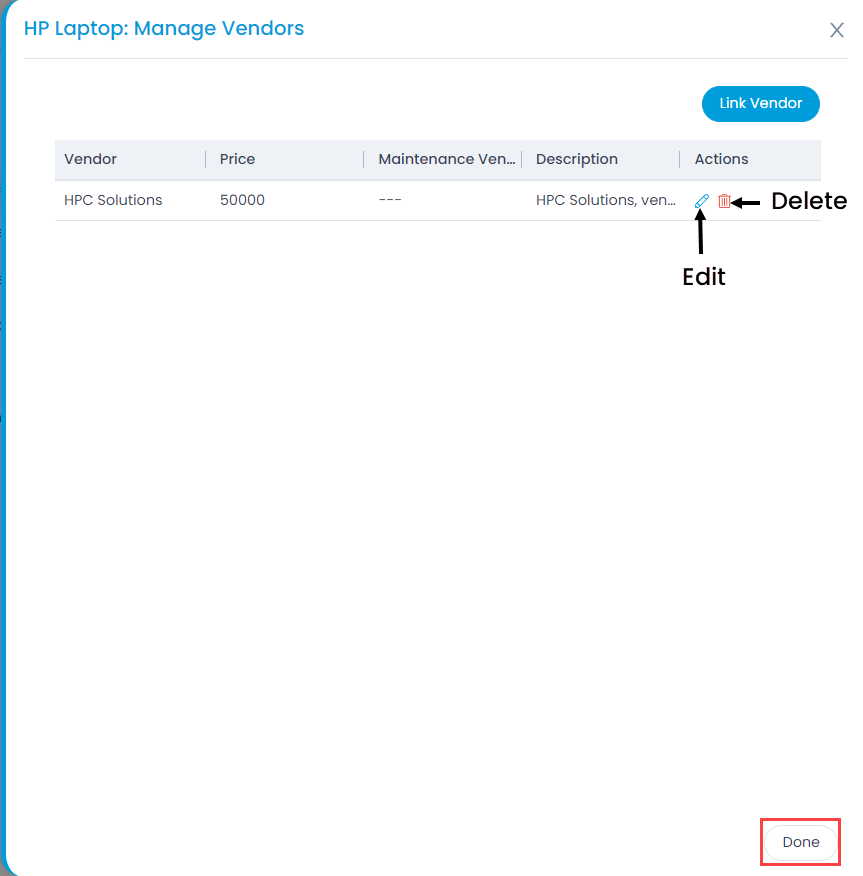
Asset Management allows you to maintain a catalog of products. You can maintain the information about the vendor and manufacturer in each product.

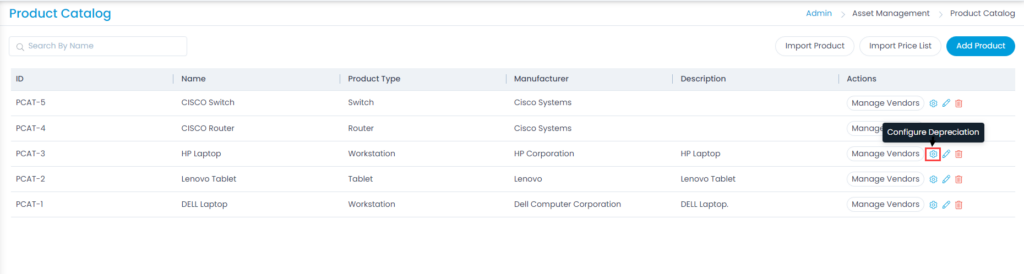
To view the Product Catalog page, navigate to Admin > Asset Management > Product Catalog.

Product Catalog Page

Here, you can do the following:

    1. Search: You can search for the required product by name.
    2. Import Product: You can import multiple products in bulk.
    3. Import Price List: You can import the product price list in bulk.
    4. Add Product: You can add a product.
    5. Manage Vendors: You can link vendors to the product. The vendors are created from the Vendor Catalog page.
    6. Configure Depreciation: You can configure depreciation of the product.
    7. Edit: You can edit the product details.
    8. Delete: You can delete the product if required. A confirmation message appears. Click Yes to continue or Cancel to stop the process.

Add Product

To add a product, follow the below steps:

  1. Click the Add Product button and a popup appears.
  2. Enter the below details:
    • Name: Enter the name of the product.
    • Product Type: Select the product type. For more details, refer to the link Product Types.
    • Manufacturer: Select the manufacturer of the product. For more details, refer to the link Manufacturer Catalog.
    • Description: Enter a short description about the product.
  3. Once done, click Add.
Add Product
Add Product

Import Product

To import products,

  1. Click the Import Product button on the list page and Product Batches page appears.
  2. Click the Import CSV Batch button.
Import CSV Batch
Import CSV Batch
  1. Select the .csv file if you already have it filled with the respective fields. If not, select the new .csv file using Click Here and fill the respective details. Once the file is uploaded, click Next.
Select .CSV File
Select .CSV File
  1. Map the fields as per the requirement. By default it is mapped, only in case of removal or change of some parameters mapping is necessary, and click Save Batch.
Map Fields
Map Fields
  1. The Product Batches page appears. It displays the status of the import along with the details like processing time, total records, success records, failed records, etc. as shown below. Once successful, the imported products will appear on the list page.
Imported CSV Batches

Import Price List

To import price list of products,

  1. Click the Import Price List button on the list page and Price List Batches page appears.
  2. Click the Import CSV Batch button.
Import CSV Batch
Import CSV Batch
  1. Select the .csv file if you already have it filled with the respective fields. If not, select the new .csv file using Click Here and fill the respective details. Once the file is uploaded, click Next.
Select .CSV File
Select .CSV File
  1. Map the fields as per the requirement. By default it is mapped, only in case of removal or change of some parameters mapping is necessary, and click Save Batch.
Map Fields
Map Fields
  1. The Product Batches page appears. It displays the status of the import along with the details like processing time, total records, success records, failed records, etc. as shown below. Once successful, the imported products will appear on the list page.
Imported CSV Batches

Manage Vendors

To link a vendor to the product, follow the below steps:

  1. Click Manage Vendors button next to the desired product name. A popup appears.
  2. Click Link Vendor to link to the product. For example: Here, HPC Solutions Vendor is linked to the HP Laptop Product.
Manage Vendors Popup
Add Vendor
Add Vendor
  1. Enter the below details:
    • Vendor: Select the vendor to link with the product. For more details, refer to the link Vendor Catalog.
    • Price: Enter the price of the product.
    • Maintenance Vendor: Select the maintenance vendor of the product.
    • Warranty Period: Enter the warranty period in years and months.
    • Description: Enter a short description about the product.
  2. Once done, click Add, and the vendor gets linked to the product. You can link multiple vendors. Once linked you can also edit or delete it if required.
List of Linked Vendors

Configure Depreciation

Depreciation is an accounting method of allocating the cost of physical asset over its useful life or life expectancy. It represents how much of an asset’s value has been used up. It helps the companies to earn revenue from an asset while expensing a portion of its cost each year the asset is in use.

Configure Depreciation Option
Configure Depreciation

Select the Depreciation Method and configure the parameters accordingly. The options are:

  • Straight Line: This methods allows calculation straight way based on the useful life in months or in Percentage% per year. In both the types the salvage value needs to be mentioned for calculation. If selected, select the Depreciation Type. The options are:
    • Useful Life: If selected, enter the Useful Life in months and the Salvage Value in US Dollars.
    • Depreciation Percentage: If selected, enter the Depreciation Percent/Year and the Salvage Value in US Dollars.
  • Declining Balance: This method allows similar calculation as Straight line.
  • Sum of the Years Digit: This method has simple input of Useful Life of asset in Years and its approximate Salvage Value in US Dollars.
  • Double Declining Balance: This method also needs a straight input of Used life of asset in Months and its approximate Salvage Value in US Dollars.