Motadata Docs

Request Status

Request Status determines the progress of the request tickets. Using these you can know how much work is done or pending on the ticket and accordingly actions can be taken. The system provides some default status values that are ready for use.

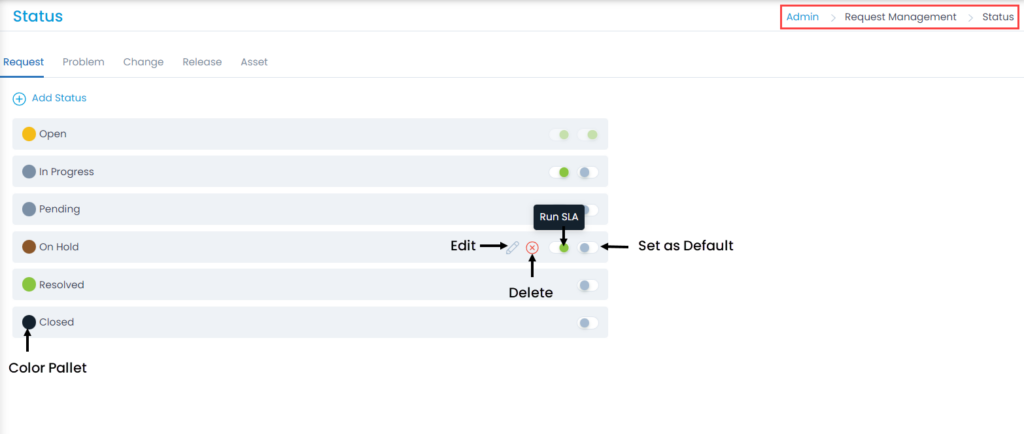
To view the Request Status page, navigate to Admin > Request Management > Request Status > Request tab.

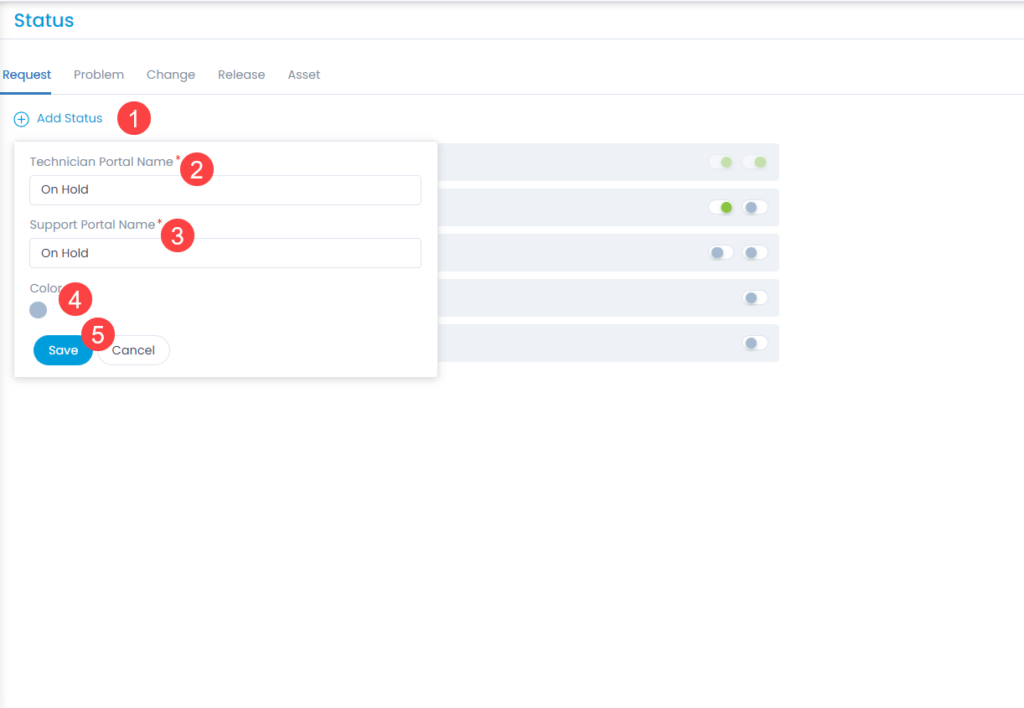
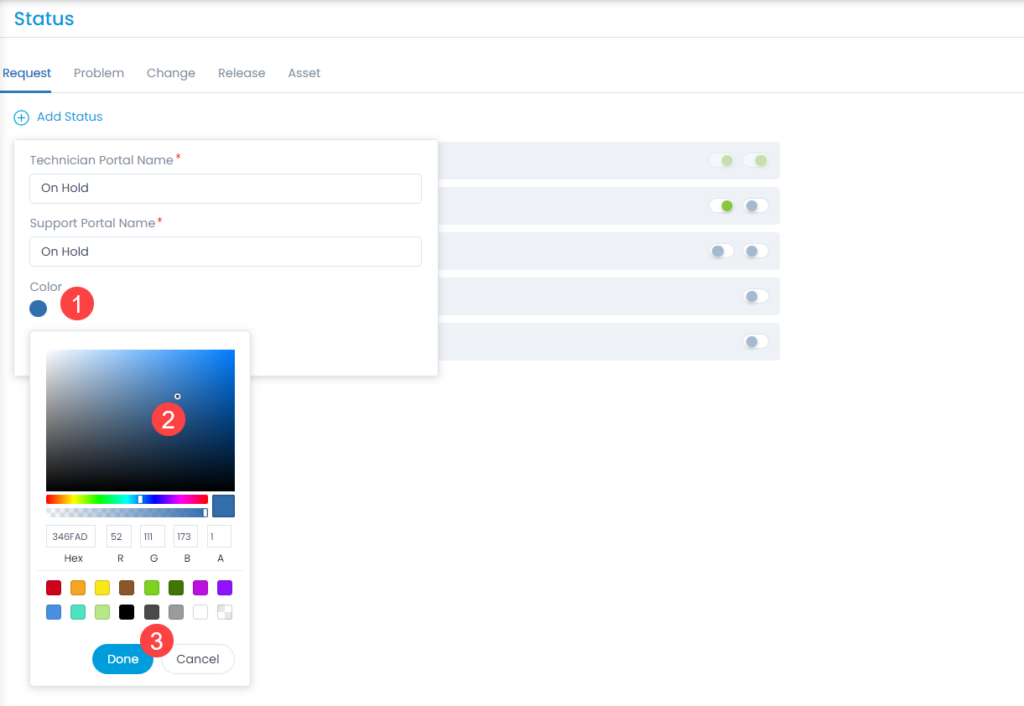
Here, you can manage the status of the tickets. Also, you can edit the status names, set any value as default, run SLA, and change the color of the status values as per the organization’s theme.

Manage Request Status

Here, you can do the following:

  • View and edit the default status.
  • Add and manage the Custom status.
  • Re-order the statuses using drag and drop.
  • Enable or disable the SLA for the status value using Run SLA. For example, if the status is ‘Pending’, the SLA should pause.
  • Set the default status of the ticket when a new request is created.

Add Status

To add a custom status,

  1. Click the Add Status link.
  2. Technician Portal Name: Enter the name of the status to appear on the Technician Portal. This is a mandatory field.
  3. Support Portal Name: Enter the name of the status to appear on the Support Portal. By default, this gets prepopulated with the above same value. You can edit this if required. For example: You can set the “In Progress” status of Technician Portal as “In Process” for the Support Portal.
  4. Color: Select the color or enter the hexadecimal code by clicking the color pallet icon.
  5. Click Save.
  6. Once added, you can edit or delete the custom status. You can only edit the default status and not delete.
Adding Status
Adding Status
Selecting Color of the Status

On this Page