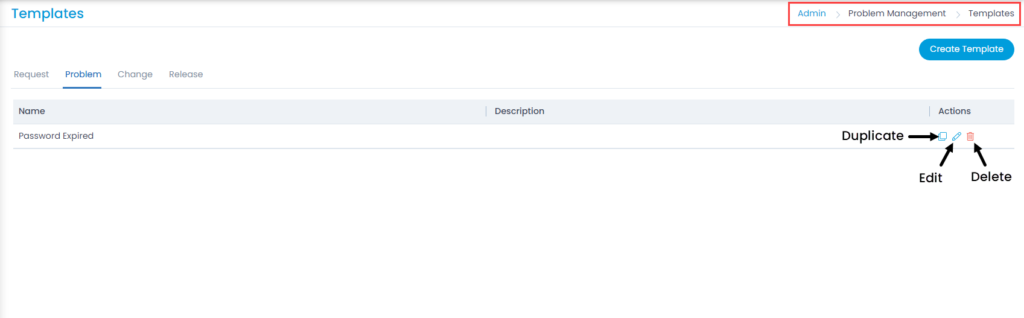
Motadata Docs

Problem Templates

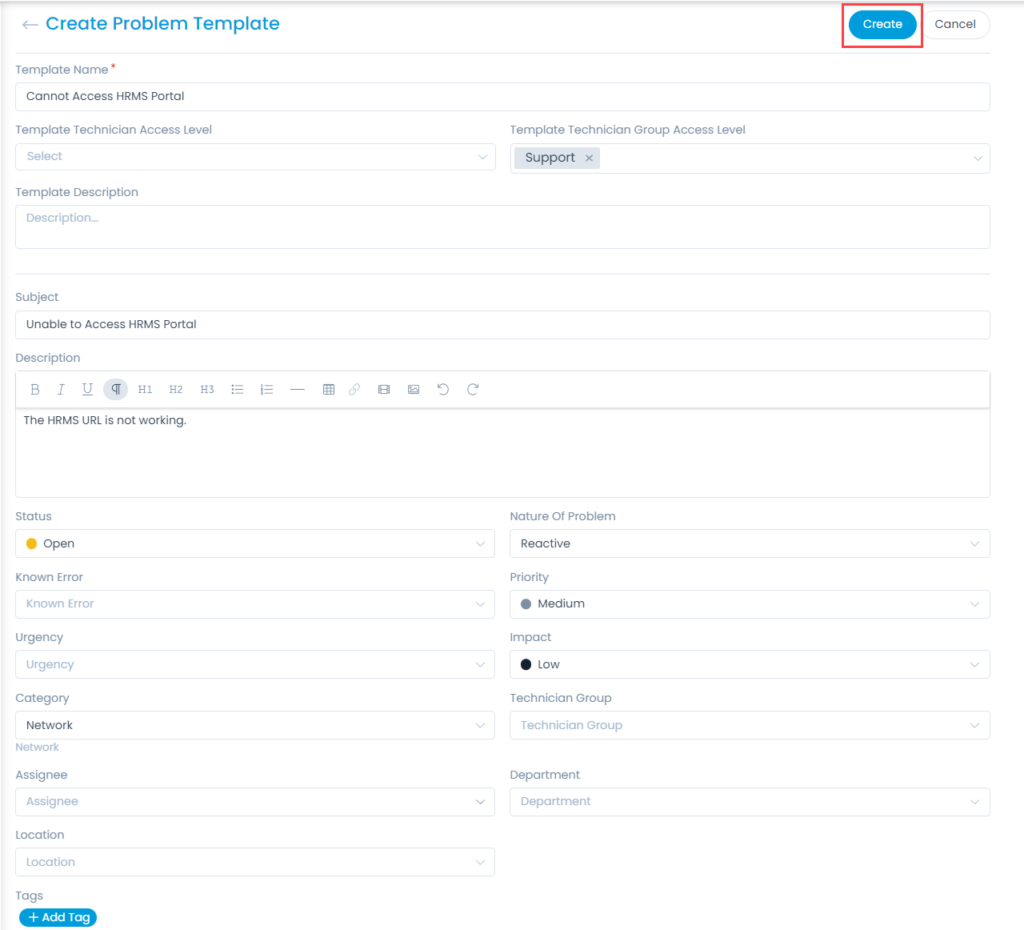
Templates are readymade forms which can be used while filling up the problem form. The user only needs to select them and the form will get automatically filled. These are convenient when a problem is of standard or recurring type. The advantages of using a template are:

  • Creating a problem using template saves a lot of time.
  • The templates ensure that proper and sufficient information is available in the problem.
  • The problem parameters like priority, urgency, assignee can be predefined in the template.

To view the Problem Templates, navigate to Admin > Problem Management > Problem Templates > Problem tab.

Problem Templates Menu

Here, you can create and manage templates for Request, Problem, Change, and Release modules.
Also, it has the below options:

  • Create Template: You can create a template from the scratch.
  • Duplicate: You can create a duplicate copy of a template to make some changes in it and use. This has two benefits: 1) If you are creating a new template similar to the existing one, you do not need to start from the scratch. 2) If you are modifying the existing one, the original works as a backup in case of errors.
  • Edit: You can edit the template to make changes in it.
  • Delete: You can delete the unwanted templates. A confirmation message appears. Click Yes to continue or Cancel to stop the process.

Create Template

To create a template, follow the below steps:

  1. Click the Create Template button on the top-right corner of the page. The Create Problem Template page appears.
Create Template
Create Template
  1. Enter the below details:
    • Template Name: Enter the name of the template.
    • Template Technician Access Level: Select the technician(s) who can access the template.
    • Template Technician Group Access Level: Select the technician group(s) who can access the template.
    • Template Description: Enter a brief description about the template.
    • Subject: Enter the subject of the problem.
    • Description: Enter the description of the problem.
    • Status: Select the status of the problem.
    • Nature Of Problem: Select the type of the problem as proactive or reactive.
    • Known Error: Select Yes if the problem is recursive or you already know what is the problem.
    • Priority: Select the priority of the problem.
    • Urgency: Select the urgency of the problem.
    • Impact: Select the impact of the problem.
    • Category: Select the category to which the problem belongs.
    • Technician Group: Select the technician group for the problem.
    • Assignee: Select the assignee if you want to assign the problem to a specific person.
    • Department: Select the department if you want to assign the problem to a specific department. It is optional.
    • Location: Select the location if you can find the location from the dropdown. It is optional.
    • Tags: You can add tags if you want. It will help you in identifying the similar problems. It is optional.
  2. Once all the details are filled, click Create. The template will become available to the users in the Fill From Template dropdown at the time of problem creation. Similarly, you can create templates for Request, Change, and Release modules.

On this Page