"Experience Our AI-driven ServiceOps and AIOps at DTX Europe 2024 to Transform your IT operations!" - Read More

Motadata Docs

Response Templates

Response Templates are used to send standard responses to the requests. Using this you can instantly send the response without wasting time in thinking and typing the email. These kind of templates are generally used in the auto-generated emails of acknowledgement or notification.

To view the Response Templates page, navigate to Admin > Request Management > Response Templates.

Response Templates Page

Here, you can do the below tasks:

  1. Search: You can search for the required template using keywords in the search field.
  2. Create Response Template: You can create a response template as per your requirement.
  3. Enable or Disable the Template: You can enable or disable the required template. If enabled the template will be available for selection in the Request Details page while replying to the request. If disabled, the template will not be available.
  4. Edit: You can edit the response templates.
  5. Delete: You can delete the templates if not required. On clicking, a confirmation message appears. Click Yes to continue or Cancel to stop the process.

Create a Response Template

To create a response template,

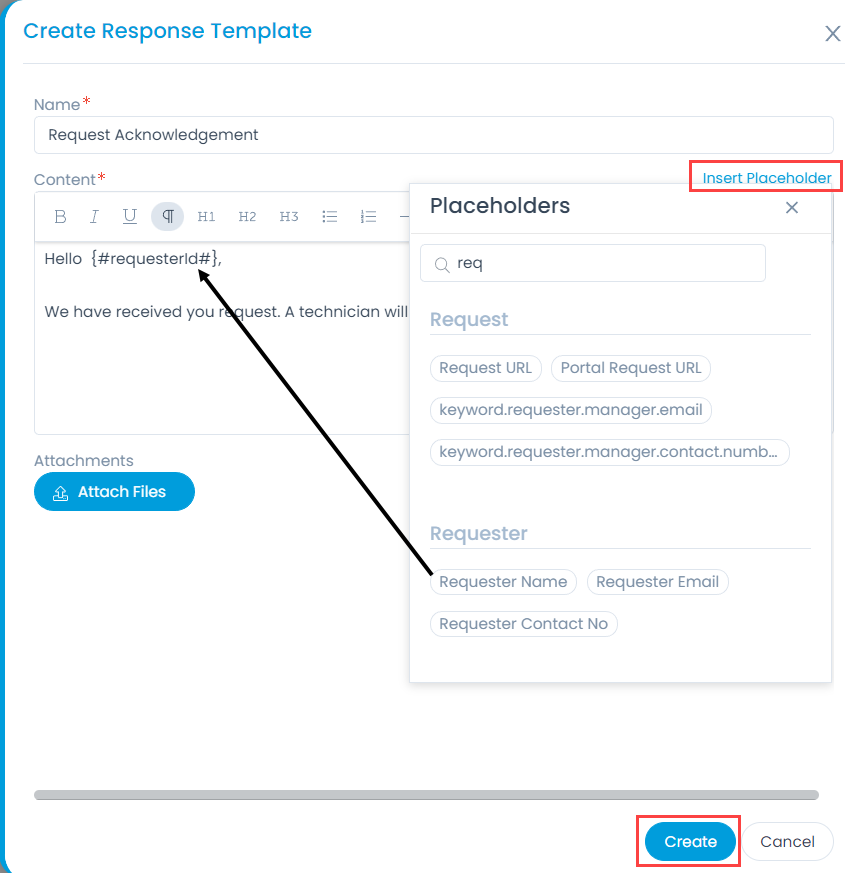
  1. Click the Create Response Template button and a popup appears.
Create Response Template
  1. Enter the below details:
    • Name: Enter the name of the template:
    • Content: Type the content of the template. You can also insert a placeholder in the content using the Insert Placeholder link. By default, all the templates have necessary placeholders available to provide request specific information. As an admin, you can add more placeholders based on the recommendations from the technicians. To add or remove a tag, edit the desired template, and use the insert placeholders.
      Note: You can only use the placeholders available in the list and cannot create the new ones.
    • Attachments: You can also attach any attachments if required.
  2. Once the details are filled, click Create.