Motadata Docs

Branding

Every organization needs its own logo and branding. Motadata ServiceOps provides this facility to its users. It allows the users to customize the portal as per their requirement.

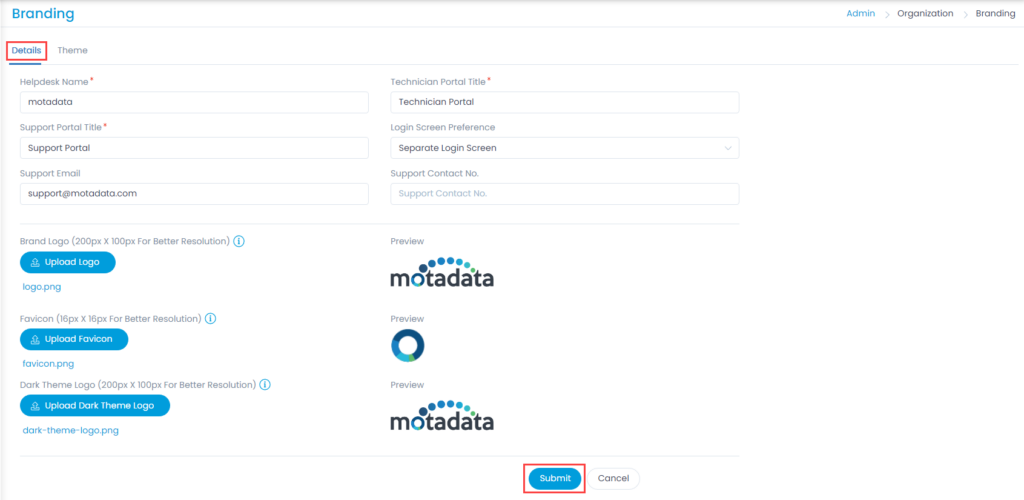
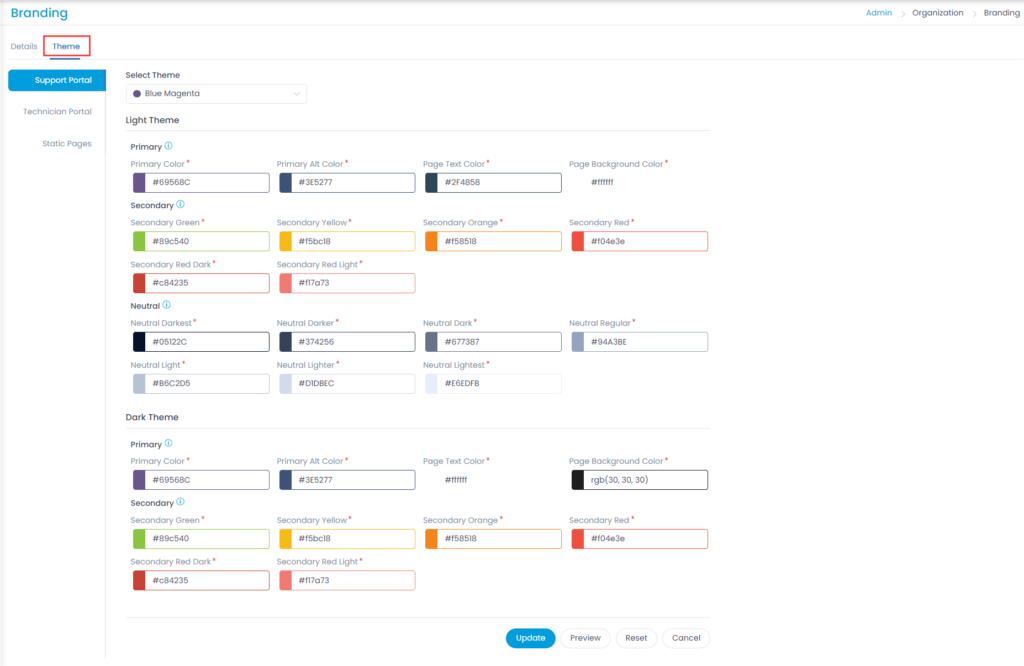
To view the Branding page, navigate to Admin > Organization > Branding.

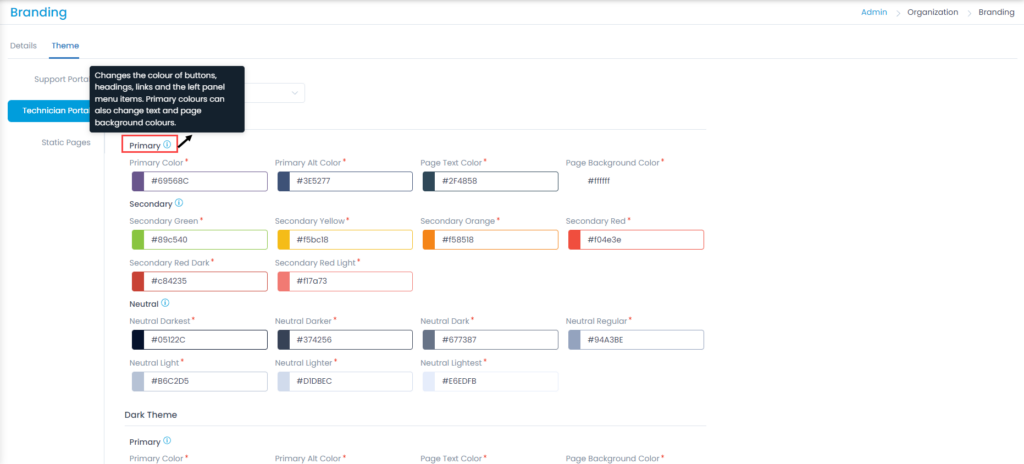
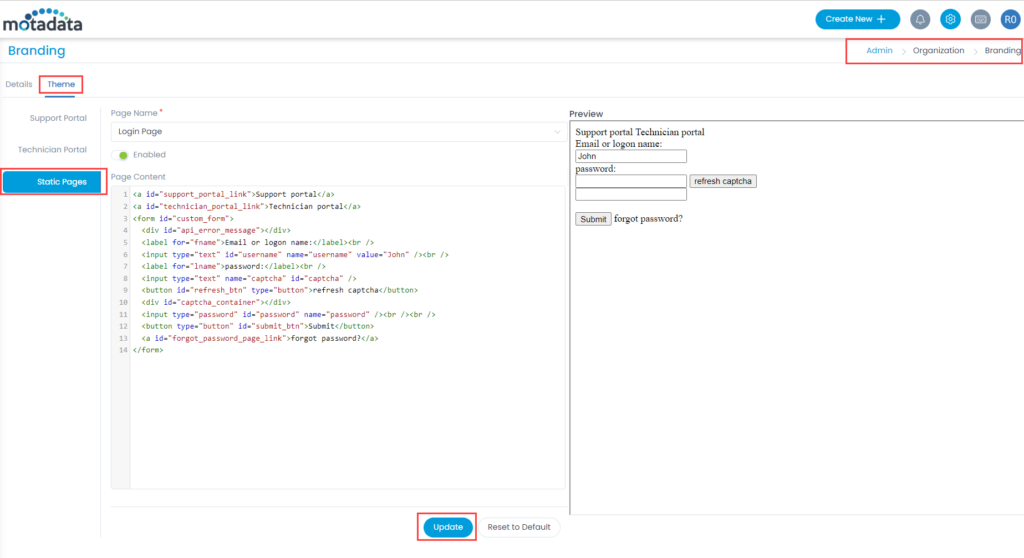
This section provides you with two tabs: Details and Theme.

Details

The details tab enables you to change the following details of the portal:

  • Helpdesk Name
  • Technician Portal Title
  • Support Portal Title
  • Login Screen Preference
  • Support Email
  • Support Contact No.
  • Brand Logo
  • Favicon
  • Dark Theme Logo
Details tab
Details tab

Helpdesk Name: The name configured here will be available on the Chatbot of the Support Portal.

Helpdesk Name
Helpdesk Name

Login Screen Preference
This parameter enables you to set the login screen that you want to view. By default, the Single Login Screen option is selected.
The options are:

  • Single Login Screen: You can login to the Support Portal only.
Single Login Screen
Single Login Screen
  • Separate Login Screen: You can login to both the Support and Technician portals.
Separate Login Screen

Also, you can preview the uploaded logo and favicon.

Once the changes are submitted, they will get reflected the next time when you login.

Theme

This tab enables you to customize the look and feel of the Support Portal, Technician Portal, and Static Pages of the application. You can change them to match your branding requirements. From here, you can define the dark and light theme colors for the portals as well as design the static pages using the HTML code.

Support Portal tab
Support Portal tab

Support and Technician Portal

To change the theme of the portals,

  1. Select the theme.
  2. Select the colors of the portal:
    • Primary: Changes the color of the buttons, headings, links, and the left panel menu items. You can also change the text and page background colors.
    • Secondary: Changes the color of the error/warning messages, alerts, and notifications including information and success banners.
    • Neutral: Changes the color of the buttons other than the ones changed by primary colors. Search tags, three-dot menu, the header of the grid or table, and the area highlighted on-hover can be changed.
  3. Once done, click Update to apply the theme. You can also preview the changes using the Preview button. To reset the theme to default, click the Reset button.
Tooltip for each color

Static Pages

This tab enables you to customize the static pages like login page.

Static Page
Static Page

To customize, configure the desired settings as below:

  1. Page Name: You can select the desired Page Name from the drop-down. For example you wish to fix the the OTP Page select OTP Page.
  2. Enable: Enable the flag to save the selected changes.
  3. Page Content: Put the desired content for the selected page in the box. Here, the pages can be customized using html code.

Once you are done with the above input, you can Update the changes. Also, you can reset all the settings to the default using the Reset to Default button.

On this Page