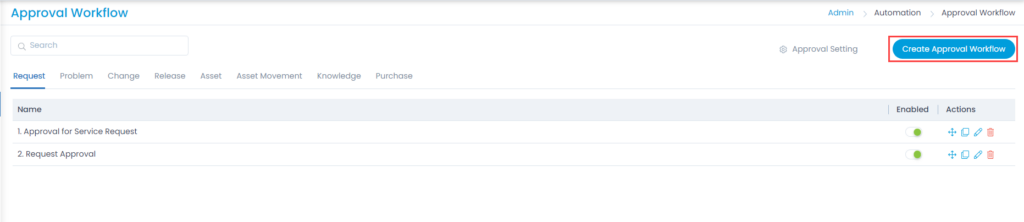
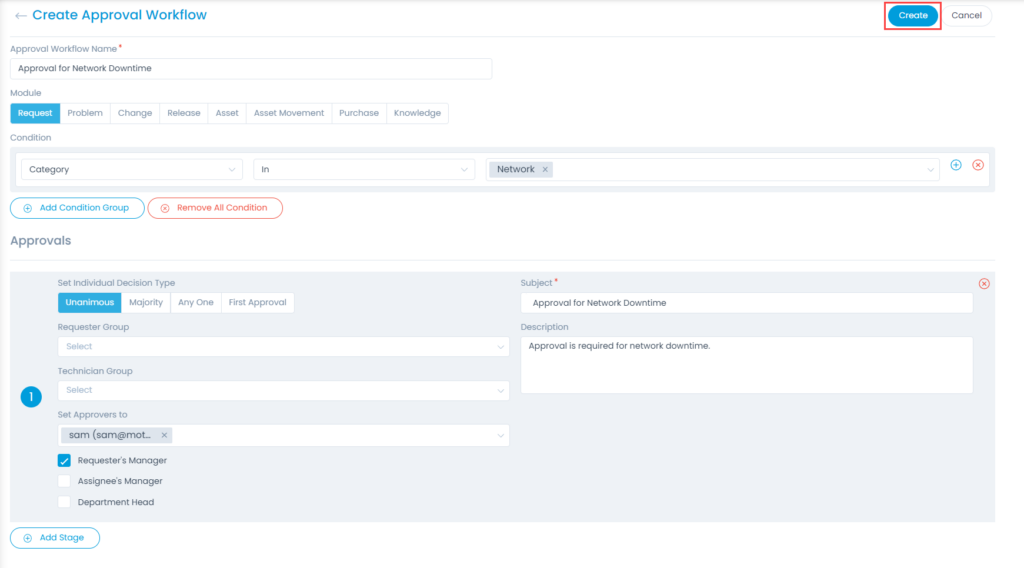
Create Approval Workflow
The page helps you to create an approval workflow using which the requests can be sent for approval to the concerned approvers automatically.
To create an approval workflow, click the Create Approval Workflow button on the top-right corner of the page.