Motadata Docs

Asset List View

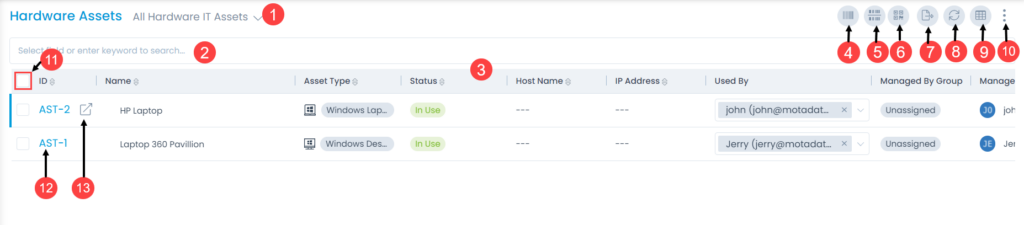
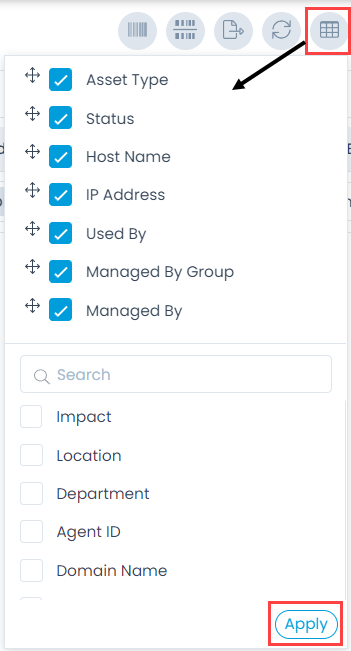
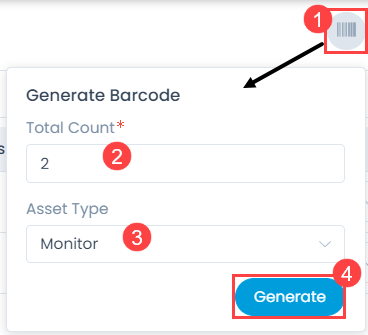
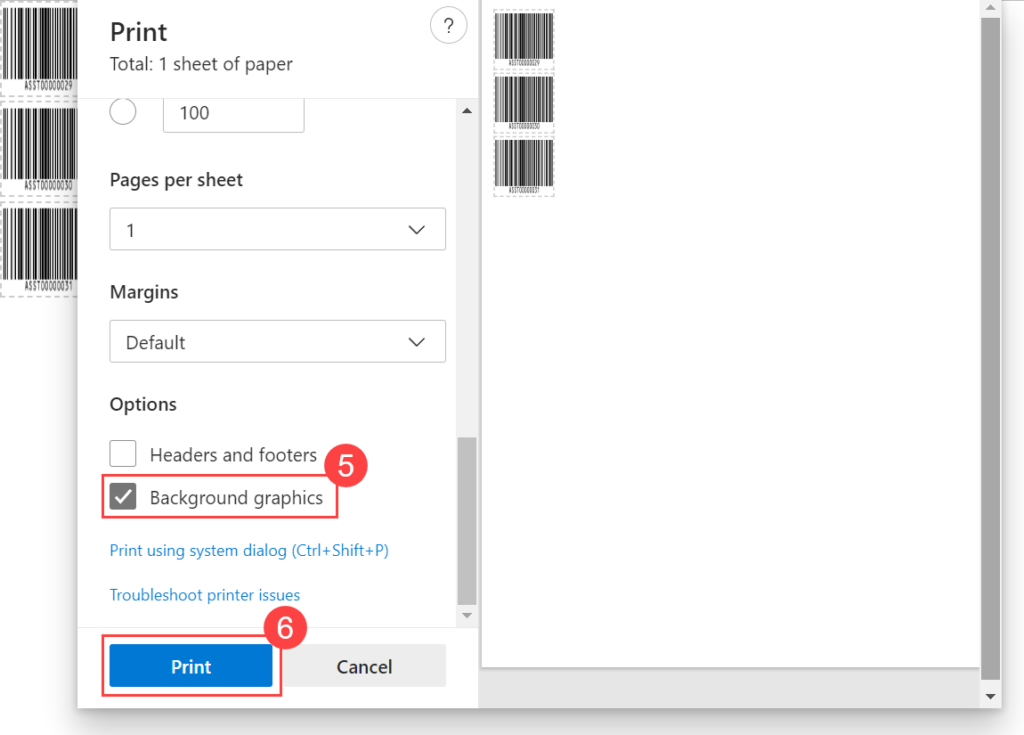
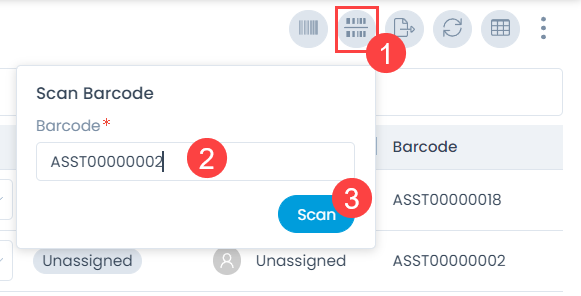
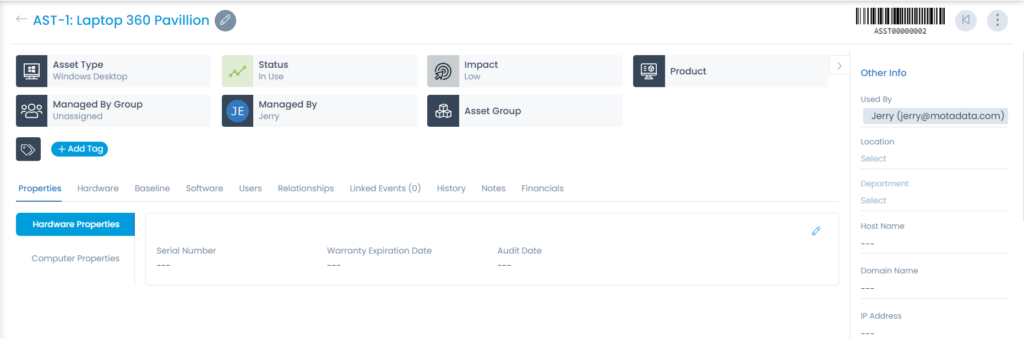
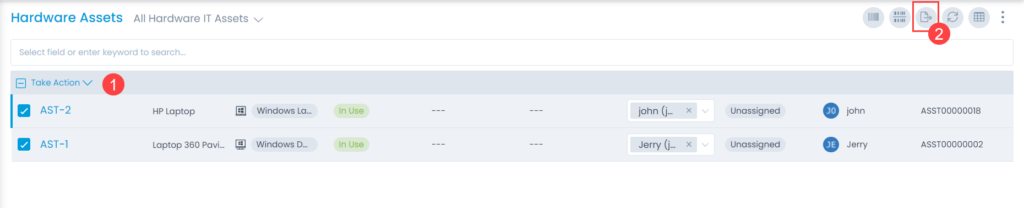
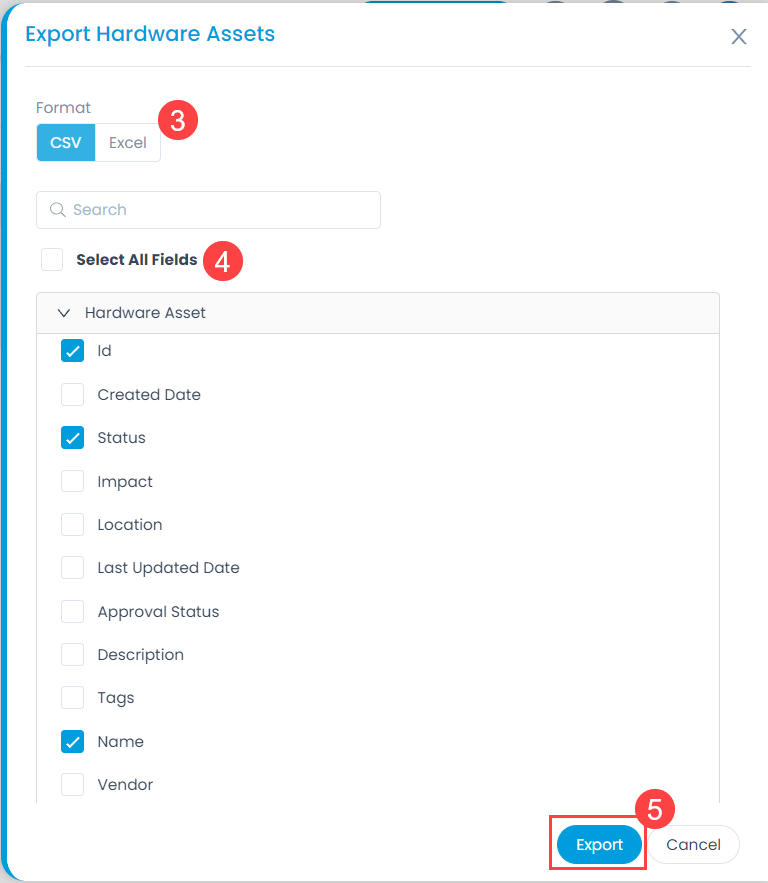
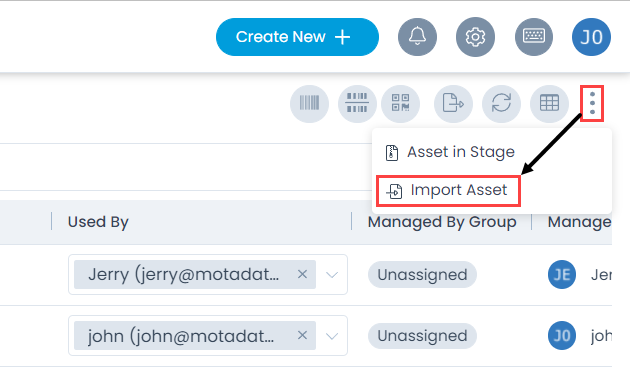
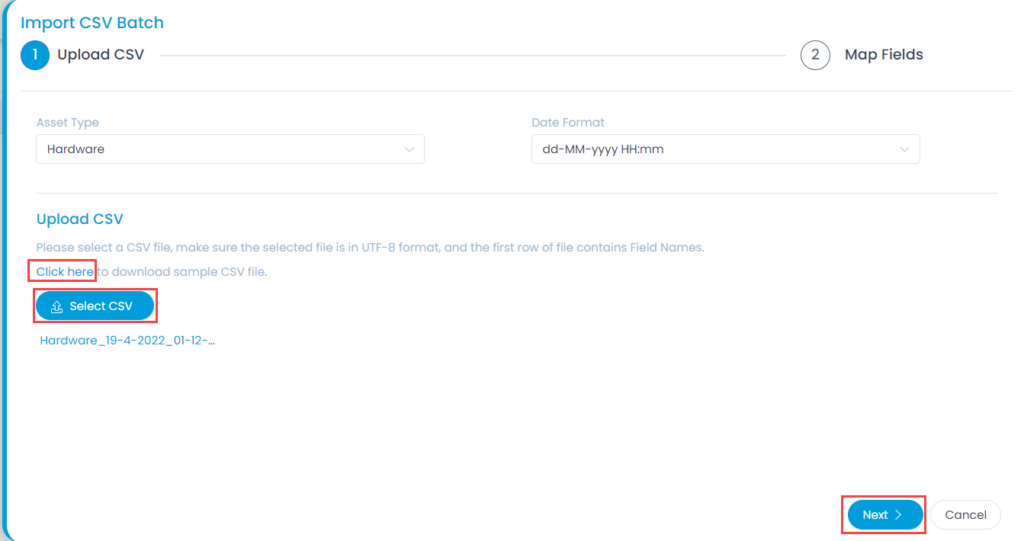
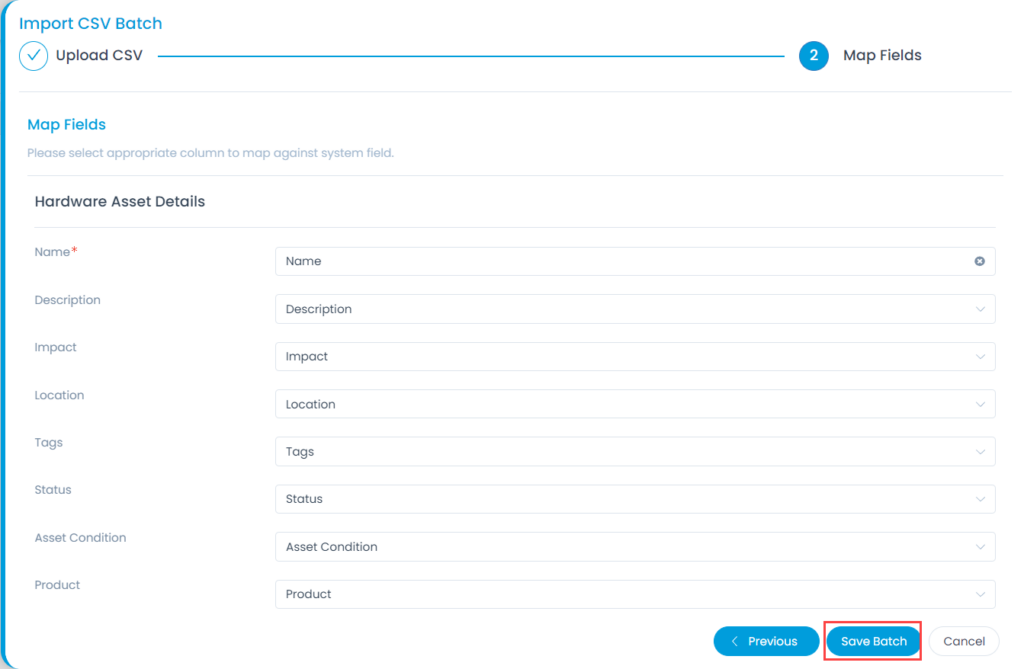
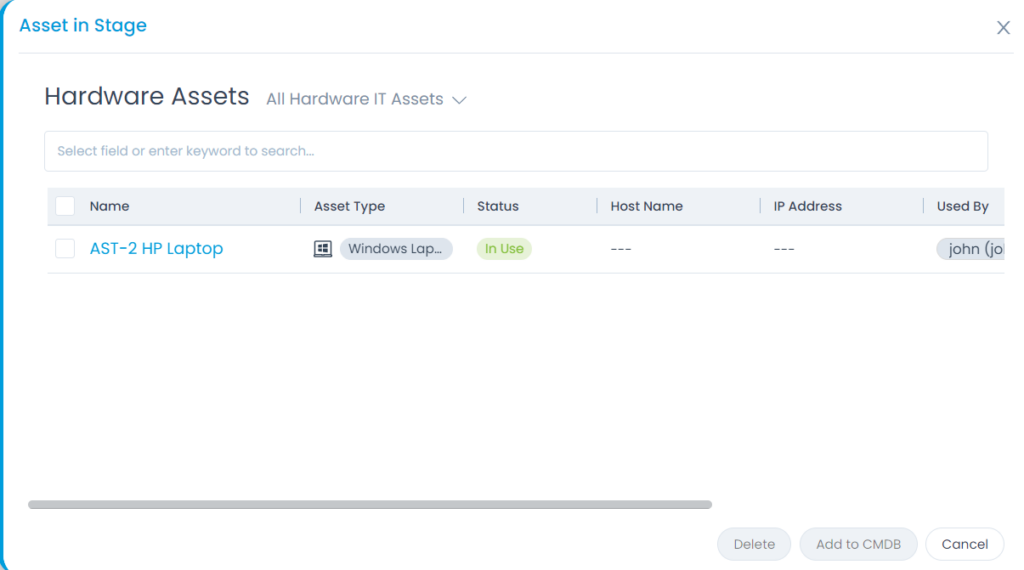
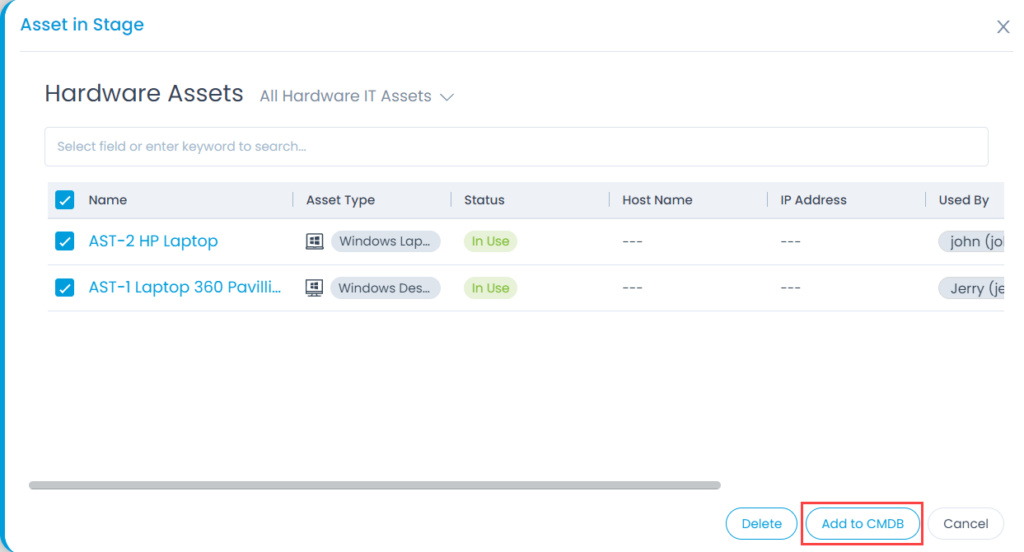
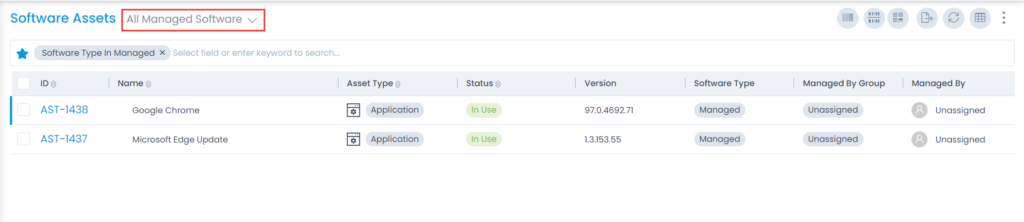
The Asset List View page helps the technicians to track and manage all the assets. It displays a list of assets along with the options like generate barcode, scan barcode, export, refresh, import, column selection, and assets in stage at one place.  The asset list appears as per the option selected from the menu. Also, you can filter the list using the default or custom filters.

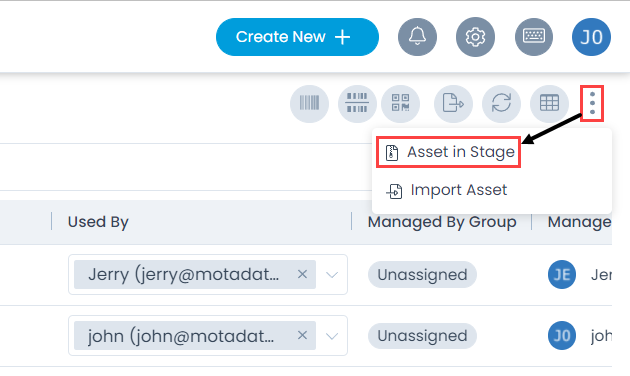
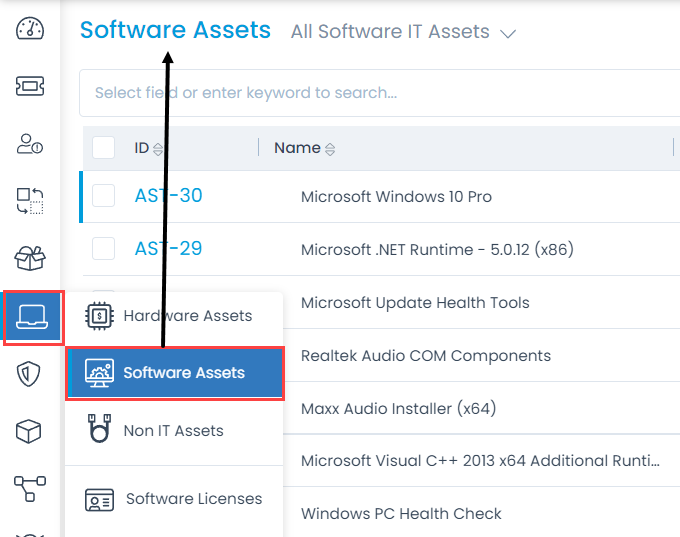
To view the Asset List page:

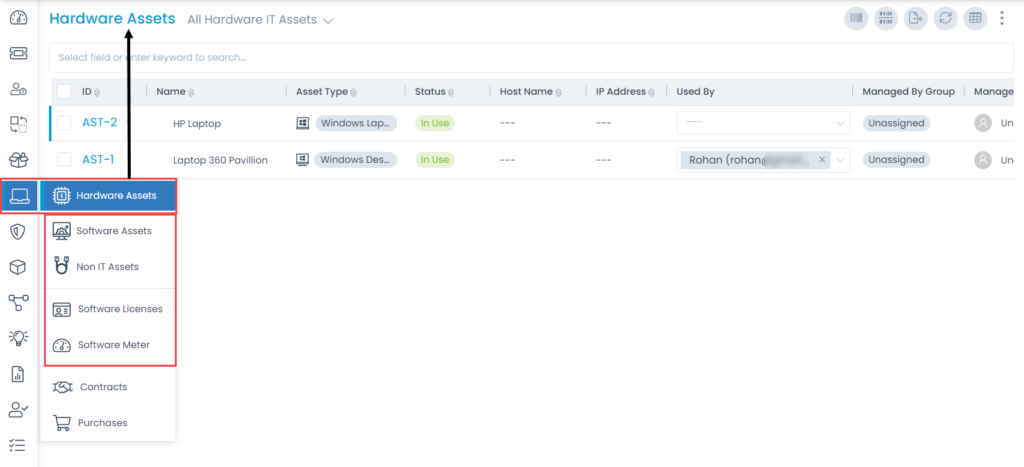
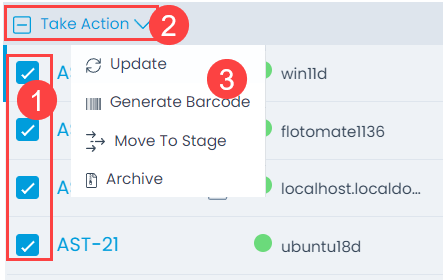
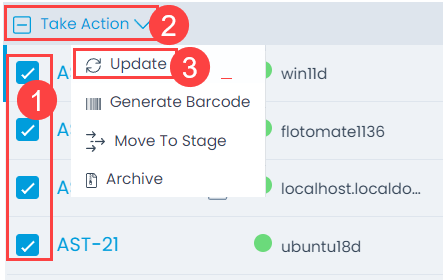
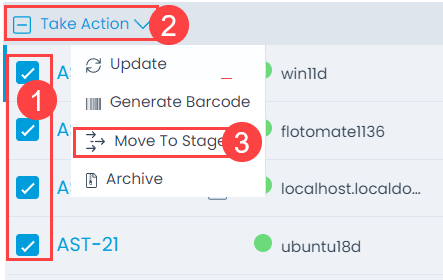
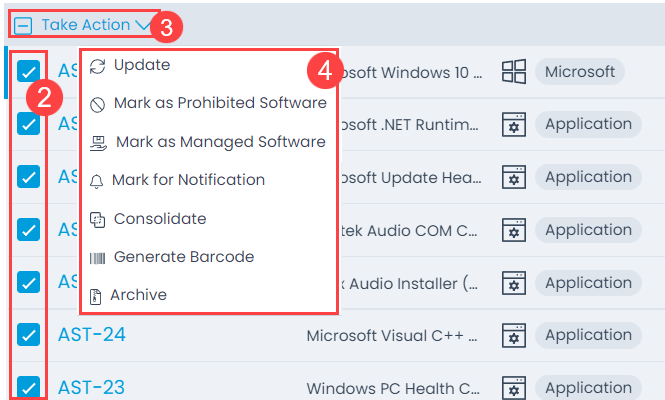
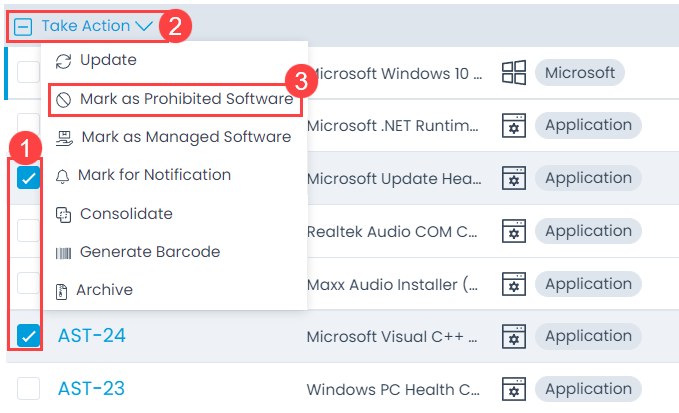
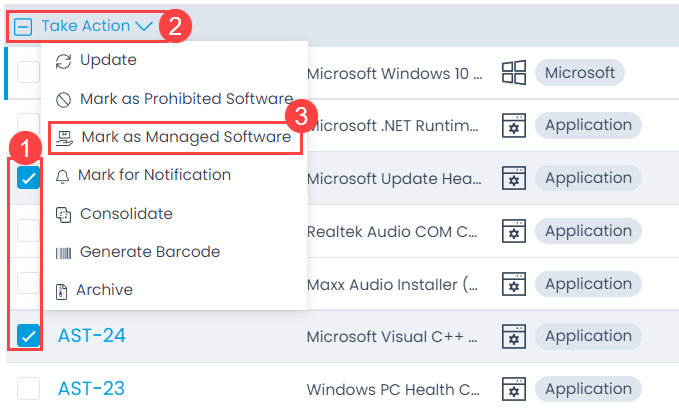
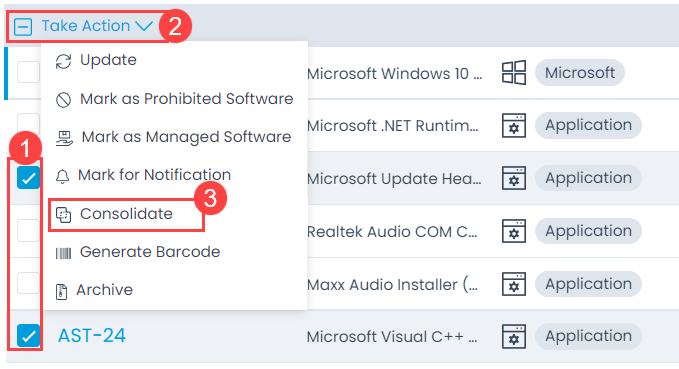
Click the Asset Menu and select the desired option as below.

Asset List as per the Option selected

The options are:

  • Hardware Assets: Displays the hardware assets and their details.
  • Software Assets: Displays the software assets and their details.
  • Non-IT Assets: Displays the Non-IT assets and their details.
  • Software Licenses: Displays the software licenses and their details.
  • Software Meter: Displays the software meters created and their details.

The List Page displays the following features:

Options on the List Page
  1. Filters: You can filter the asset list as per the pre-defined options.
  2. Search: You can search for the required records or list based on a specific criteria.
  3. Grid: You can view the details of the assets. Also, you can change certain details from here.
  4. Generate Barcode: You can generate and print the required number of barcodes in bulk.
  5. Scan Barcode: You can scan the barcode of the asset.
  6. Scan QR Code: You can scan the qr code of the asset. For more details, refer QR Code page.
  7. Export: You can export the asset list.
  8. Refresh: You can refresh the list. This is useful when multiple people are working on the asset and contents are updated frequently.
  9. Column Selection: You can personalize the columns of the list page. The unselected columns will remain hidden in the grid.
  10. Options: Click to view the assets in stage and import the assets.
  11. Bulk Operations: You can perform the required operation on multiple assets. You can update, generate barcode, move to stage, and archive the asset in one go.
  12. View Details Page: You can click the asset ID to view the Asset Details page.
  13. View Details Page in a new tab: You can click the arrow icon next to the ID to view the details page in a new tab.

The Grid

The Grid displays the details as per the columns selected using the Column Selection button as shown below.

Column Selection
Column Selection
The Grid
The Grid

The default details are:

Parameter Description
ID ID of the asset.
Name Name of the asset.
Asset Type Type of asset. You can also change it by clicking on it and selecting the required option.
Status Status of the asset. You can change the status by clicking on it and selecting the required option. The options are: In Stock, In Use, Missing, and Retired.
Hostname The host name of asset.
IP Address IP Address of the asset.
Used By Name of the person using the asset. You can also assign the asset to someone from here. If not assigned, the column displays Unassigned.
Managed By Group Name of the group managing the asset. You can also assign it to other group by clicking on it and selecting the required group. If not assigned, the column displays Unassigned.
Managed By Name of the person managing the asset. You can also assign it to someone else by clicking on it and selecting the required name. If not assigned, the column displays Unassigned.

You can also select other columns to be viewed in the grid later and set their values.

Generate Barcode

To generate the required amount of barcodes,

  1. Click the Generate Barcode button
  2. In Total Count field, enter the number of barcodes required.
  3. Select the Asset Type or Location based on which the barcode is to be generated. The option appears as per the option selected from the Auto Barcode Generation Strategy dropdown on the System Preference page.
  4. Click Generate and a pop-up appears for the selection of the layout and other settings.
  5. Here, enable the flag Background Graphics for the barcode image to generate and appear. Keeping it disabled, will only show the barcode details and not the image.
  6. Click Print. For more details, click Barcodes.
Generate Barcode
Generate Barcode
Print Barcode
Print Barcode

Scan Barcode

To scan the barcode,

  1. Click the Scan Barcode button.
  2. Enter the Barcode number. You can take the barcode number from the Asset Details page.
  3. Click Scan and the asset details page appears as shown below.
Scan Barcode
Scan Barcode
Asset Details Page
Asset Details Page

Export Assets

You can export the details of any asset in CSV and Excel format.

To do so,

  1. Select the desired assets to be exported.
  2. Click the Export button and a popup appears. If no asset is selected, all the added asset details would be included.
  3. Select the format as CSV or Excel.
  4. Select the desired fields to be included in the file.
  5. Click Export and the link to download the file is sent via an email.
Export Assets
Export Assets
Select Format and Fields to be Exported

Import Assets

This option allows you to import the assets in bulk. To do so,

  1. Click the vertical three dots and select the Import Asset option. The Asset Batches page appears.
  2. Click the Import CSV Batch button.
Import Asset Option
Import Asset Option
  1. Select the .csv file if you already have it filled with the respective fields. If not, select the new .csv file using Click Here and fill the respective details. Once the file is uploaded, click Next.
Select .CSV File
Select .CSV File
  1. Map the fields as per the requirement. By default it is mapped, only in case of removal/change of some parameters mapping is necessary, and click Save Batch.
Map Fields
Map Fields
  1. The Asset Batches page appears. It displays the status of the import along with the details like processing time, total records, success records, failed records, etc. as shown below. Once successful, the imported assets will appear in the asset list page.
Import CSV Batches
Import CSV Batches

Hardware/Non-IT Assets Bulk Operations

With bulk operations, you can manage multiple assets together. To do so, select the asset/s (1), click Take Action dropdown (2), and a list of actions appears (3).

Bulk Operations
Bulk Operations

Update

This option helps you to make changes to any of the field associated with the asset directly. If you want to update the same field for multiple assets,

  1. Select the desired assets.
  2. Click on the Take Action dropdown.
  3. Select the Update option. A popup appears. It displays all the common fields that can be updated in one go.
  4. Edit the required fields.
  5. Click Update. Refer to the section Updating Asset for more details.
Update Option
Update Option
Bulk Update
Bulk Update

Generate Barcode

This option helps to generate a barcode for the selected assets in one go. Select the desired assets, click Take Action, and select the Generate Barcode option. It will download all the barcodes. For more details, refer Barcodes.

Move to Stage

This option helps you to move the unwanted or unused assets to the stage so they will not be visible anymore in the list. Stage is the place where the extra or unused assets are stored. To do so,

  1. Select the desired assets.
  2. Click the Take Action dropdown.
  3. Select the option Move To Stage. A confirmation message appears. Click Yes to continue or No to discard the action.
  4. If Yes is clicked, the asset moves to the stage as shown in the below-right figure
Move To Stage
Move To Stage
Assets Moved to Stage

Later, the assets in stage can be moved back to CMDB (Central Database) using the Add to CMDB button as shown below. Once added, the assets will be available in the list. Multiple asset selection is also possible using bulk actions. You can also view the assets in stage, by clicking the vertical three dots and selecting the Asset In Stage option as shown below.

Adding Assets to CMDB
Asset In Stage Option

Archive

This option allows you to archive multiple assets in one go. All the archived assets can be seen using the predefined filters available and restored or deleted too if no longer required.

To restore or delete the assets,

  1. Search for the archived assets using the predefined filter All Archived {Asset Type} Assets. Here, hardware asset is used.
  2. Select the required assets.
  3. Click the Take Action dropdown.
  4. Select Restore and the selected assets will move from the Archive list to the asset list. Also, if required you can delete the archived assets from here using the Delete option.
Restore Assets
Restore Assets

Software Assets Bulk Operations

With bulk operations, you can manage multiple software assets together.
To do so,

  1. Click the Asset menu and select the Software Assets sub-menu. A list of software assets appear.
  2. Select the asset/s.
  3. Click the Take Action dropdown and a list of actions appears as shown below.
Software Assets List View
Bulk Operation Options

For Update, Generate Barcode, and Archive options refer to the above Hardware Assets Bulk Operation section.

Mark as Prohibited Software

This option helps you to prohibit the software in bulk. Once prohibited, the selected software is not allowed to be used and it gets removed from the software list. You can also prohibit software automatically using software rules.

To prohibit a list of software,

  1. Select the software.
  2. Click the Take Action dropdown.
  3. Select the Mark as Prohibited Software option and a confirmation message appears. Click Yes to continue or No to cancel the action.

Once the software is prohibited, it gets removed from the list. But, you can view them using the predefined filter All Prohibited Software as shown below.

Mark as Prohibited Software Option.
Viewing All Prohibited Software

Mark as Managed Software

This option helps you to set the software type as managed for multiple software in bulk. Once marked, the selected software can be managed with regards to license and compliance.

To mark the software as managed in bulk,

  1. Select the software.
  2. Click the Take Action dropdown.
  3. Select the Mark as Managed Software option and a confirmation message appears. Click Yes to continue or No to cancel the action.

Once the software is marked as managed, it gets removed from the list. But, you can view them using the predefined filter All Managed Software as shown below.

Mark as Managed Software Option
Viewing All Managed Software

Mark for Notification

This option helps you to enable the notifications for the selected software.

To mark the software for notification in bulk,

  1. Select the software.
  2. Click the Take Action dropdown.
  3. Select the Mark for Notification option and a confirmation message appears. Click Yes to continue or No to cancel the action.

Once the software is marked for notification, all the notifications related to the software will be available.

Consolidate

This option helps you to consolidate multiple software assets into one.

To consolidate the software,

  1. Select the software.
  2. Click the Take Action dropdown.
  3. Select the Consolidate option and a popup appears as shown below. The popup displays the primary (1) and secondary software assets (2). Also, it displays the other assets list (3).
  4. If required select other assets from the list on the right side and click the Add to Secondary button (4). The asset moves to the secondary asset list.
Consolidate
Consolidate
Consolidate Software Assets

If required you can also make a secondary asset as primary by hovering the mouse on the required asset and clicking the P icon as shown below.

Making Secondary Asset as Primary
  1. Once the primary and secondary assets are set, click the Consolidate button, and all the secondary assets get merged into the primary asset. These secondary assets can then be viewed from the Software Assets Details page as shown below.
Viewing Consolidated Software