Motadata Docs

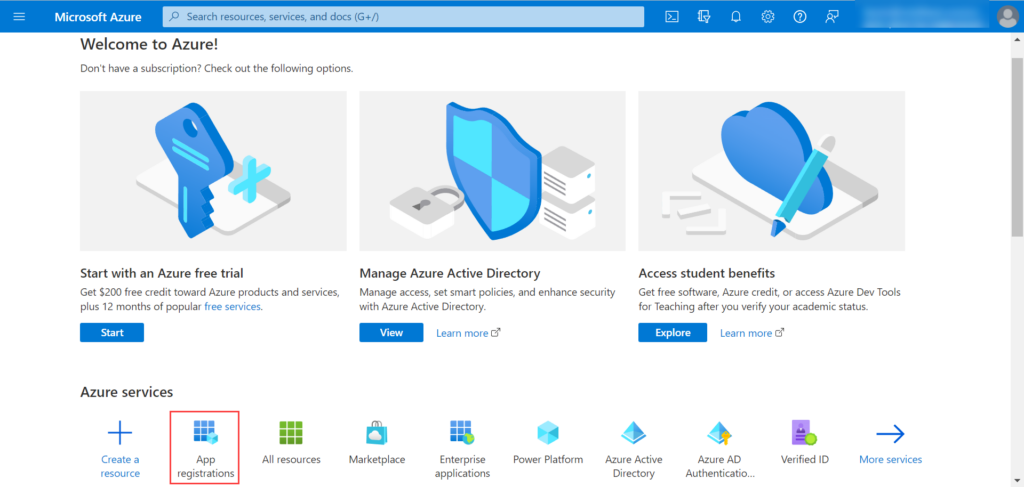
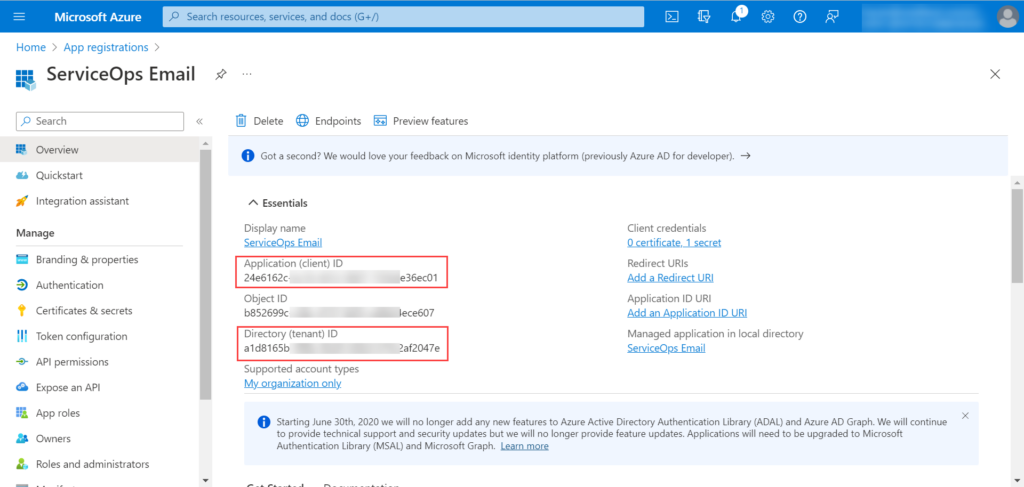
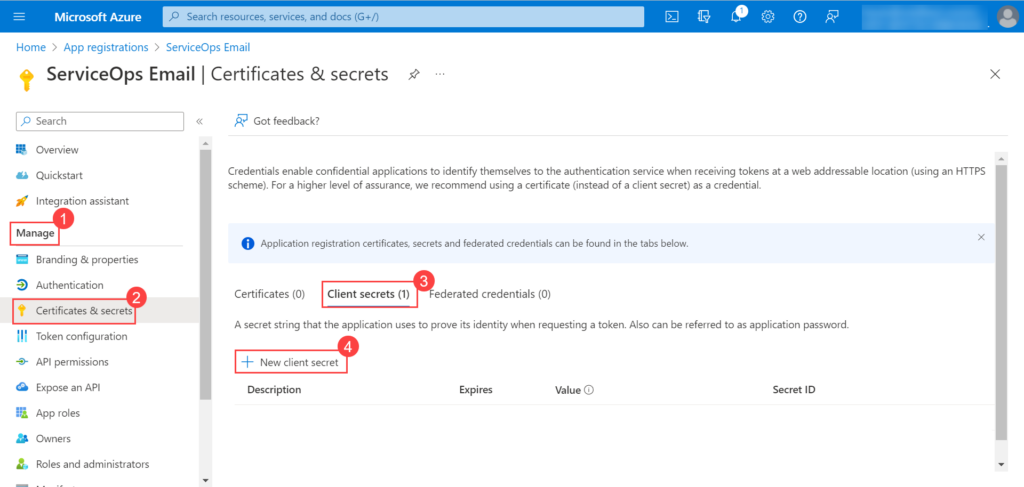
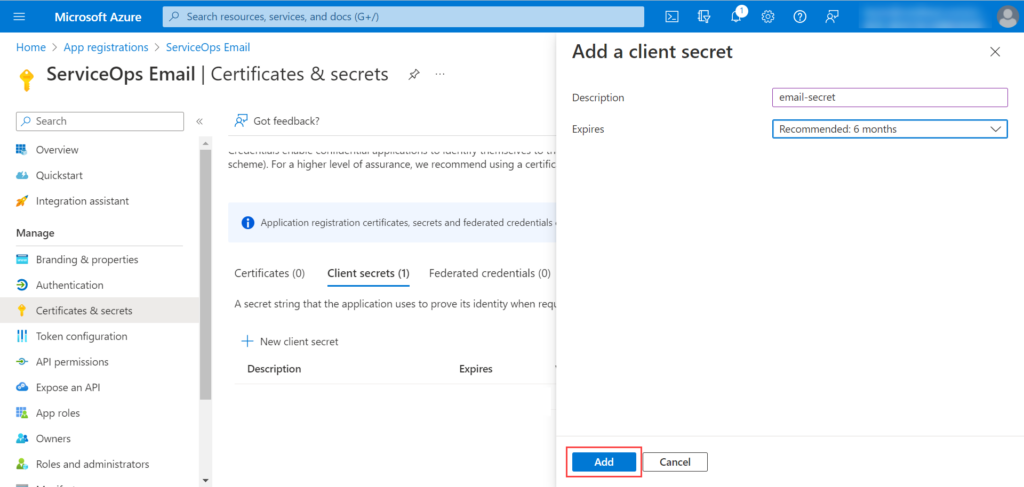
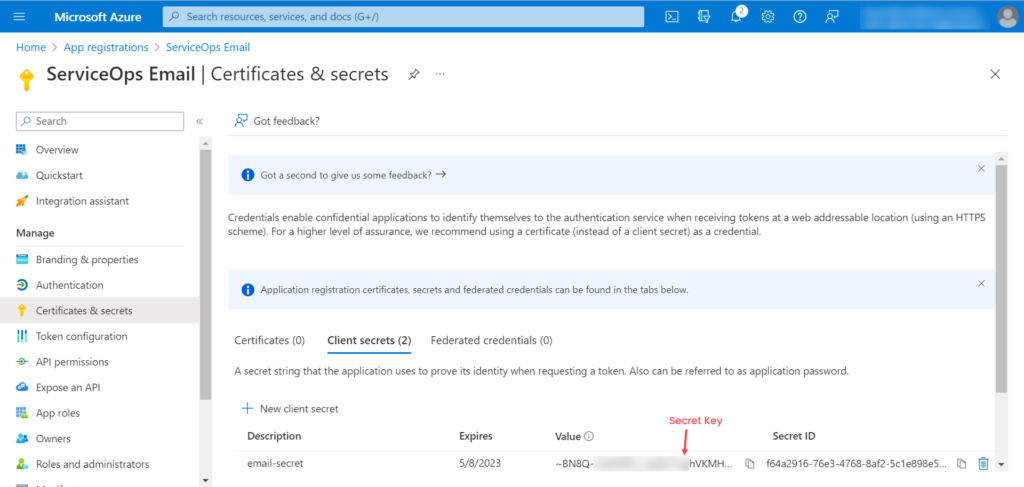
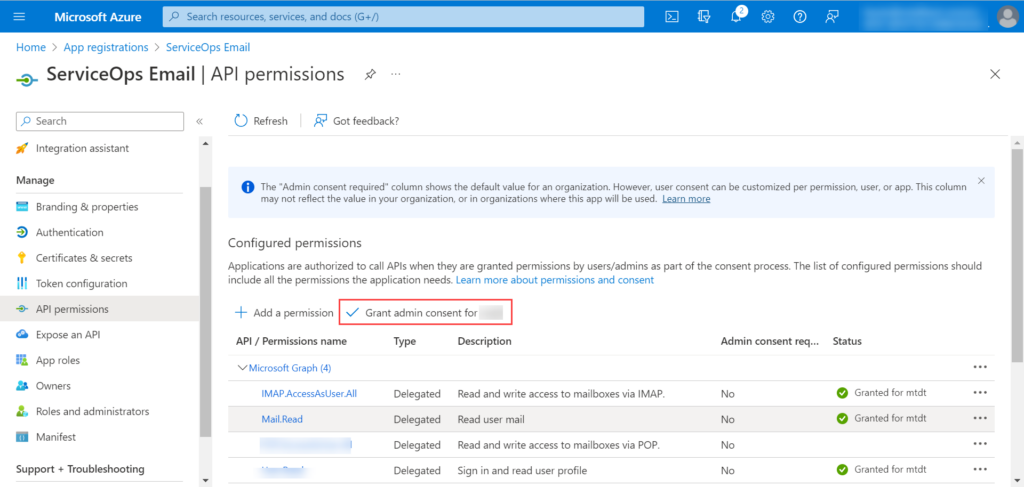
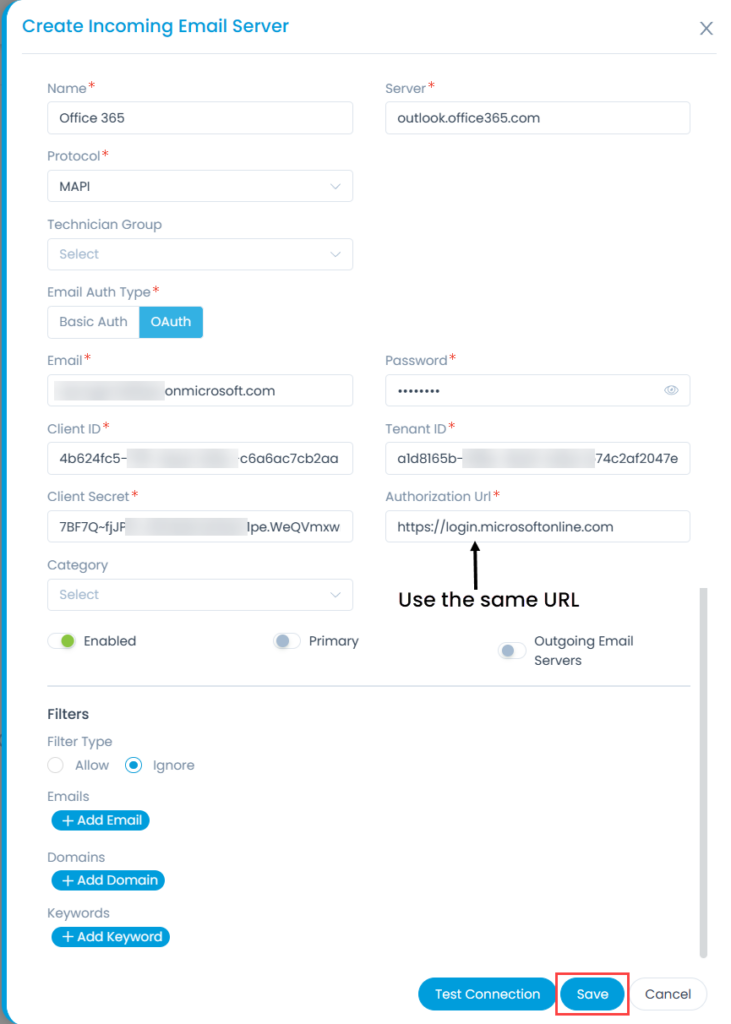
Configuring Microsoft Azure for OAuth

What is Microsoft Azure?

Microsoft Azure is a public cloud computing service owned by Microsoft. It provides a wide range of cloud services, including analytics, storage, computing, and networking.

What is OAuth?

OAuth is an Open Standard Authorization protocol that allows you to authenticate one application communicating with another on your behalf without sharing the password. It uses client secret values instead of a password to allow access to a secured resource. Thus, the email communication will be secured.

This functionality is applicable from version 7.9 and above.

Configuring Microsoft Azure as Authentication Server

To configure Microsoft Azure as the authentication server, follow the below steps:

  1. Sign in to the Microsoft Azure portal.
Microsoft Azure Portal Home page
  1. In the Azure services section, click App registrations > New Registration.
Note: Create a separate app for every incoming email server (in ServiceOps), if multiple servers are configured each with different domains.
New Registration
New Registration
  1. In the next screen, enter the name, select the Supported account types, and click Register.
Register the Application

The application will appear in the list as shown below.

Registered Application
  1. Click on the application, and the below screen appears. Copy the Application (client) ID and Directory (tenant) ID.
Application Details
Application Details
  1. Go to the Manage > Certificates & secrets > Client secrets tab, and click New Client Secret.
Certificates and secrets
  1. Enter the description, select the expiry time, and click Add.
Adding Client Secret
  1. The secret appears in the table as shown below. Copy it too.
Note: The client secret value can be viewed only once immediately after creation. Hence, it is recommended to save the secret key before leaving the page.
Copy the Client Secret Value
  1. In the Authentication > Advanced settings section, enable the flag “Allow public client flows”, and click Save. By default, it is disabled.
Enable the flag
Enable the flag
  1. In Microsoft Azure, go to Manage > API Permissions tab, and click Add a permission to add permissions for the application.
API Permission
API Permission
  1. The Request API Permissions popup appears. Click Microsoft Graph.

Microsoft Graph
Microsoft Graph
  1. Add Permissions for IMAP or Office 365 Exchange Online (MAPI).

IMAP

Select Delegated Permissions, select the desired permissions for the application, and click Add Permissions.

Note: The Azure application must have the below Delegated permissions for IMAP:
Microsoft Graph (Delegated Type):

  • IMAP.AccessAsUser.All
  • Mail.Read
Add Permissions
Add Permissions

Office 365 Exchange Online (For MAPI)

  1. For Office 365 Exchange, click Add a Permission > APIs my organization uses tab, search for the Office 365 Exchange Online permission, and click on it.

Note: The Azure application must have the below Application permissions for IMAP:
Office 365 Exchange Online: (Application Type):

  • Exchange.ManageAsApp
  • Full_access_as_app
  • Mail.Read
  • Mail.ReadWrite
Microsoft Exchange Permissions
  1. Next, click on the Application permissions tab, select the desired permissions, and click Add Permissions.
Add Permissions
Add Permissions
  1. Click Grant admin consent for <application name>. A confirmation window will appear. Click Yes to continue.
Grant admin Consent
Grant admin Consent

Note: The Grant admin consent option will be enabled only if you are logged in as a user with Azure Global Administrator rights. For more details, refer Grant Tenant-wide admin consent to an application.

  1. For IMAP, register your Azure AD Application service principals in Exchange Online and grant access to the Exchange Online mailbox to this service principal. For more details, refer Register service principals in Exchange.
  2. For IMAP and MAPI, it is recommended to restrict the mailbox access, so that Azure app can access only a single mailbox. For more details, refer Limiting application permissions to specific Exchange Online mailboxes.

Configuring Microsoft Azure in ServiceOps

Now, login to the ServiceOps Portal, and go to Admin > Support Channel > Emails > Incoming Email Servers tab. Click the Add Incoming Email Server button and the below popup appears.

Configuring Incoming Email Server in ServiceOps

Enter the required details, paste the copied Client ID, Tenant ID, and Client Secret from Microsoft Azure, and click Save

Microsoft Azure is now configured as an email server for ServiceOps.