Introduction
Motadata ServiceOps is an ITIL compliant ITSM tool that uses AI/ML to optimize and streamline the service delivery across the various business processes. It automates the support workflows and discards the manual complexities. Apart from request tracking and management, it also provides Problem, Change, Release, Assets, Patches, Packages, Projects, Knowledge, Reports, and Task management functionalities. With all these services in a single ServiceOps instance, an organization does not need to buy multiple tools for different services, making it an All-in-One solution. Moreover, with a modern and user-friendly interface, the IT team can work effectively and streamline the IT service delivery. Thus, the technicians and administrators can resolve the queries or requirements of the end users in no time.
This guide walks you through the initial steps of installing the Motadata Service Desk. It provides the procedure about how to install the various servers, and configure high availability. Also, you can find the information to upgrade ServiceOps. For more details see the Upgrade Guide section.
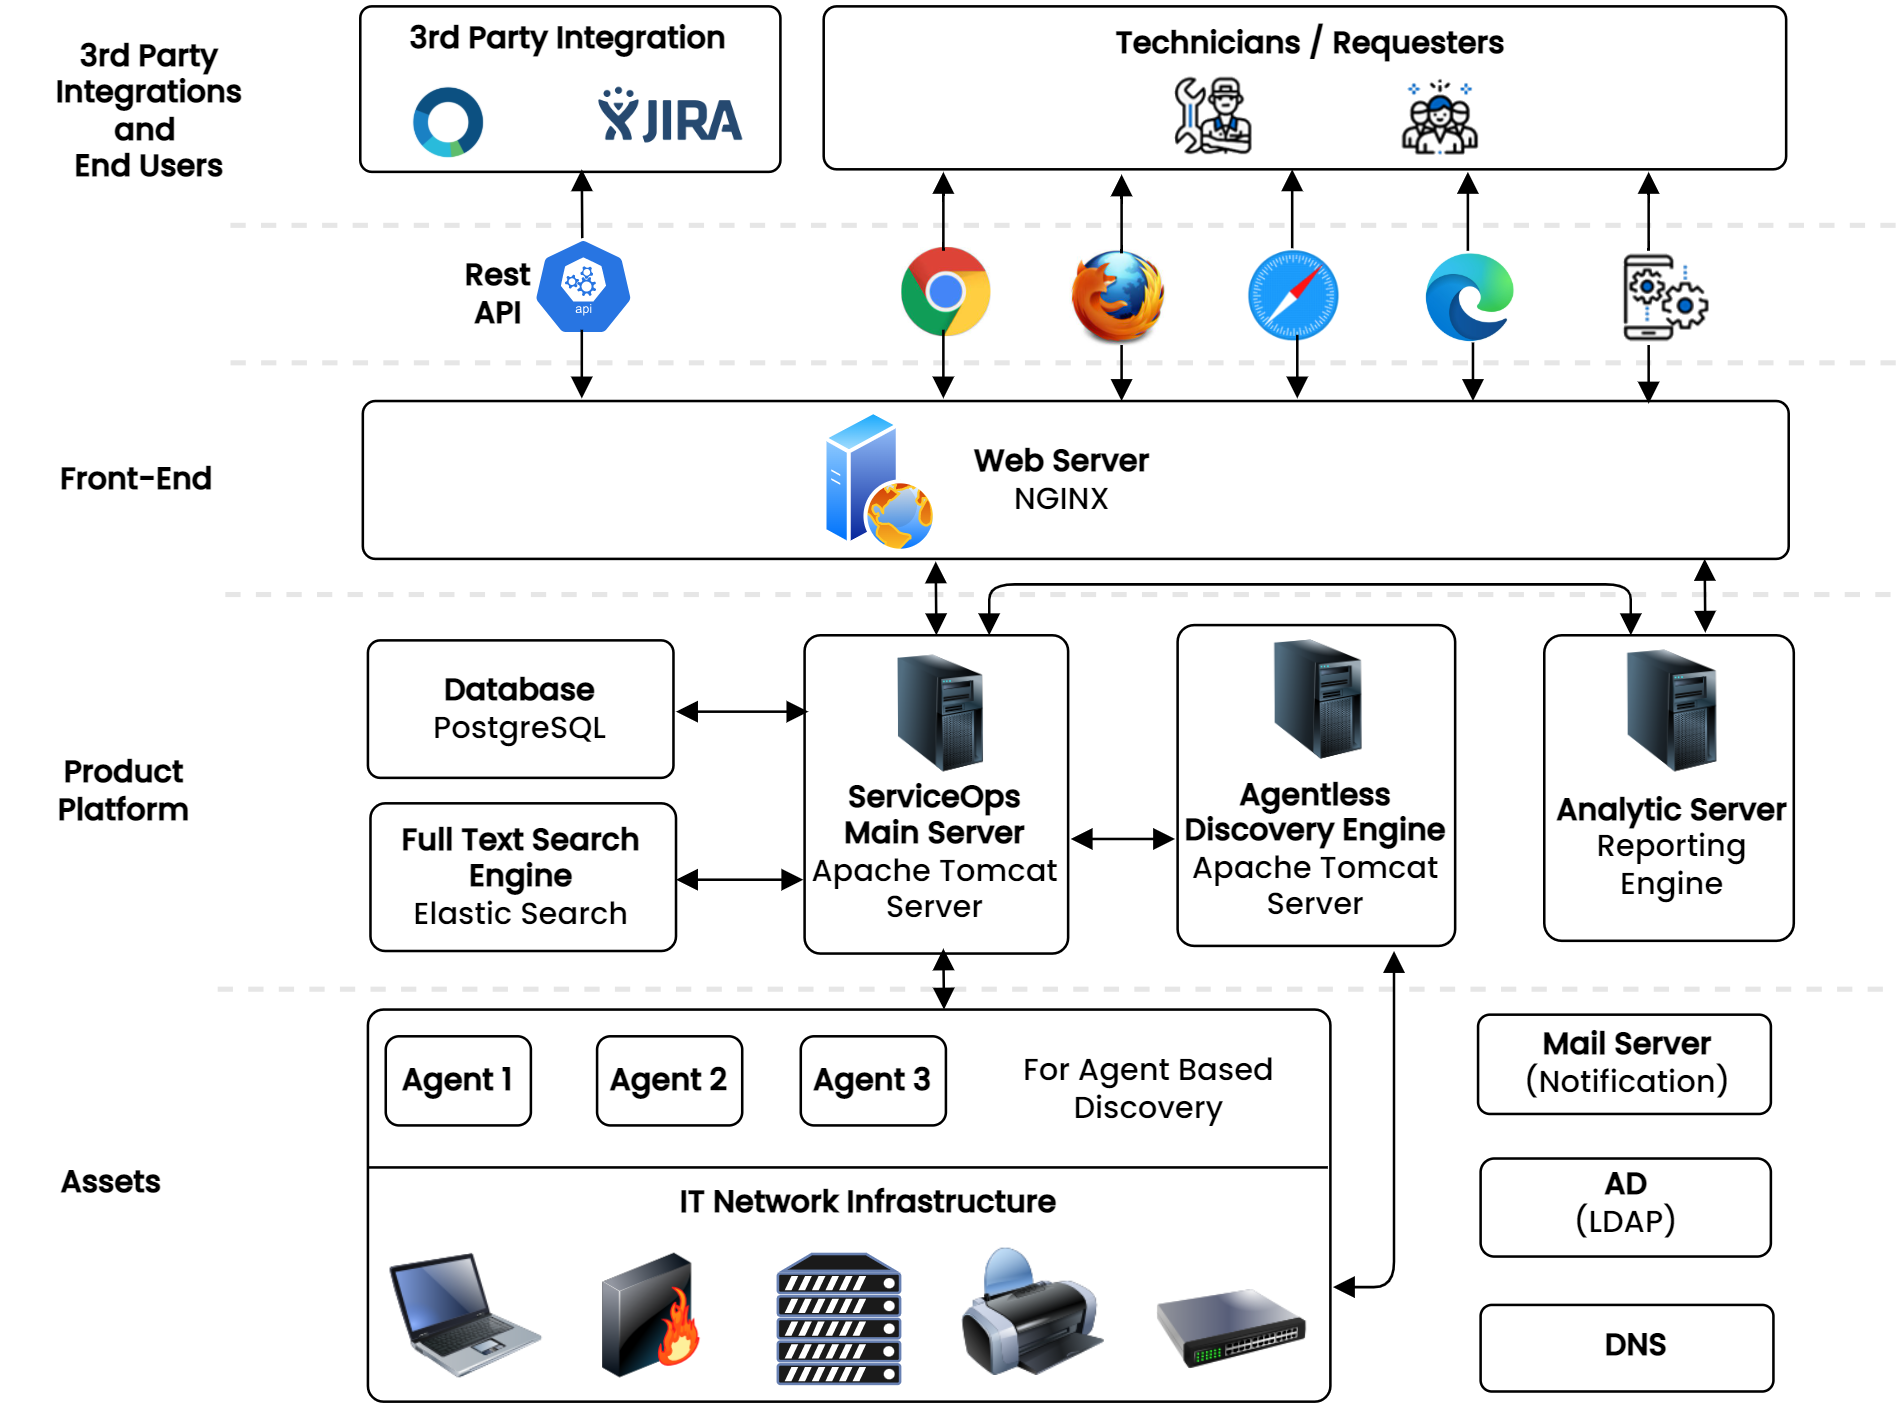
Before moving ahead, let’s understand the architecture of ServiceOps.

