Motadata Docs

Departments

Motadata allows you to add your organization’s department names and sub-departments in the product. Each department can have sub-departments up to level five.

The benefits of having department names in the product are:

  • You can classify tickets, Assets, Projects and users by department.
  • You can create automated workflows using department as a condition.
  • You can create Requestor Groups by using department names.
  • You can generate department specific reports.

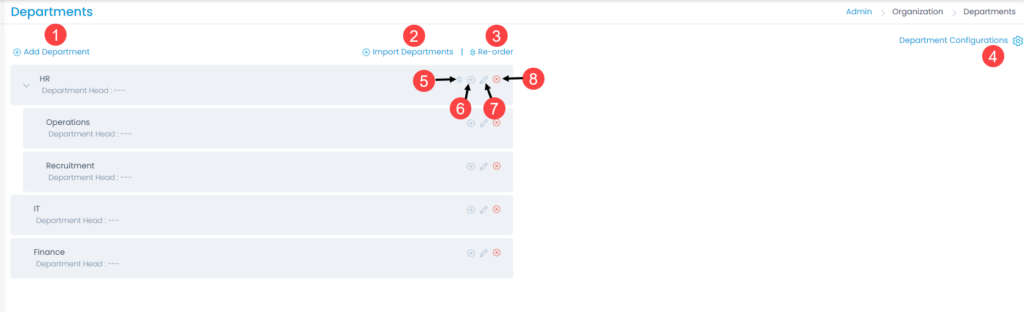
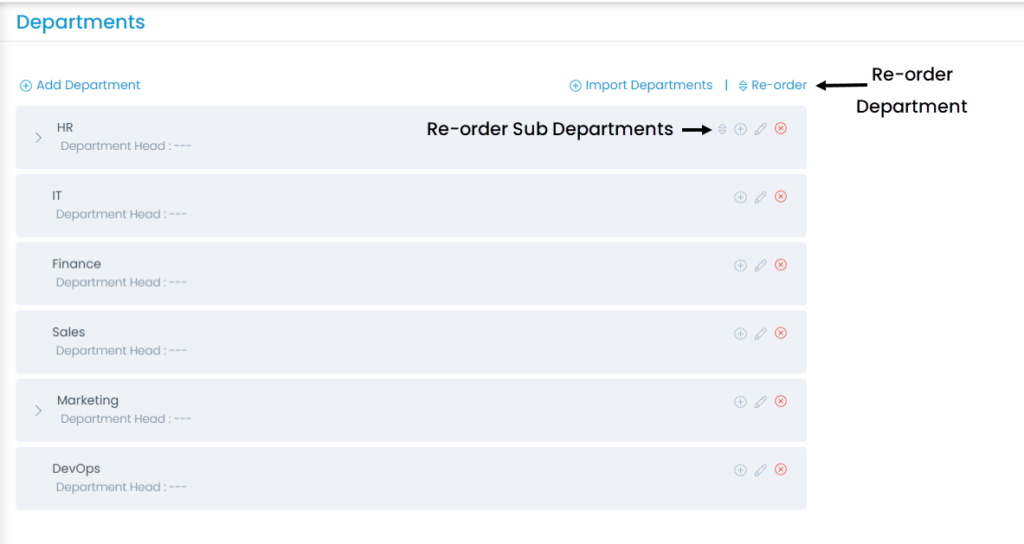
To view the Departments page, navigate to Admin > Organization > Departments.

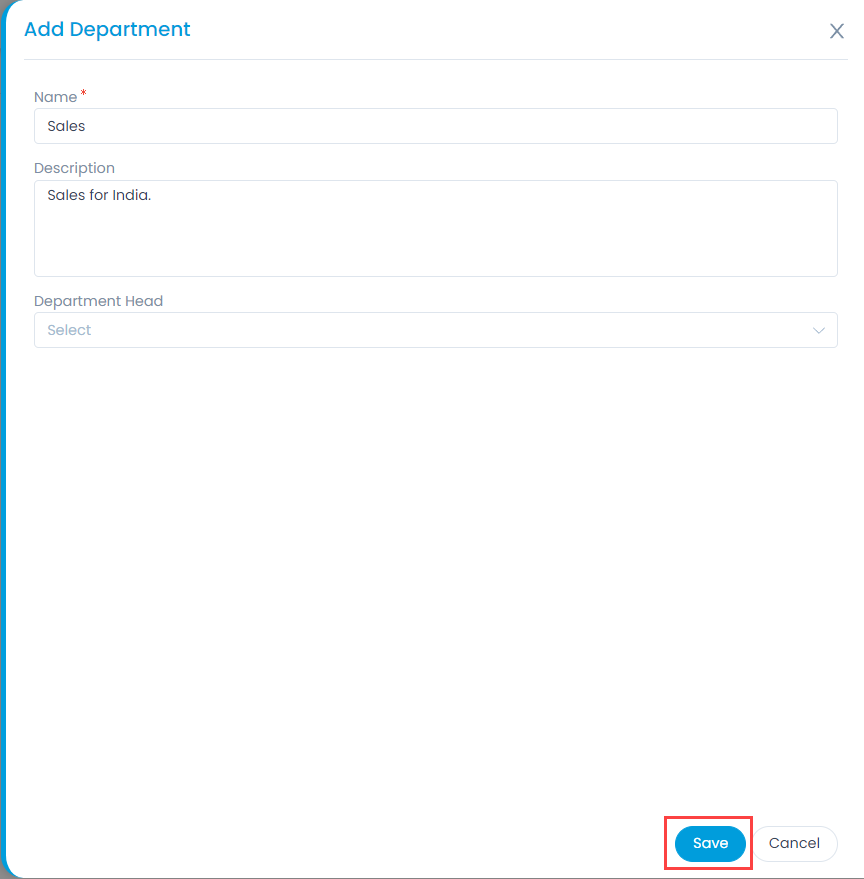
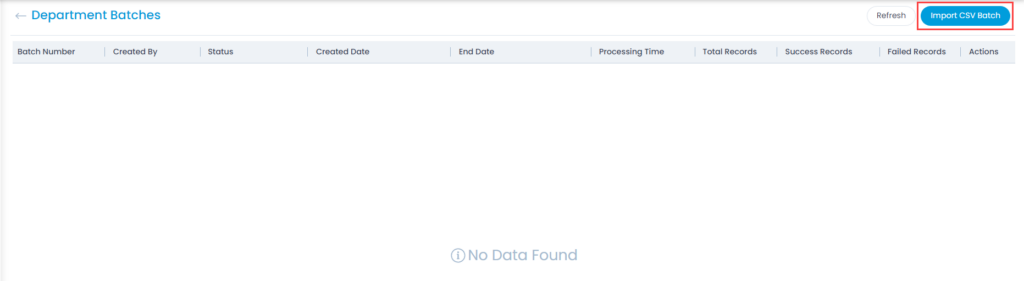
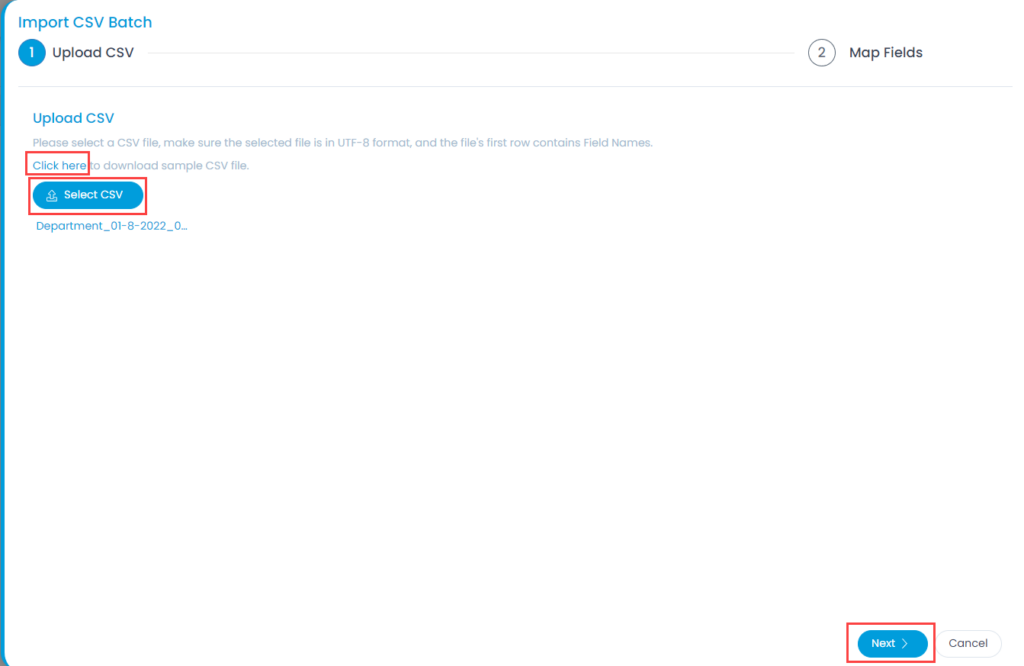
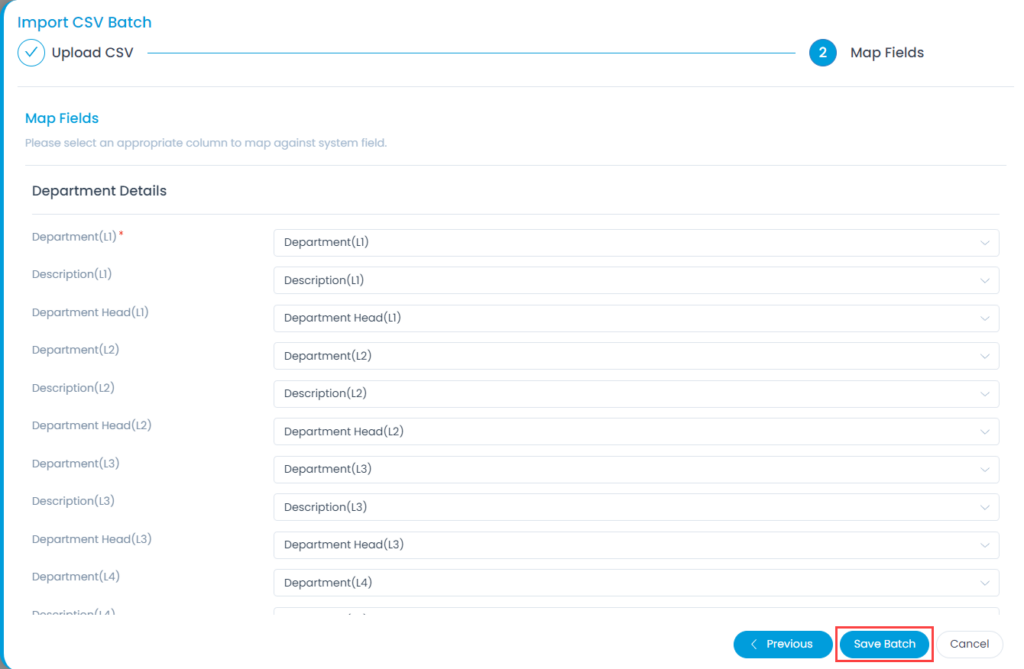
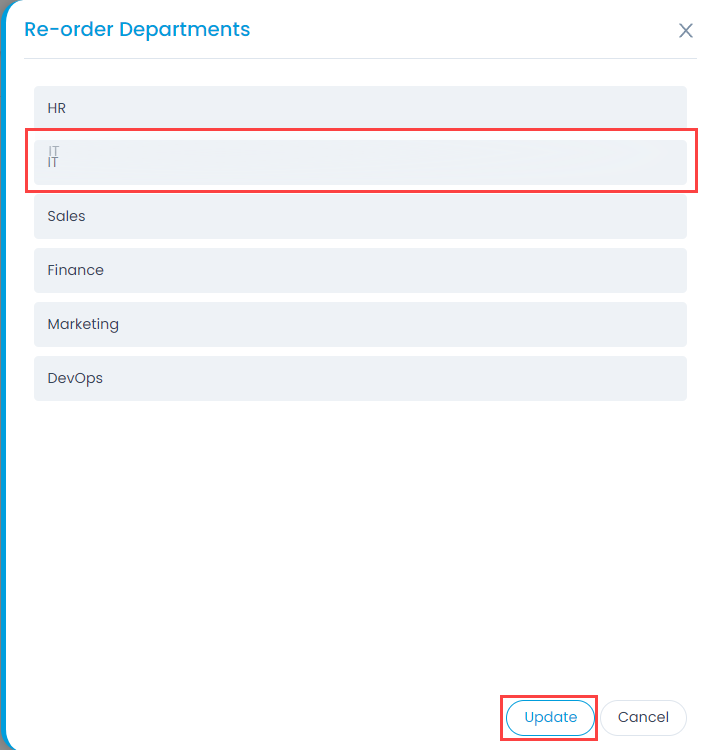
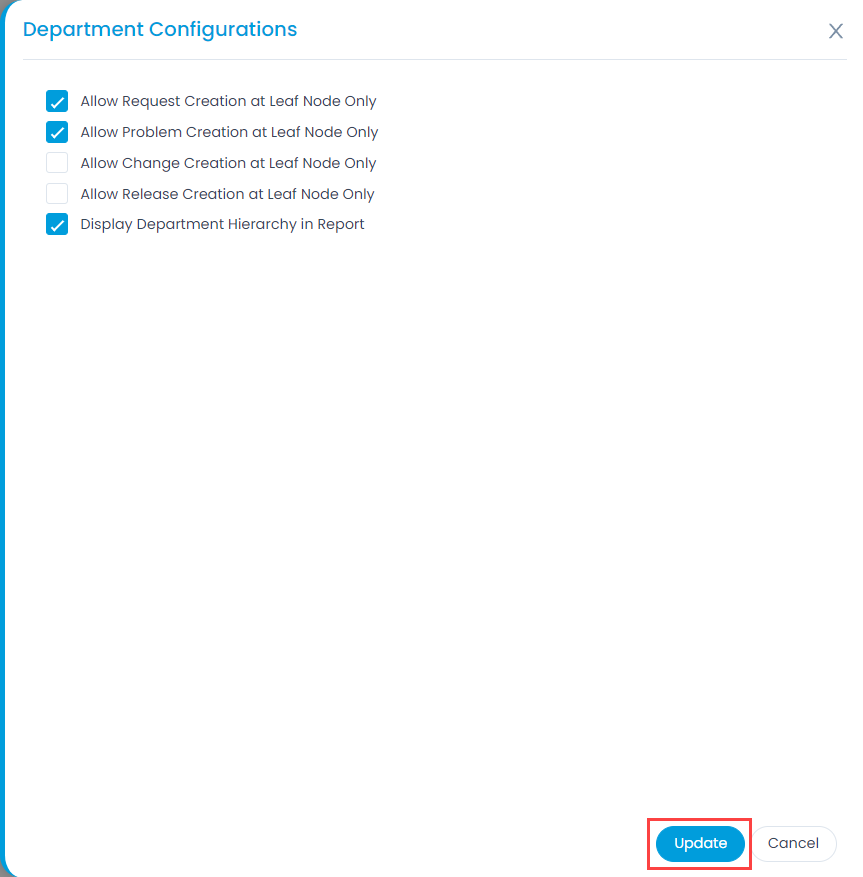
The list page displays all the available departments. Here, you can add, edit, delete, import, and re-order the departments and sub-departments. Also, you can set the department configurations.

Departments Page
Departments Page

The page provides the following features:

  1. Add Department: You can add a new department.
  2. Import Departments: You can import a list of departments in bulk.
  3. Re-order Departments: You can re-order the departments as per your requirements.
  4. Department Configurations: You can configure the settings for ticket creation at leaf node.
  5. Re-order Sub-Departments: You can re-order the sub-departments as per your requirements.
  6. Add Sub-Department: You can add a sub-department.
  7. Edit Department: You can edit the desired department.
  8. Delete Department: You can delete the department if not required anymore.

Add Department and Sub-Department

To add a department or sub-department,

  1. Click the Add Department/Sub-Department link and a popup appears.
Add Department
Add Department
Add Sub-Department
Add Sub-Department
  1. Enter the following details:
    • Name: Enter the name of the department.
    • Description: Enter a brief description about the department.
    • Department Head: Select the head of the department from the dropdown list.
  2. Once done, click Save and the department gets added.
  3. Similarly, you can add a sub-department by clicking the round plus icon next to the edit icon of the respective department.

Import Departments

To import a list of departments in bulk,

  1. Click the Import Departments icon and the Department Batches page appears.
  2. Click Import CSV Batch and a popup appears.
Department Batches
Department Batches
  1. Select the .csv file if you already have it filled with the respective fields. If not, select the new .csv file using Click Here and fill the respective details. Once the file is uploaded, click Next.
Select .CSV File
Select .CSV File
  1. Map the fields as per the requirement. By default it is mapped, only in case of removal or change of some parameters mapping is necessary, and click Save Batch.
Map Fields
Map Fields
  1. The Department Batches page appears. It displays the status of the import along with the details like processing time, total records, success records, failed records, etc. as shown below. Once successful, the imported departments will appear on the list page.
Import CSV Batches
Import CSV Batches

Re-Order Departments

To re-order the placement of departments,

  1. Click the Re-Order icon and a popup appears.
  2. Select the desired department, drag, and drop it to the desired location up or down. The order is reflected while working on the requests.
  3. Once done, click Update. Similarly, you can re-order the sub-departments as well.
Options to Re-Order Departments and Sub Departments
Re-ordering the Departments

Department Configurations

The configuration page enables you to allow or restrict the users from creating tickets at leaf node.

Department Configurations
  • Allow Request Creation at Leaf Node Only: Enable if you want to allow the user to create or update requests only at the leaf node department. For example: If HR is the parent department and Operations is the sub-department. You will be allowed to create request with Operations department only. You will not be able to select HR.
  • Allow Problem Creation at Leaf Node Only: Enable if you want to allow the user to create or update problems only at the leaf node department. For example: If HR is the parent department and Operations is the sub-department. You will be allowed to create problem with Operations department only. You will not be able to select HR.
  • Allow Change Creation at Leaf Node Only: Enable if you want to allow the user to create or update changes only at the leaf node department. For example: If HR is the parent department and Operations is the sub-department. You will be allowed to create change with Operations department only. You will not be able to select HR.
  • Allow Release Creation at Leaf Node Only: Enable if you want to allow the user to create or update releases only at the leaf node department. For example: If HR is the parent department and Operations is the sub-department. You will be allowed to create release with Operations department only. You will not be able to select HR.
  • Display Department Hierarchy in Report: Enable if you want to display the department hierarchy in the generated report.

Once configured, click Update.