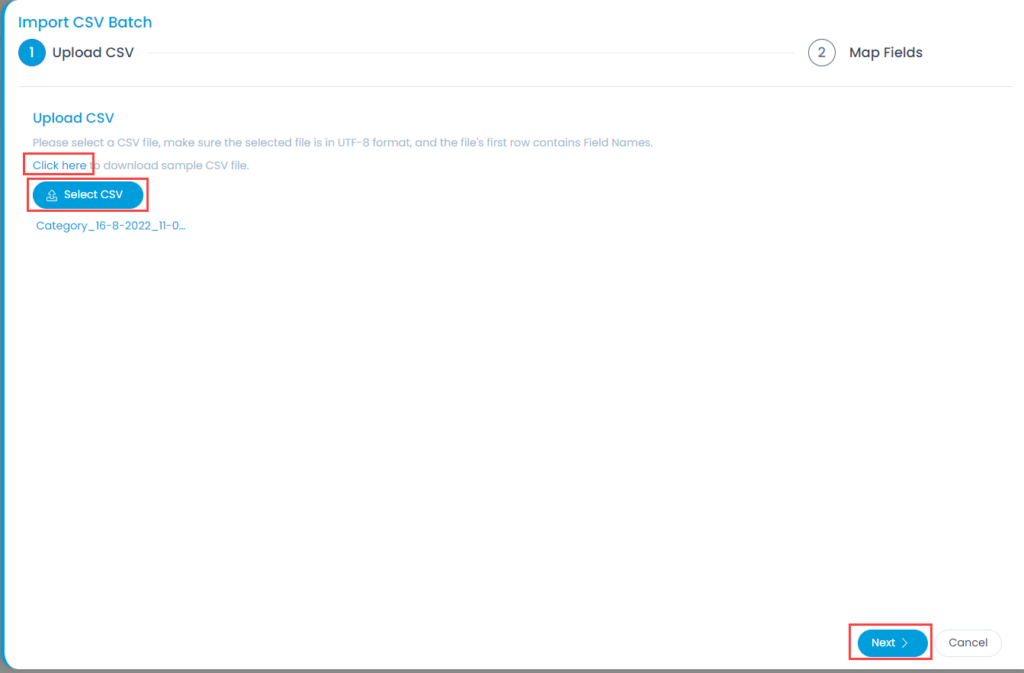
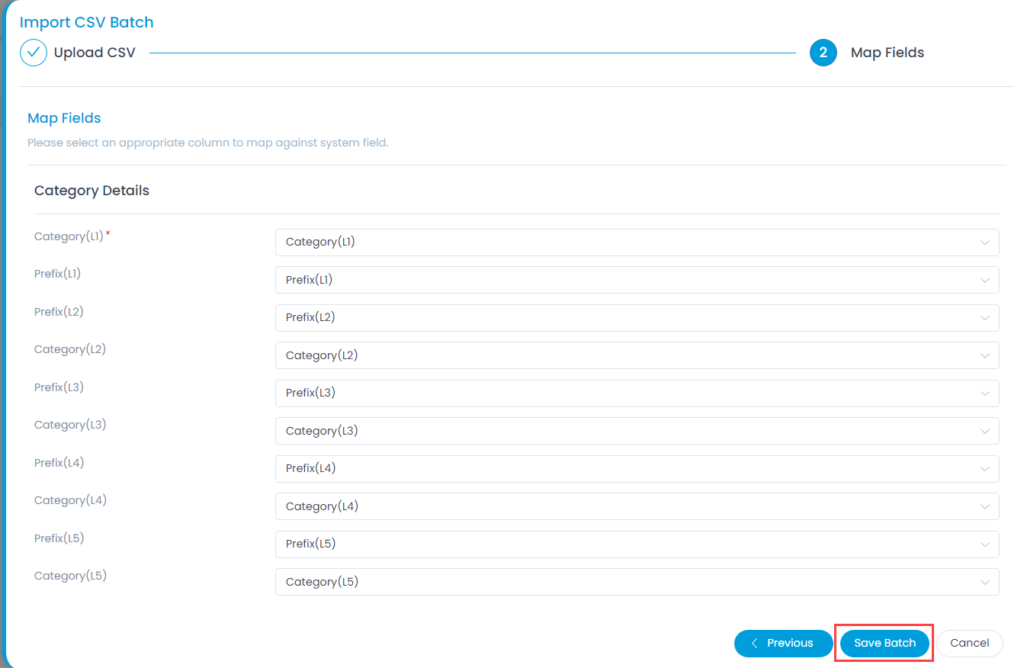
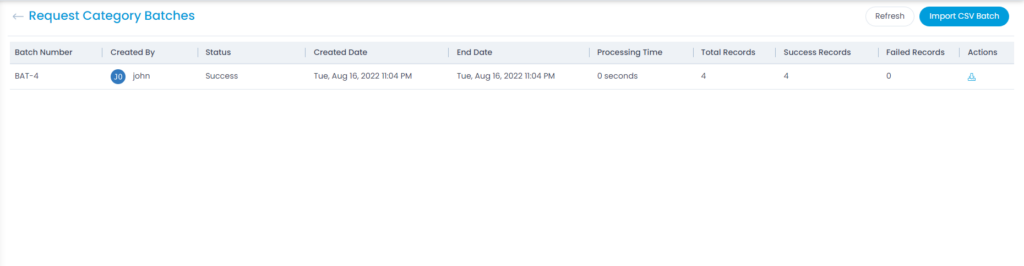
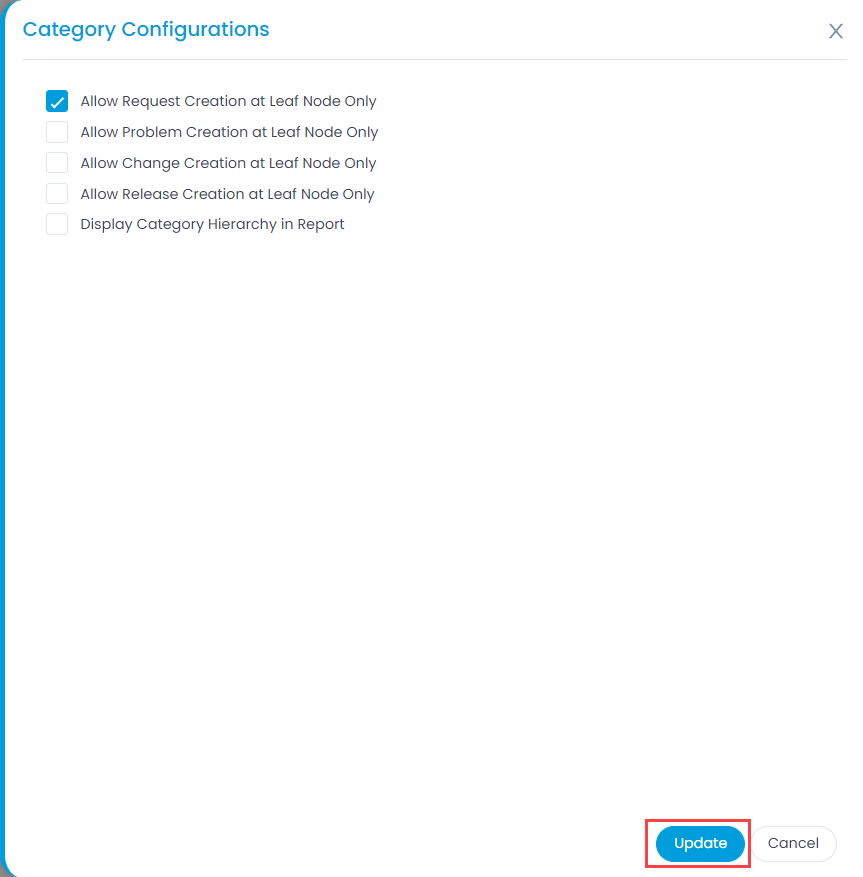
Motadata Docs

Request Category

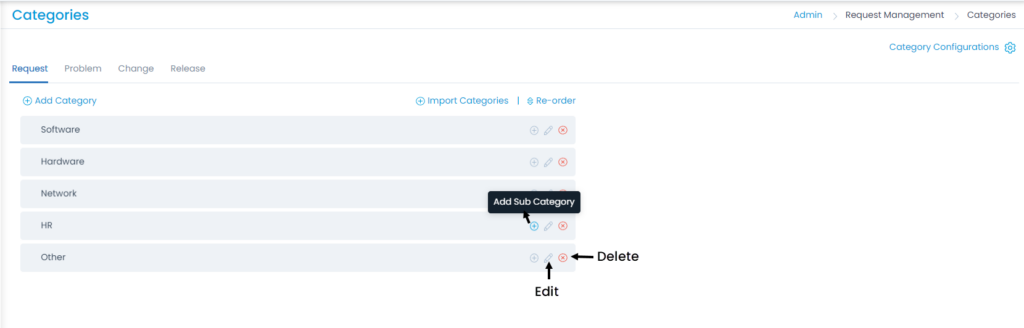
Categories enable you to bring the similar requests under a single group. This helps the technicians in filtering out the required requests easily and quickly from a huge list. The system provides the below categories by default:

  • Software
  • Hardware
  • Network
  • HR
  • Other

To view the Request Category page, navigate to Admin > Request Management > Request Categories > Request tab.

Request Category Menu

Here, you have the below options. All these options are common in Request, Problem, Change, and Release tabs.

  • Add Category: You can add a category.
  • Import Categories: You can import a list of categories in bulk.
  • Re-Order: You can re-arrange the order of the category in the list using drag and drop. You can also re-order the sub categories.
  • Category Configurations: You can configure the settings for request creation.
  • Add Sub Category: You can add a sub-category.
  • Edit: You can edit the category name.
  • Delete: You can delete the category if not required. A confirmation message appears. Click Yes to continue or Cancel to stop the process.

Add Category

To add a category, follow the below steps:

  1. Click the Add Category link and a popup appears.
Adding Category
Adding Category
  1. Enter the Name of the Category.
  2. Enter the Category Prefix.
  3. Click Save. Similarly, you can add problem, change, and release categories as well.

Add Sub Category

To add a sub category, follow the below steps:

  1. Click the Add Sub Category icon next to the required category and a popup appears.
Adding Sub Category
Adding Sub Category
  1. Enter the Name of the Sub Category.
  2. Enter the Category Prefix.
  3. Click Save. Similarly, you can add problem, change, and release sub categories as well.

Import Categories

This option allows you to import the categories of Request, Problem, Change, and Release modules in bulk. To do so,

  1. Click the Import Categories link. The Request Category Batches page appears.
  2. Click the Import CSV Batch button.
Import Categories Link
Import CSV Batch
Import CSV Batch
  1. Select the .csv file if you already have it filled with the respective fields. If not, select the new .csv file using Click Here and fill the respective details. Once the file is uploaded, click Next.
Select .CSV File
Select .CSV File
  1. Map the fields as per the requirement. By default it is mapped, only in case of removal/change of some parameters mapping is necessary, and click Save Batch.
Map Fields
Map Fields
  1. The Request Category Batches page appears. It displays the status of the import along with the details like processing time, total records, success records, failed records, etc. as shown below. Once successful, the imported categories will appear in the category list page.
Imported CSV Batches

Category Configurations

These are the flags which when enabled helps in the creation of Request, Problem, Change, and Release at the Leaf Node level only.

Here, you can also enable the flag for displaying the Hierarchy of Category in the Report.

Category Configurations