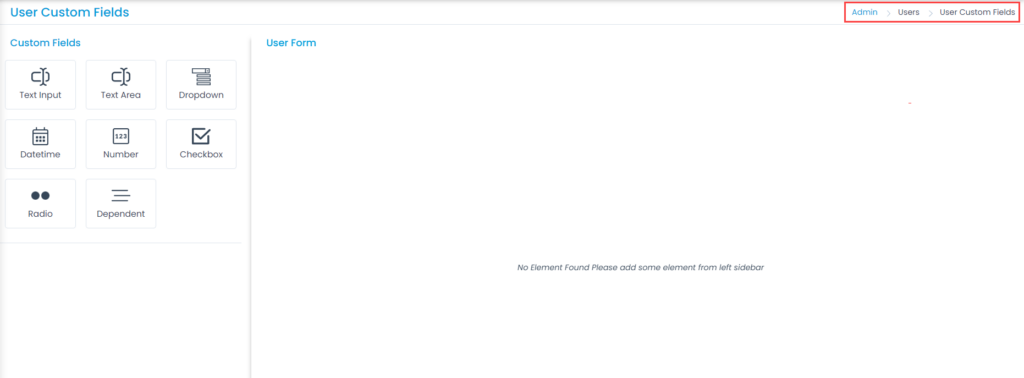
Motadata Docs

User Custom Fields

Custom Fields are fields that the admin creates to capture additional details about the users who are using the system. At times, apart from the default fields, few additional once are also required to get the necessary details. These details can be collected using the custom fields which later can be used in the automation activities.

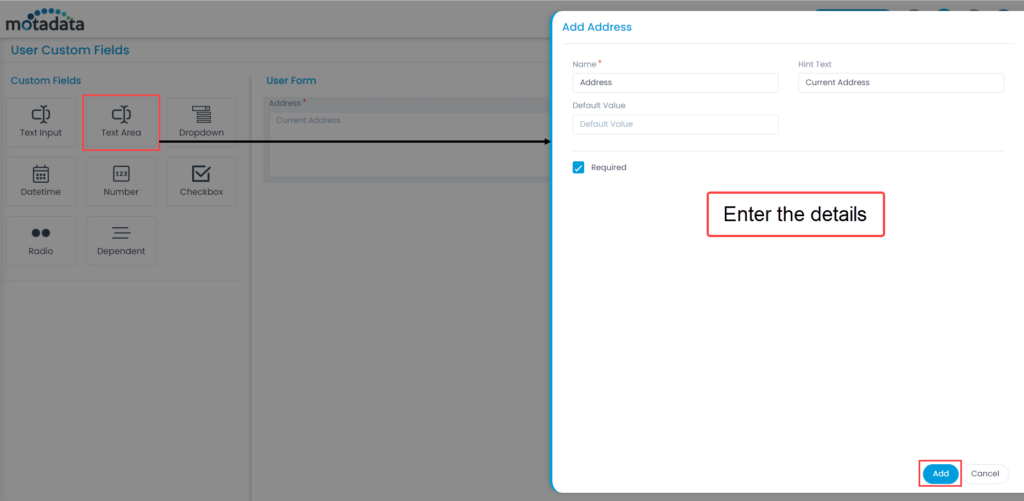
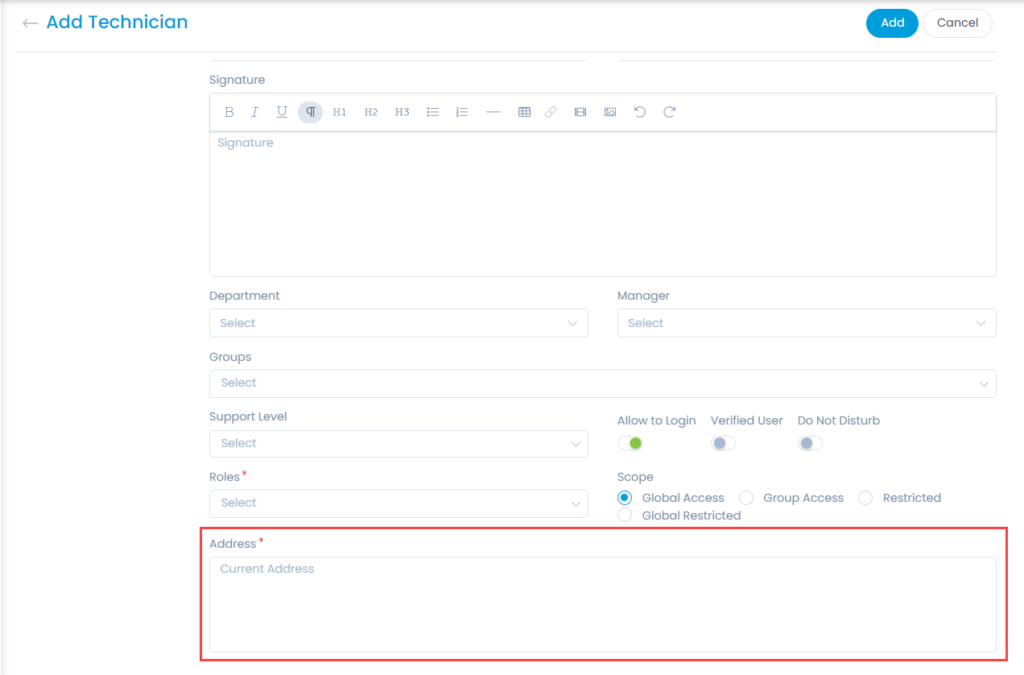
The User Custom Fields page enables you to create and manage such custom fields. Once created, they are available in the form while creating technicians or requesters. You can also arrange,  expand/collapse its size, create a duplicate field, edit, and remove the field if not required.

To view the User Custom Fields page, navigate to Admin > Users > User Custom Fields and the page appears.

User Custom Fields Page

Here, you can configure the following custom fields:

  • Text Input: Use this to capture inputs from the user. For example: Designation.
  • Text Area: Use this to capture lengthy input from the user. For example: Address.
  • Dropdown: Use this to have options in the dropdown list.
  • Datetime: Use this to capture date values. For example: Start Date
  • Number: Use this to capture numerical values. For example: Retry No.
  • Checkbox: Use this to capture multiple options from a list.
  • Radio: Use this to capture a single value from a list of options. For example: Yes/No.
  • Dependent: Use this when you want an option to be visible based on a selected value.

Adding a Custom Field

To add a custom field,

  1. Simply drag and drop the required field in the User Form on the right-hand side and a popup appears as shown below.
  2. Enter the required details. These details vary based on the selected field.
  3. Once done, click Add, and the field appears in the form. Here, Text Area field is used as an example. Once a custom field is added, it can be used as Condition in the Requester Groups. All the custom field types except for Text Area can be used in the Condition.
Adding a Custom Field
Custom Field displayed on Add Technician page

Text Input and Text Area

Add these fields when you need text input from the user.

Parameter Description
Name Enter the name of the field.
Hint Text Enter the text that you want to display as hint. It is displayed in grey color in the form.
Default Value Enter the default value of the field.
Required Select if you want the field to be mandatory in the form.

Add these fields when you want the user to select a single or multiple options from a list.

Field Description
Name Enter the name of the field.
Hint Text (For Dropdown) Enter the text that you want to display as hint. It is displayed in grey color in the form.
Default Value Enter the default value of the field.
Options Add the options that you want to display in the dropdown, checkbox, or radio fields. You can add the options using the Add link. Also, you can import the options in bulk using the Import Options link. Once added, you can change the order of the options to be displayed using drag and drop.
Required Select if you want the field to be mandatory in the form.

Datetime and Number

Add these fields when you want the user to select a date or enter number.

Field Description
Name Enter the name of the field.
Hint Text Enter the text that you want to display as hint. It is displayed in grey color in the form.
Default Value Select the default value that you want to display in the field. For the Datetime field, you can select either custom or current date option.
Allow to select time? (For Datetime) Enable if you want to allow the user to select time along with the date. If selected, the user is allowed to select the date and time. Also, a clock symbol is displayed in the field. If unselected, the user can select only date and a calendar icon appears in the field.
Allow Decimal in number? (For Number) Enable if you want to allow the user to enter decimal numbers. If unselected, the user can enter only whole numbers in the field.
Required Select if you want the field to be mandatory in the form.

Dependent

Add this field when you want to display a hierarchy and allow user to select option from it. For Example: Allowing the user to select countries based on continents.

Adding Sub-Options
Adding Sub-Options
Field Description
Name Enter the name of the field.
Hint Text (For Dropdown) Enter the text that you want to display as hint. It is displayed in grey color in the form.
Allow user to select leaf node only Enable if you want to allow the user to select only the leaf node option and not the parent node. If unselected, the user can select the parent node also.
Display Entire Hierarchy in Report Enable if you want to display the entire hierarchy of options in the report.
Options Add the hierarchy of options and sub-options that you want to display in the list. You can add the options using the Add link. Also, you can import the options in bulk using the Import Options link. Once added, you can change their order using drag and drop.
To add the sub-options to the list use the Add (Plus) icon next to the main option.
Required Select if you want the field to be mandatory in the form.