"Experience Our AI-driven ServiceOps and AIOps at DTX Europe 2024 to Transform your IT operations!" - Read More

Motadata Docs

Non-IT Asset Details Page

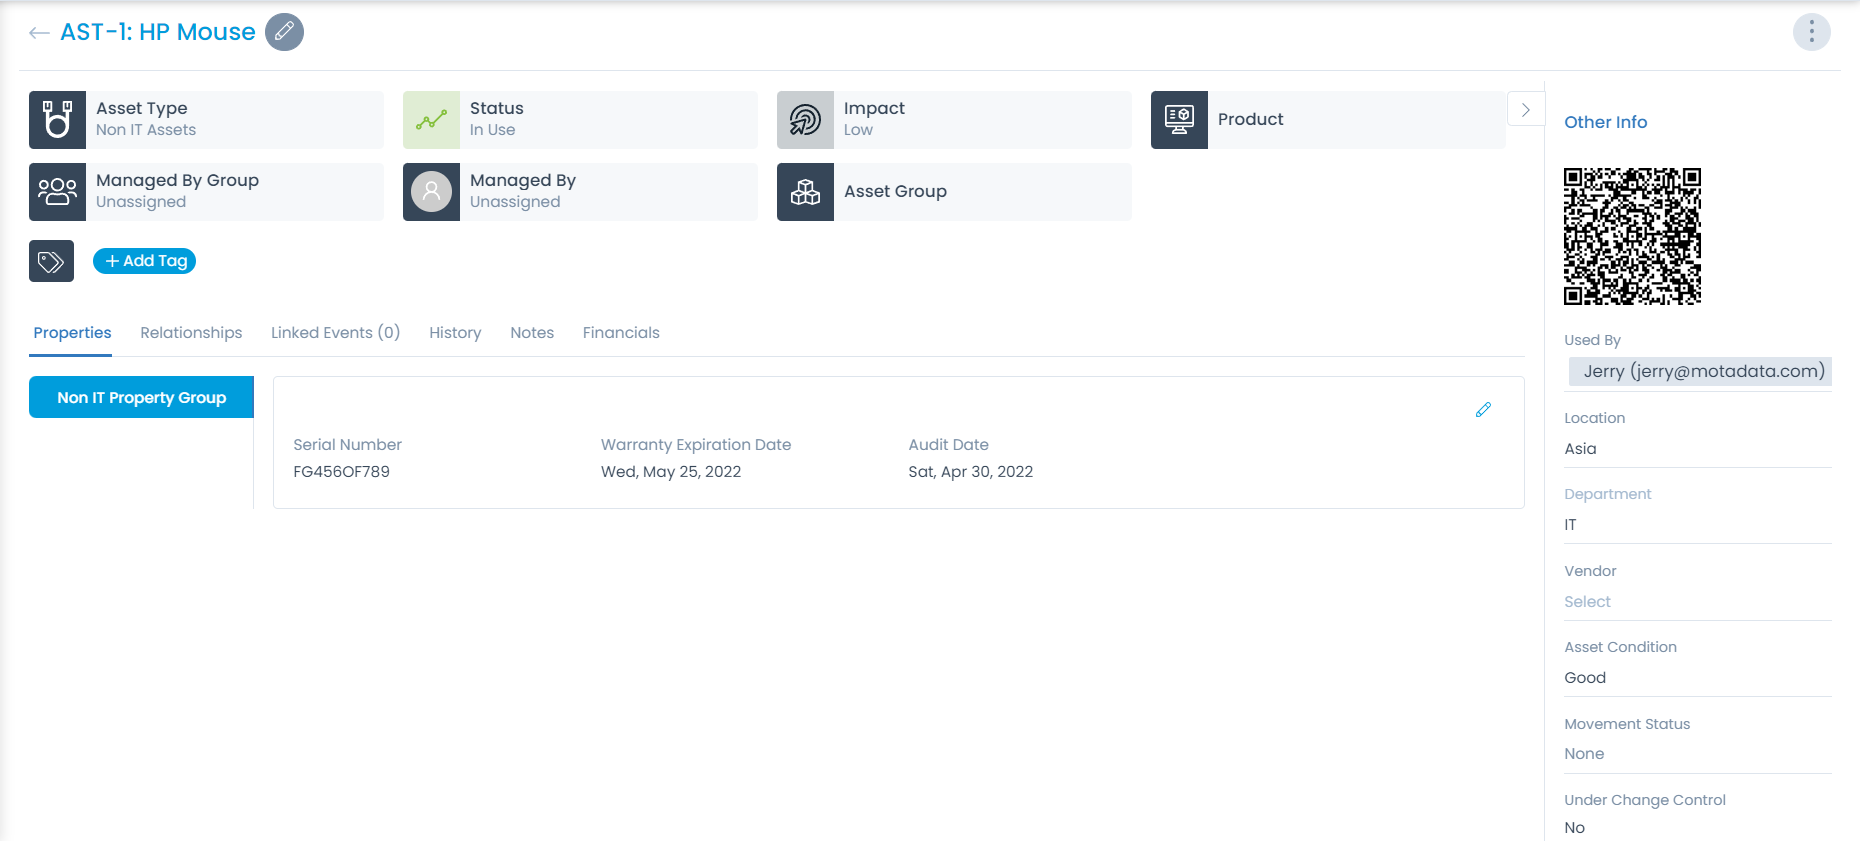
On the Non-IT Asset Details page you can view the complete details of the asset and perform the desired activity.

To view the details page,
On the Non-IT Assets list page, click on the subject of the asset whose details you want to view, and the below page appears.

Non-IT Asset Details Page

Subject and Description

You can see the complete subject and the description on the top of the details page.

Asset Subject and Description

Classifiers of Asset

These properties tell you the current statistics of the asset and help you classify them under different labels. When someone works on an asset, they update the labels accordingly. For e.g. if the ‘status’ is closed, it means you do not need to do anything on the asset.

Classifiers of Asset
  • Asset Type: It classifies the name of the asset type.
  • Status: It classifies the asset based on the status. The default options are: In stock, In use, Missing, and Retired.
  • Impact: It classifies the asset based on the impact factor. The default values are: Low, On Users, On Department, and On Business.
  • Product: It classifies the asset based on the product.
  • Managed By Group: It displays the group which manages the particular asset.
  • Managed by: It displays the name of the person who is to manage the asset.
  • Asset Group: It displays the group in which the asset belongs. You can also change it and search for the desired group to associate.
  • Add Tags: You can add the custom tags to quickly find the assets based on it. Also, system adds some default tags when based on certain labels and actions.

Associated Actions for Asset

You can create/edit different actions and activities as a part of relationships, notes, and history in the asset. The available types of actions are:

  • Properties: You can view and edit properties of the asset.
  • Relationships: You can view and manage the relation of this particular asset with other assets.
  • Linked Events: You can view link, create, or relate the existing asset to various requests, problems, changes, releases, contracts, knowledge, and projects.
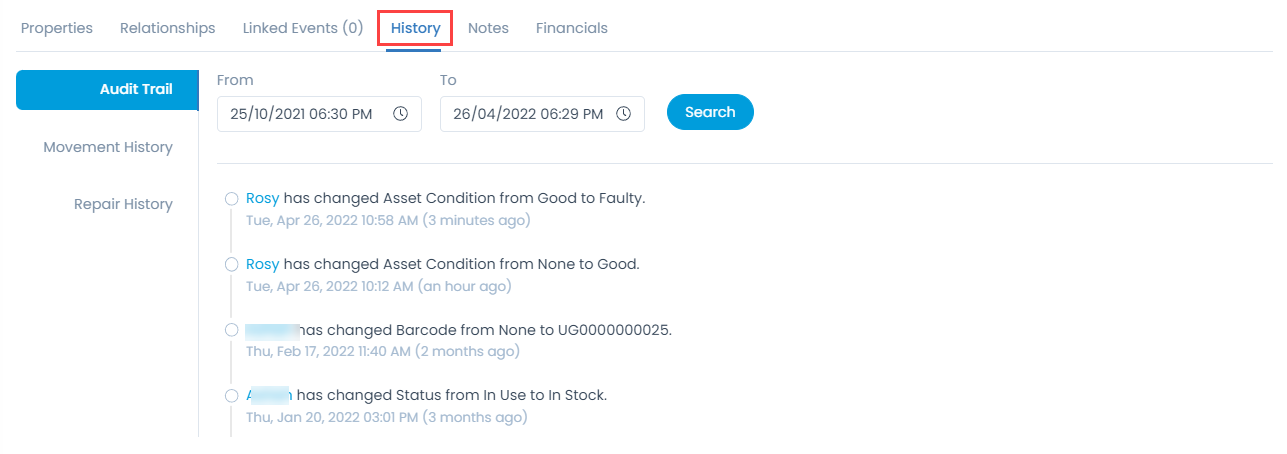
  • History: You can view and manage the audit logs of the asset.
  • Notes: You can add notes for future reference.
  • Financials: You can add cost and depreciation details.

Properties

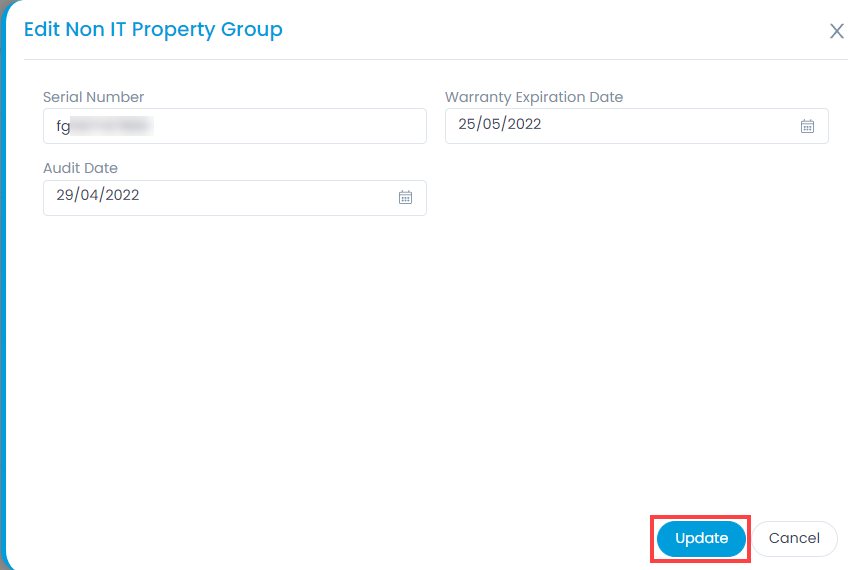
This shows all the specifications of the asset. It includes the serial number, warranty expiration date, and audit date. You can also edit the properties by clicking the Edit icon.

Properties Tab
Properties Tab
Edit Non-IT Property Group

Relationships

You can view and manage the relation of this particular asset with other assets. The relation is represented pictorially for better understanding and visuals.

Relationships Tab
Relationships Tab

From here, you can do the following:

  • View the Relationships tab in full screen.
  • Add Relationships. For more details, refer Hardware Asset Details Page.
  • View the added relationships.
  • Navigate to right, left, up, and down using the Navigation Control.
  • Zoom In
  • Zoom Out
  • Move the relationship diagram by clicking near the figure, dragging and dropping at the desired location.

Linked Events

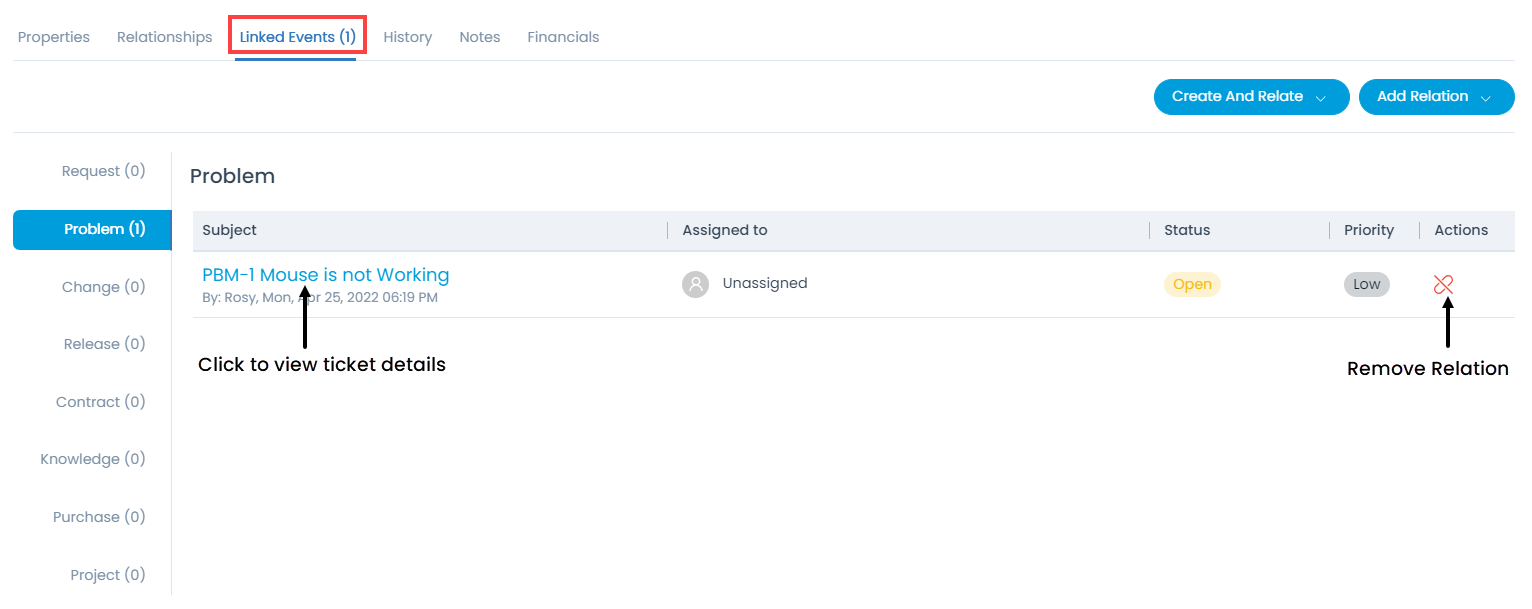
You can view the link, create, or relate the existing asset to various Request, Problem, Change, Release, Contract, Knowledge, Purchase, and Project. Here, the count of the linked entities will also be shown.

Linked Events Tab
Linked Events Tab

From here, you can do the following:

  • View a list of tickets linked with this asset in the table.
  • Create and Relate Incidents, Request Service, Problem, Change, and Release tickets with this asset.
  • Add Relation.
  • View the ticket details if required.
  • Unlink the ticket and remove it from the list.

Creating and Relating a Request
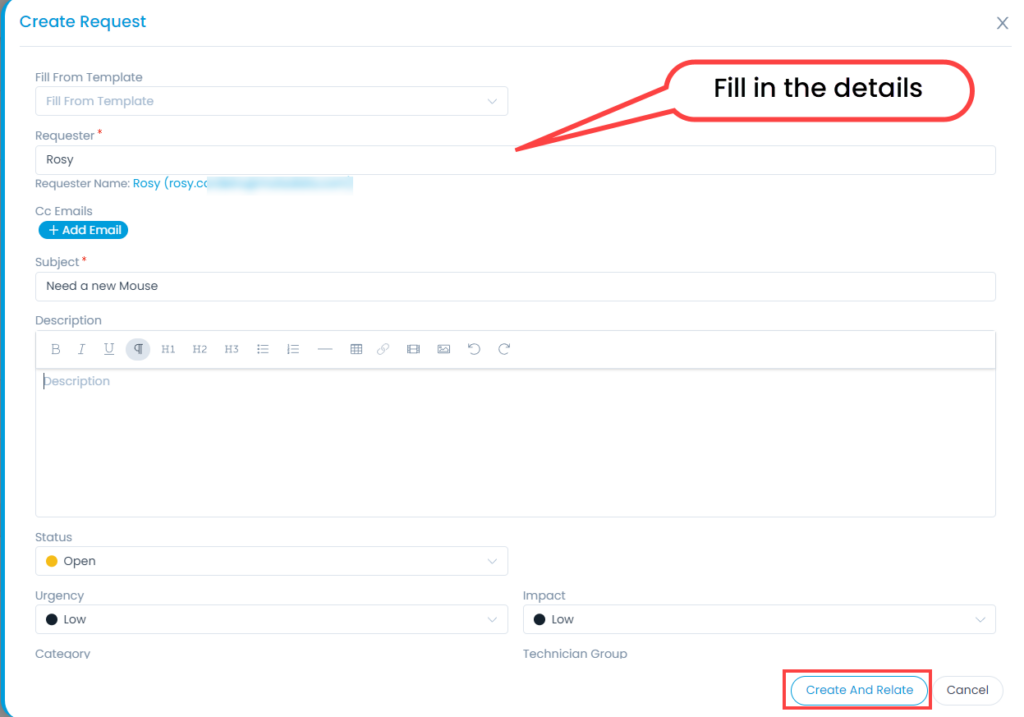
To create and relate a request,

  1. Click the Create and Relation button. A popup appears.
  2. Fill in the details.
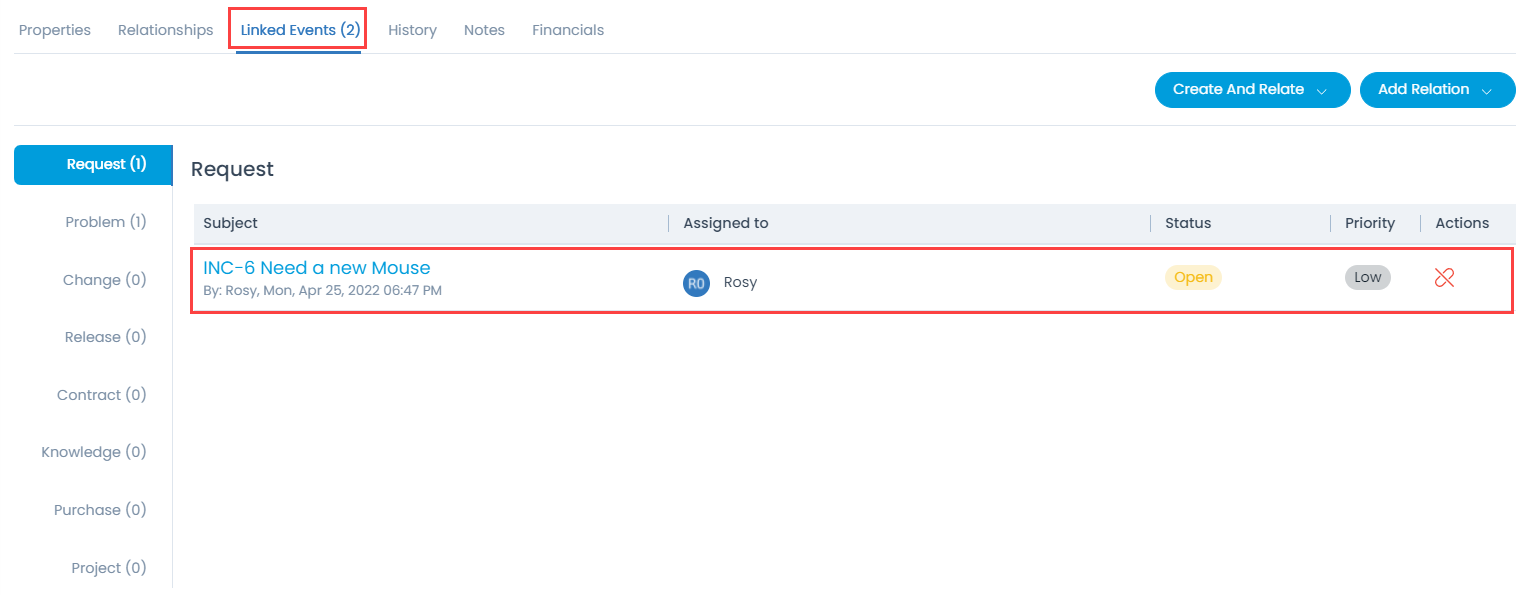
  3. Click Create and Relate. The ticket gets created and appears in the table as shown below.
Create and Relate Ticket
Linked Ticket
Linked Ticket

History

You can view and search for the audit logs, movement history, and repair history of the asset within the selected duration.

History Tab - Audit Trail

Movement History
This displays a list of asset movement requests created for this asset along with their details. For more details, refer to the section Asset Movement.

Movement History
Movement History

Repair History
This displays the repair history of the asset.

Repair History
Repair History

Notes

You can view and add notes for future reference.

Notes Tab
Notes Tab

Financials

This displays the costing and depreciation details of the asset. For more details, refer Hardware Asset Details Page.

Financials Tab
Financials Tab

Other Information

The other information shows additional details about the asset.

Other Information
Other Information
  • QR Code: Shows the QR code of the asset.
  • Used By: Shows the name of the person who is using the asset. You can edit if required.
  • Location: Shows the location of the asset. You can edit if required.
  • Department: Shows the department of the asset. You can edit if required.
  • Company: Shows the company associated with the Non-IT asset. This field is available only if the Managed Services Provider feature is enabled.
  • Vendor: Shows the Vendor from where the asset is bought. You can change if required.
  • Asset Condition: Shows the condition of the asset. The options are: None, Faulty, Good, and Non Repairable.
  • Movement Status: Shows the status of the asset movement.
  • Under Change Control: Shows whether the asset is under change control.
  • Business Service: Shows the associated service with the respective asset. You can edit the value.
  • Origin: Shows from where the asset is originated. It can be Discovery, Manually, Agent, or CSV Import.
  • Acquisition Date: Shows the date of the addition of the asset.
  • Assignment Date: Shows the date of the Assignment, when it is handed over to any user.
  • Created and Last Updated Date: Shows the date and time of the asset created and last updated.