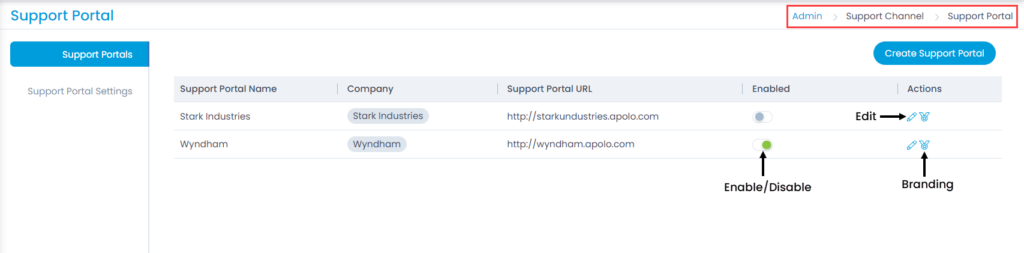
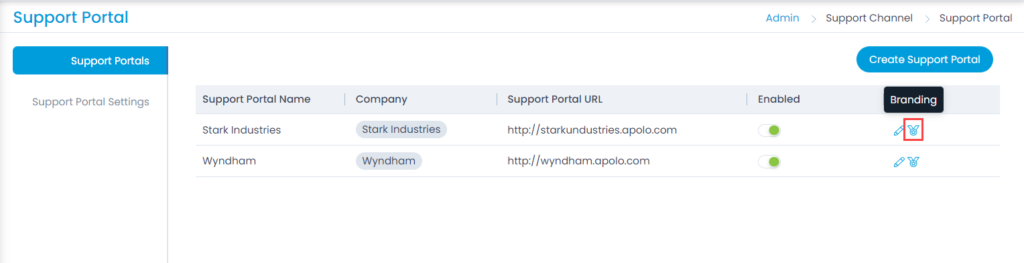
Motadata Docs

Support Portals

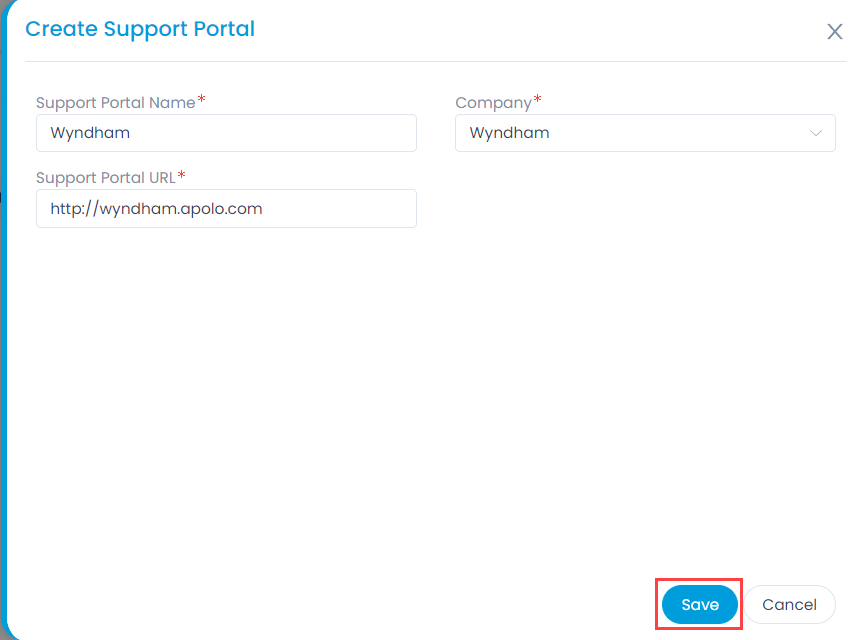
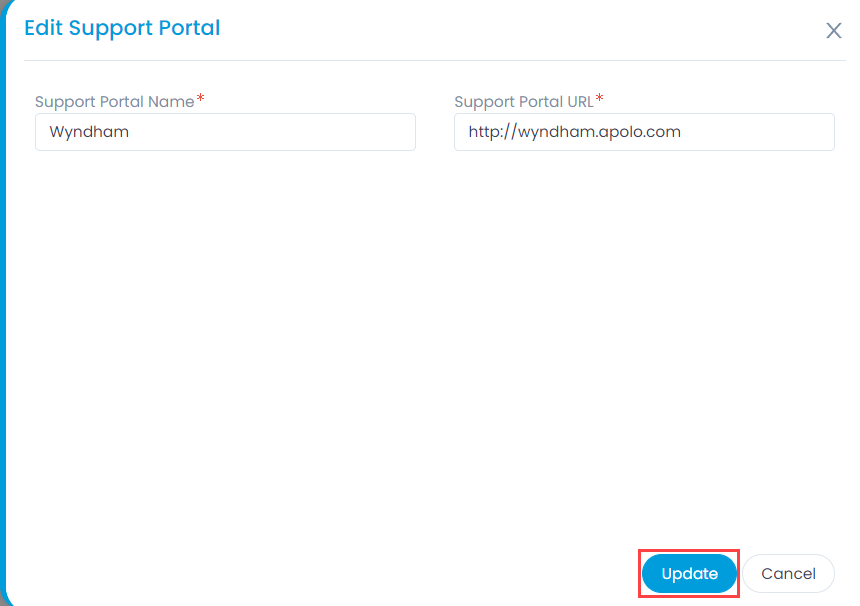
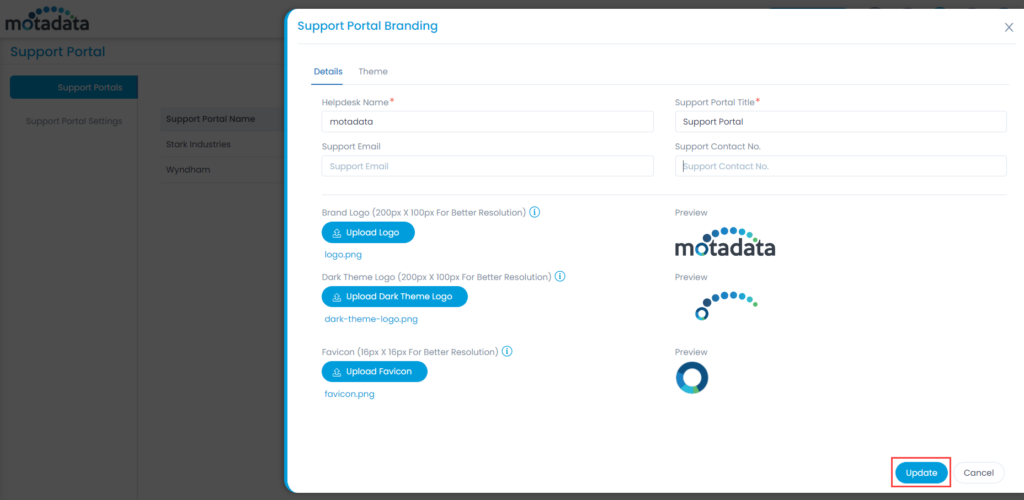
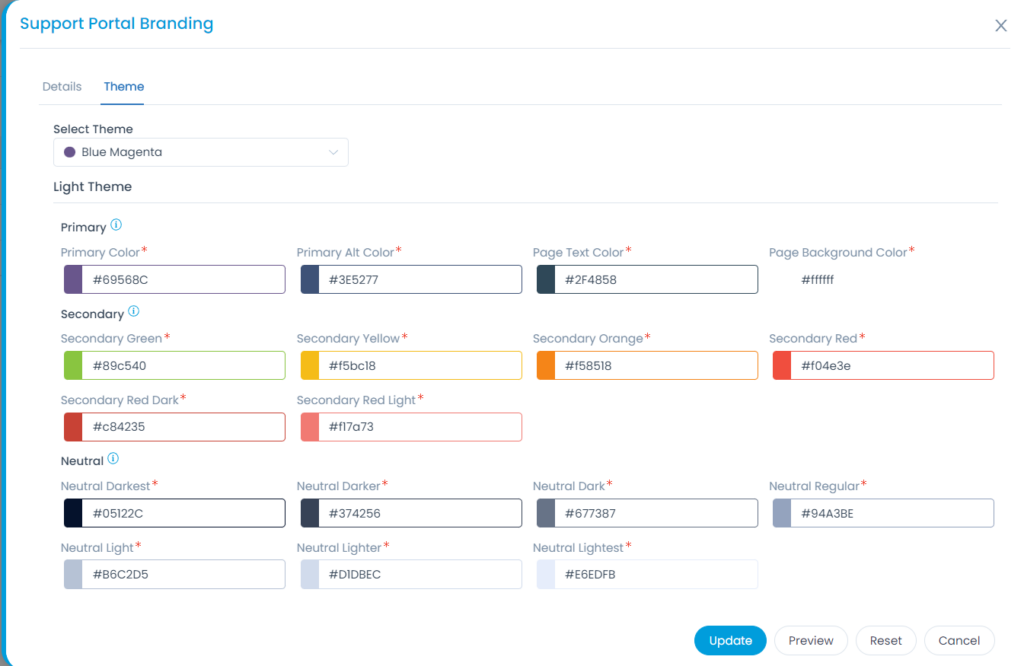
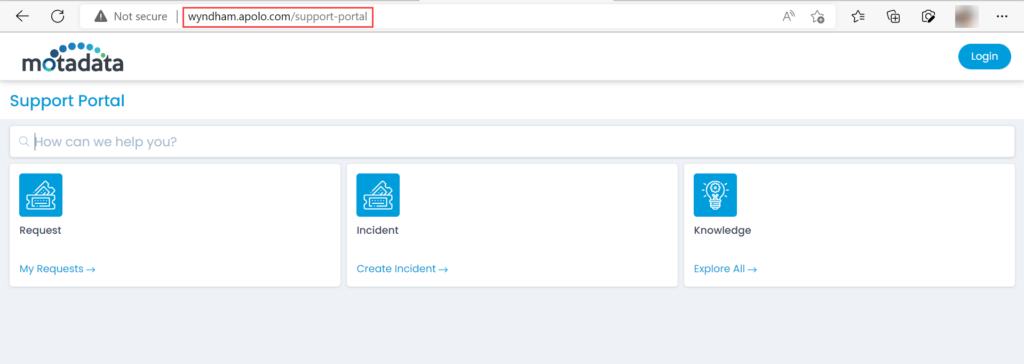
Here, you can create and manage multiple Support Portals for companies created in the Managed Services Provider sub-menu. A single Support Portal can be associated to a single Company. If required, you can also customize their look and feel with the help of branding.

Note: This tab is available only if the Managed Services Provider feature is enabled. If disabled, only Support Portal Settings (Support Portal) tab will be available.

To view the Support Portals list page, navigate to Admin > Support Channels > Support Portal > Support Portals tab, and the below page appears.

Support Portals list page

Here, you can do the following:

  • View the details of the already existing Support Portals.
  • Create Support Portal: You can create and associate a Support Portal to a company.
  • Enable/Disable: You can enable or disable a Support Portal by clicking the toggle button. Once enabled, its color will turn green. By default, it is disabled.
  • Edit: You can edit the required Support Portal.
  • Branding: You can customize the theme and details of the Support Portal as per your requirement.

Create Support Portal

To create a new Support Portal, follow the below steps:

  1. Click Create Support Portal on the top-right corner of the page.
Create Support Portal Popup
  1. Enter the below details:
    • Support Portal Name: Enter the name of the Support Portal.
    • Company: Select the company with whom you want to associate the Support Portal.
    • Support Portal URL: Enter the URL of the Support Portal. This will be used for accessing the portal.
  2. Once done, click Save and the Support Portal will get created. By default, it is in disabled state. To access this portal, you need to enable it, and then enter the URL in the address bar of the browser. Once done, the Support Portal will appear.
Note: A Support Portal can only be disabled and not deleted from here. However, if its associated Company is deleted it will also get deleted automatically.

You can now enable it, edit, or set branding for it.

  1. In the Enabled column, click the toggle button to enable it to make it live.
  2. To edit the details, click the Edit icon. Here, you can edit the Support Portal Name and its URL. Once done click Update.
Edit Support Portal
Edit Support Portal

Branding

To set branding for a particular Support Portal, click the Branding icon, and a side-popup appears.

Branding Option
Branding Option
Support Portal Branding Popup

The popup provides you with two tabs: Details and Theme.

Details

The details tab enables you to change the following details of the portal:

  • Helpdesk Name
  • Support Portal Title
  • Support Email
  • Support Contact No.
  • Brand Logo
  • Dark Theme Logo
  • Favicon

You can also view the Preview of the uploaded logo and favicon.

Helpdesk Name: The name configured here will be available on the Chatbot of the Support Portal.

Helpdesk Name
Helpdesk Name

Theme

This tab enables you to customize the look and feel of the Support Portal. You can change it to match your branding requirements. From here, you can define the dark and light theme colors for the portal.

Theme tab
Theme tab

To change the theme of the portal,

  1. Select the theme.
  2. Select the colors of the portal:
    • Primary: Changes the color of the buttons, headings, links, and the left panel menu items. You can also change the text and page background colors.
    • Secondary: Changes the color of the error/warning messages, alerts, and notifications including information and success banners.
    • Neutral: Changes the color of the buttons other than the ones changed by primary colors. Search tags, three-dot menu, the header of the grid or table, and the area highlighted on-hover can be changed.
  3. Once done, click Update to apply the theme. You can also preview the changes using the Preview button. To reset the theme to default, click the Reset button.
Tooltip for each Color

Access the Support Portal

  1. To access the Support portal, enter the Support Portal URL in the address bar of the browser, and the home page appears as shown below.
Accessing the Support Portal URL
  1. Click the Login button and the below page appears.
Sign In Page
Sign In Page
  1. Enter the email addresspassword, and click Sign In. The below screen appears.
Support Portal Home Page
  1. You can now use this portal as per your requirement.