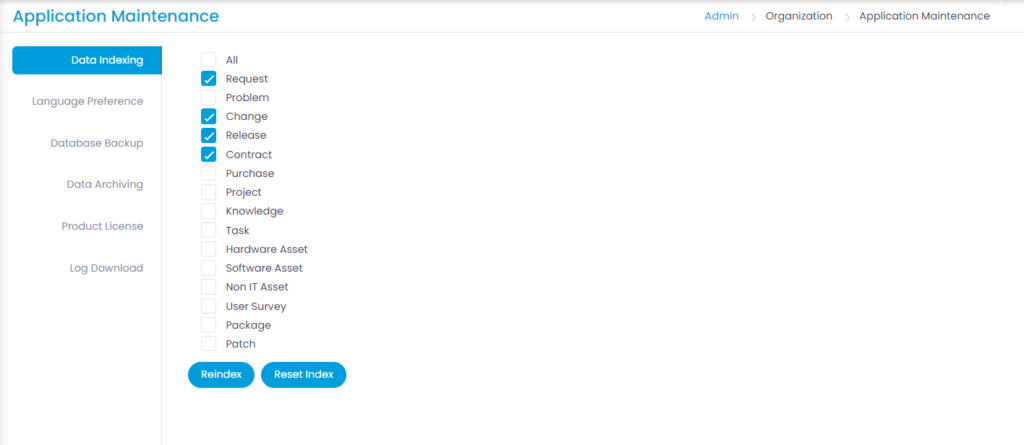
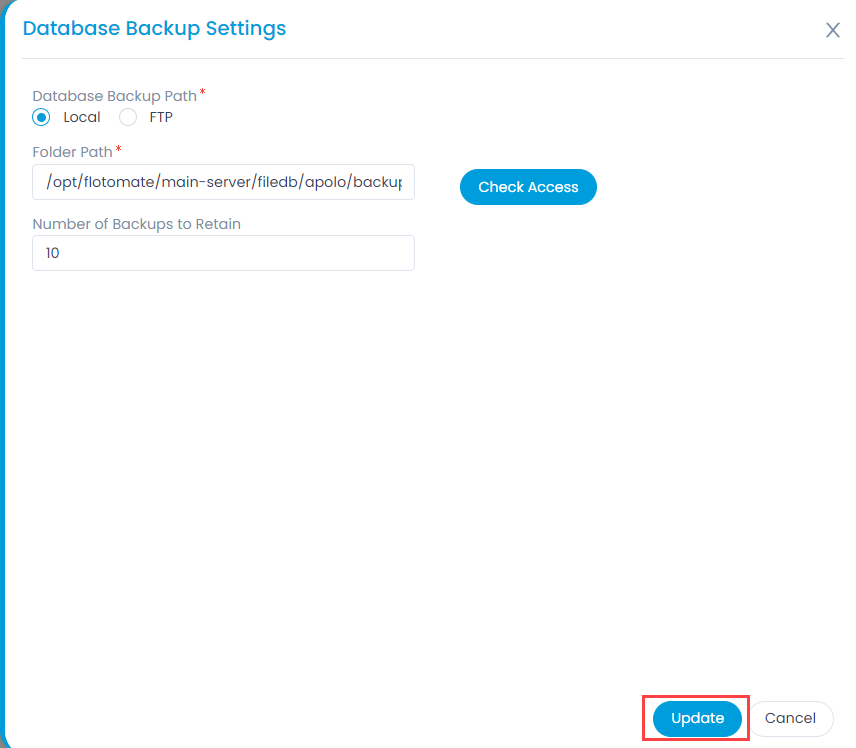
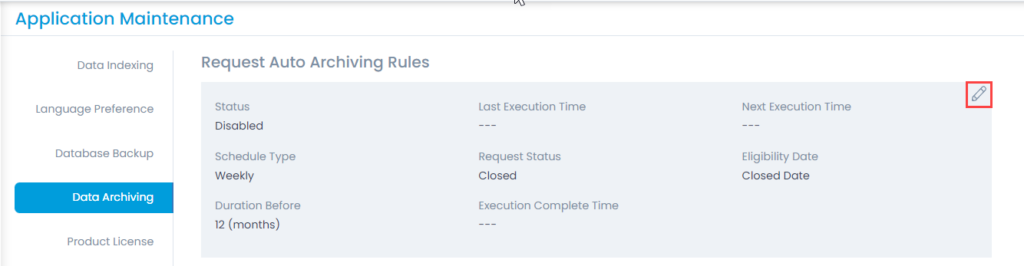
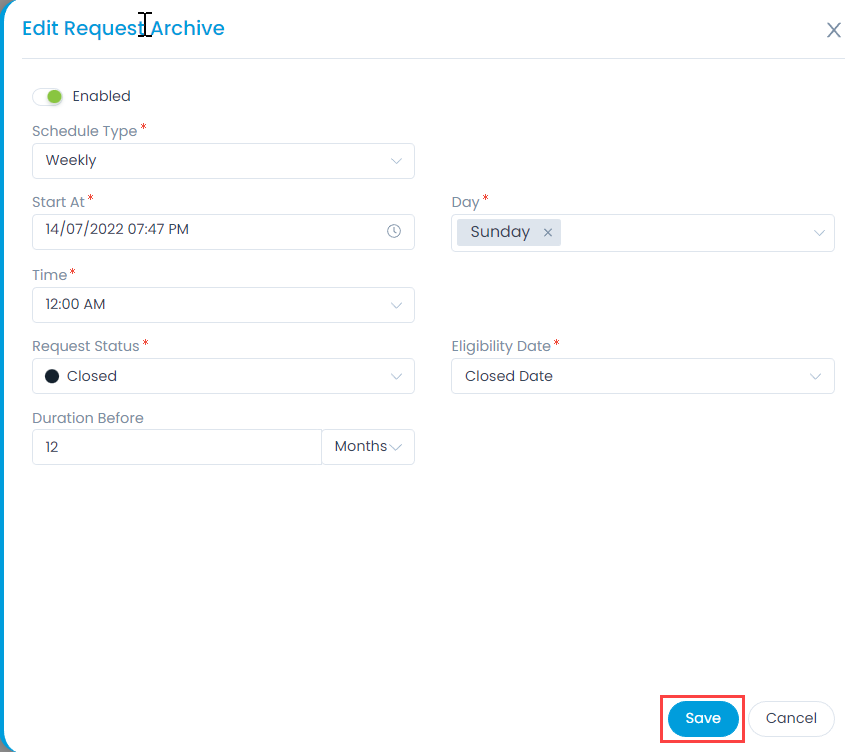
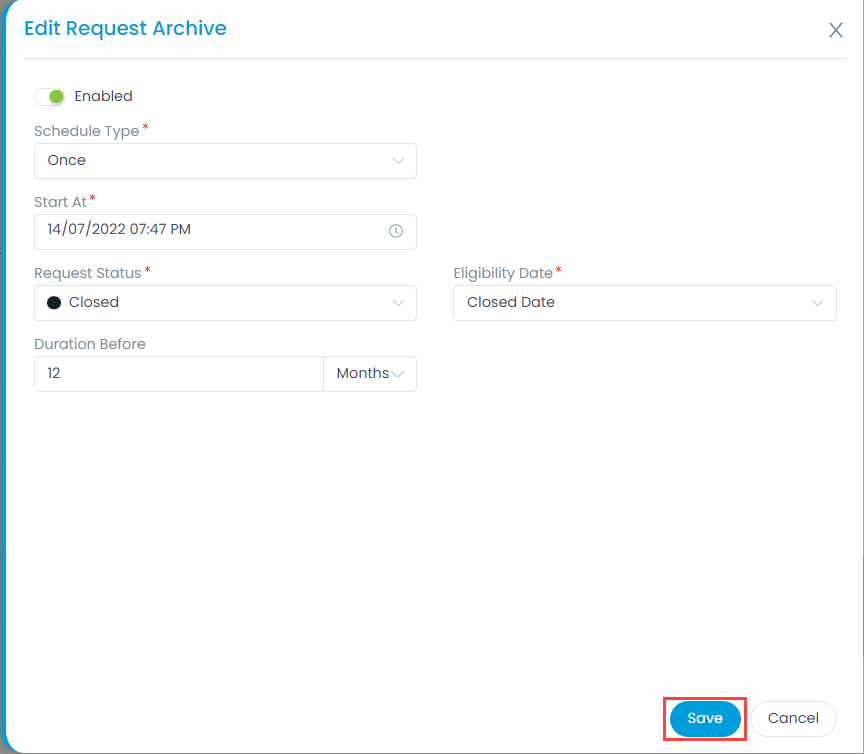
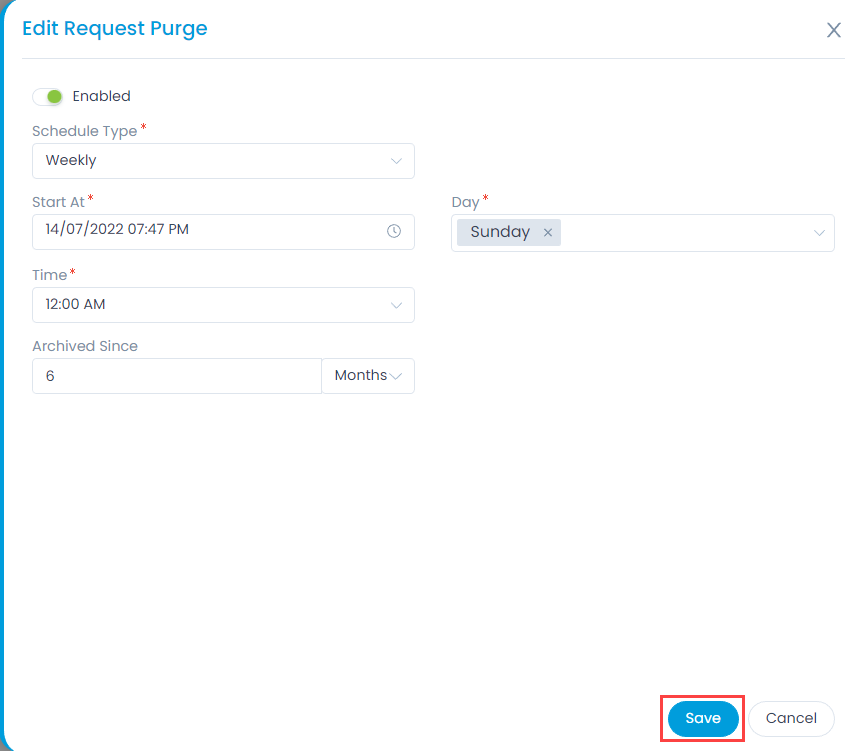
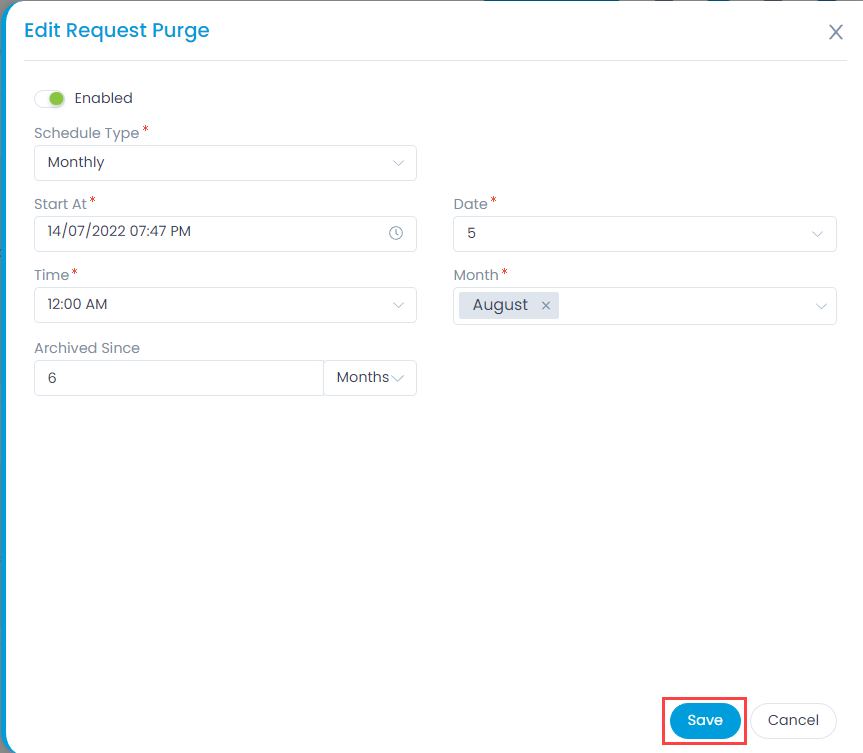
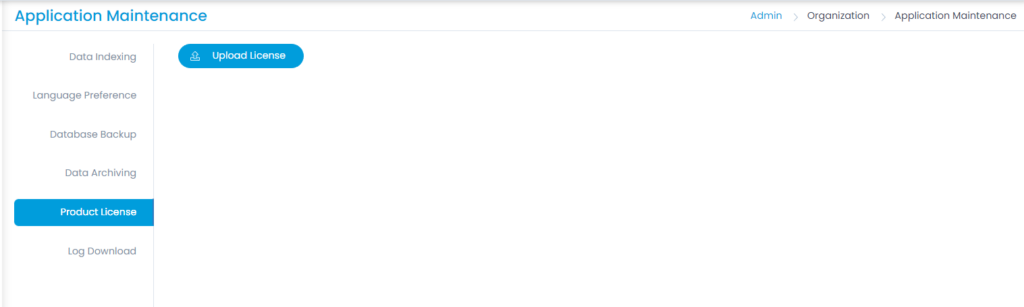
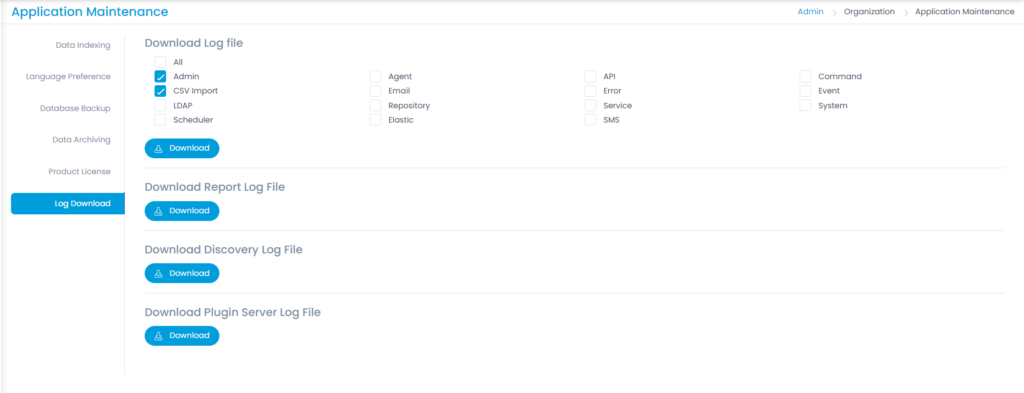
Application Maintenance
Maintenance in business premises comprises of front end as well as backend processes. It includes all, for example Logs, Database, Licensing, Indexing, etc.
To view the Application Maintenance page, navigate to Admin > Organization > Application Maintenance.
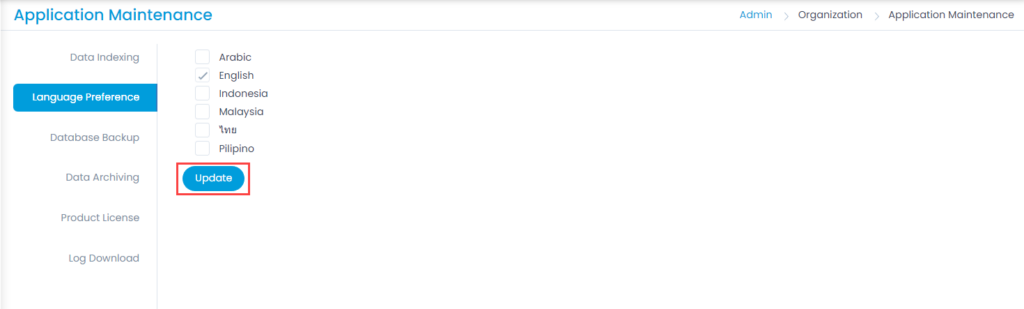
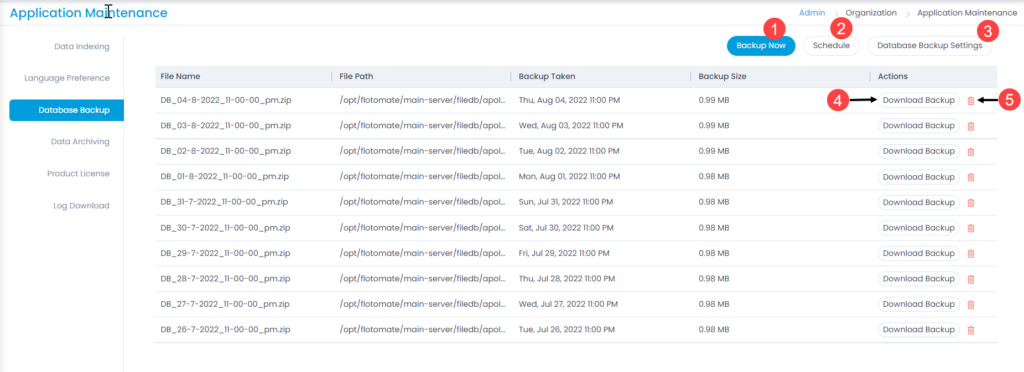
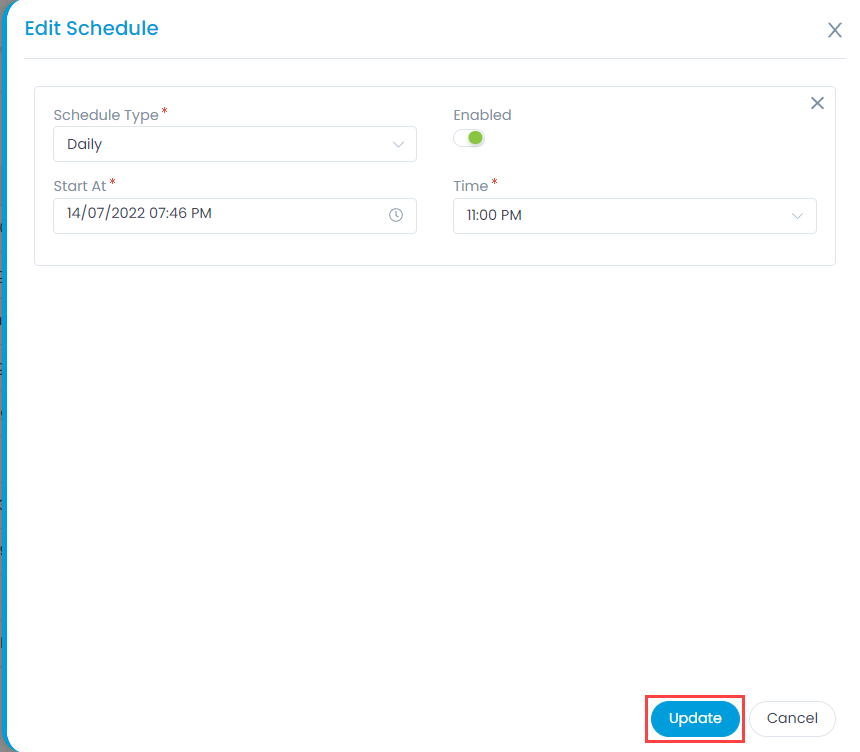
The page consists of the following tabs: