How to Create a Topology Plugin?
Overview
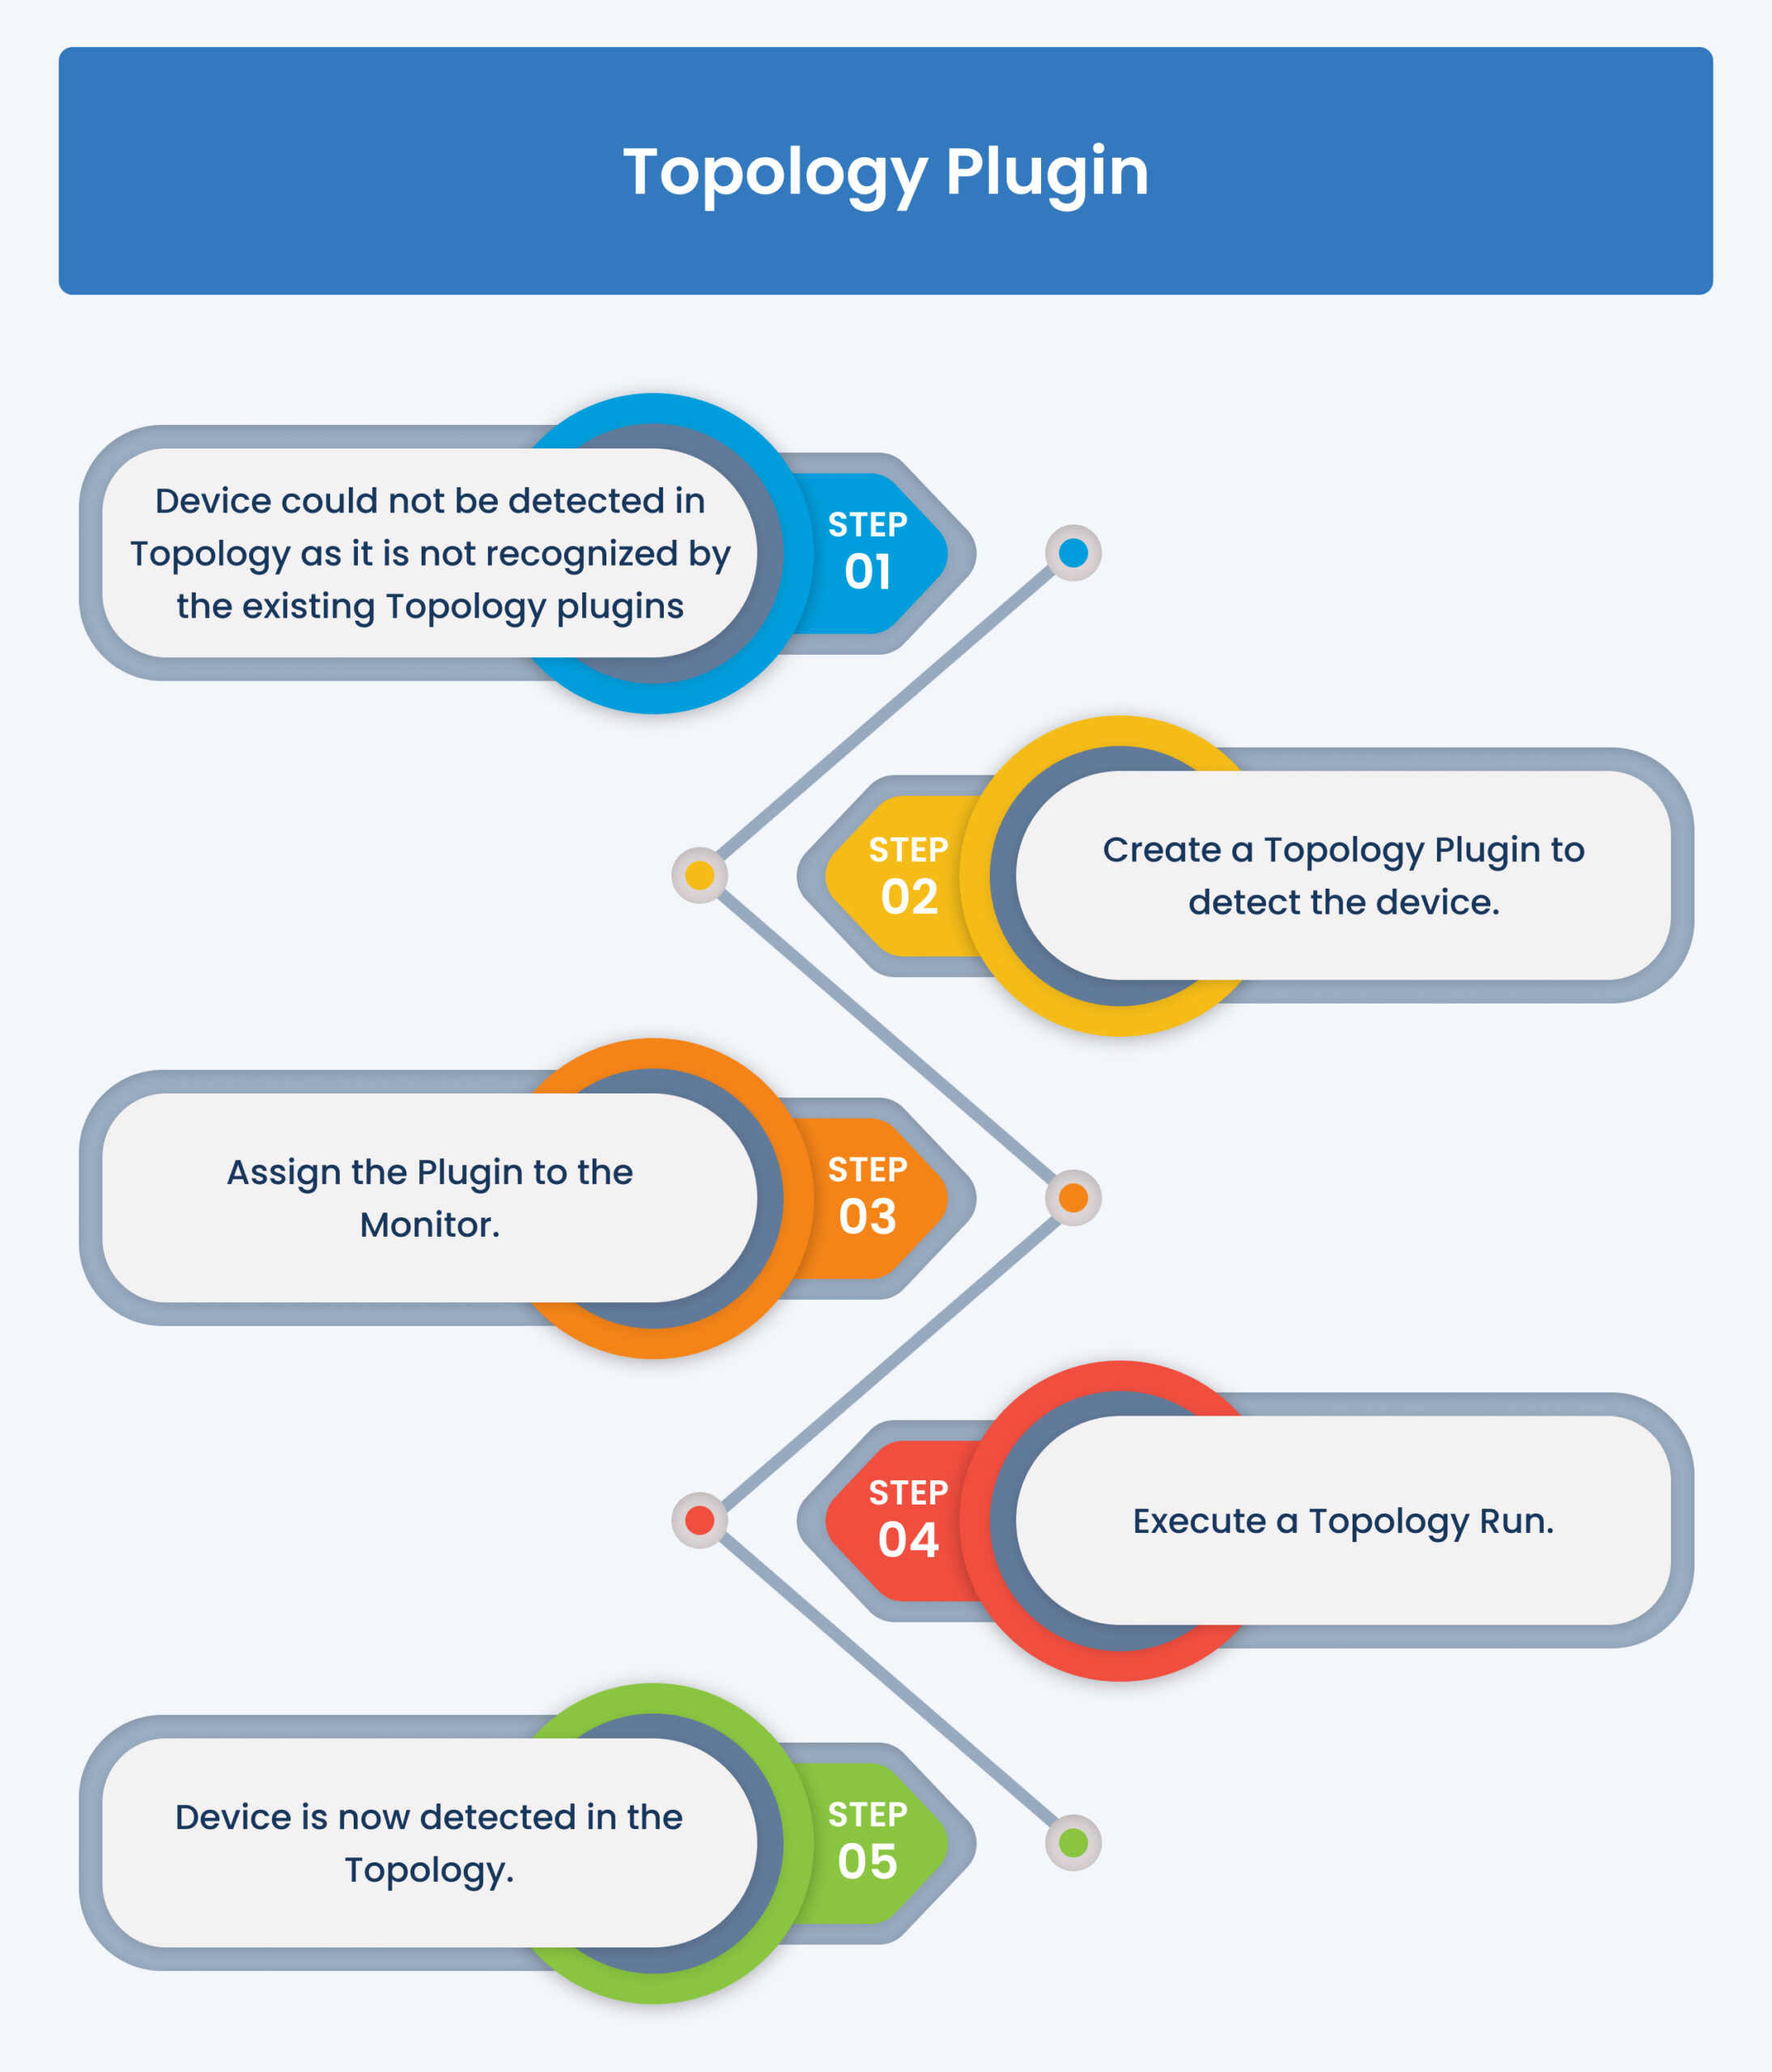
A Network Topology is created with the help of routing protocols such as CDP, OSPF, etc. These routing protocols are embedded in the Topology plugins. When you execute a Topology run, AIOps creates a Topology map with the help of these plugins.
There might be a situation where a device in your network might not show up in the Topology map. This would generally mean that the device belongs to a vendor not recognized by any in-built Topology plugins. For such cases, you can create a topology plugin to identify devices.
Once you create a new topology plugin for the device, assign it to a monitor, and run the Topology scheduler, the Topology plugin will now be able to read the device and help create the Topology map for that device.
Navigation
Go to Menu, Select Settings ![]() . After that, Go to Plugin Library
. After that, Go to Plugin Library ![]() . Select Topology. The topology plugin screen is displayed.
. Select Topology. The topology plugin screen is displayed.
Select  to start creating a topology plugin.
Parameters to Create Topology Plugin
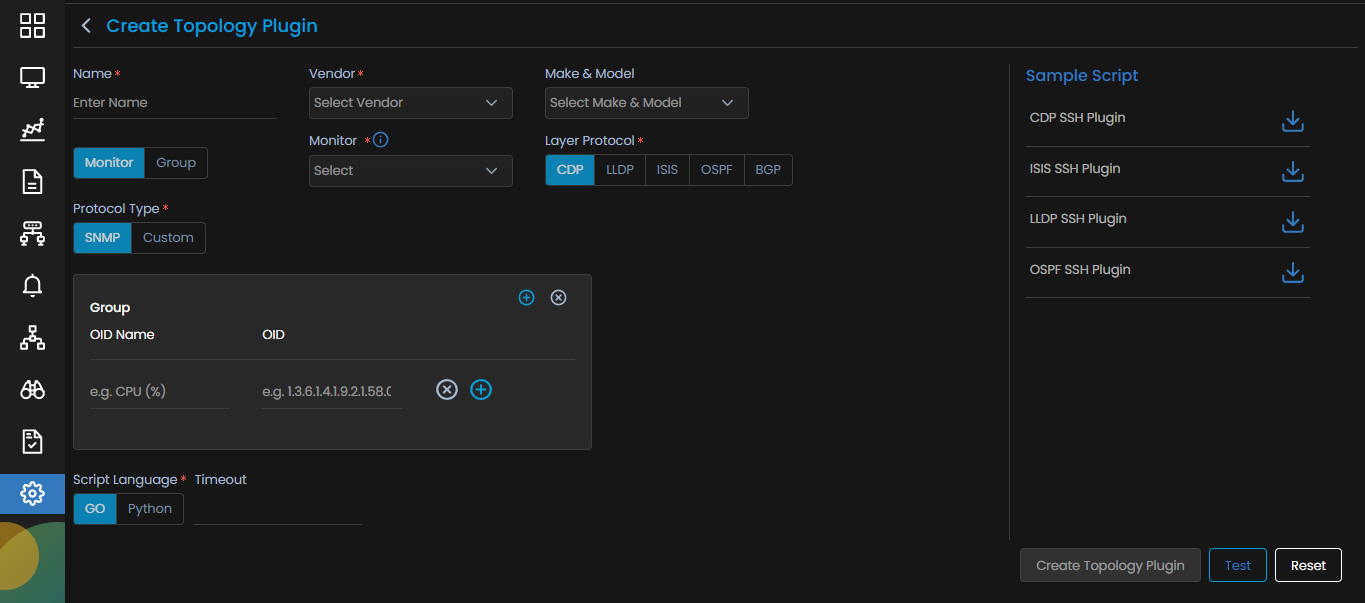
The following parameters appear on the Create Topology Plugin screen:
| Name | Enter a unique name of the topology plugin you wish to create. |
| Vendor | Select the vendor for which you are creating the plugin. |
| Make and Model | Select the Make and Model of the monitor for which you are creating the plugin. |
| Monitor/Group |
Select Monitor or Group based on your requirement.
|
| Layer Protocol |
Select the layer protocol out of the following:
|
| Protocol Type |
Select the type of discovery protocol from the following:
|
| Script Language | Select the language (GO or Python) in which you will write your script |
| Timeout | |
| Parser Script | Enter the script to parse the OID details. |
| Add Variable | Add a variable, if needed to be used in the script. |