Motadata Docs

Problem Form

The layout of the problem management has all the fields required to manage the problems of an organization. However, to meet the organization’s needs, you can modify the default template and add new fields. The fields can later be used in the automation settings also.

To view the Problem Form, navigate to Admin > Problem Management > Problem Form and the below page appears.

Problem Form
Problem Form

The page displays two types of fields:

  • Default Fields: These are the primary fields that come with the fresh installation. The field names can neither be changed nor deleted.
  • Custom Fields: These are the additional fields added from the pallet. The fields can be renamed and deleted.

Here, you can customize the form using the below options:

  1. Field Pallet: You can drag and drop the fields from the pallet to add into the form.
  2. Re-Order: You can drag and drop the fields to change the order of the form. This option is available for both: default and custom fields.
  3. Expand/Collapse: You can expand and collapse the fields to show 1 in a row or 2 in a row. If collapsed, the width of the field will get reduced to half. This option is available for both: default and custom fields.
  4. Duplicate: You can create duplicate fields from the custom fields. This option is available only for custom fields.
  5. Edit: You can edit the fields and make them mandatory, show on problem form, or change their characteristics. For default fields, some of the options are restricted.
  6. Remove: You can delete the custom fields and not the default ones.

Example Scenario: For example, every problem in an organization requires a follow-up date. This is the date by which a technician has to close the problem.

DateTime

To add the Datetime custom field, drag and drop it on the form in the right-hand side, and a popup appears.

Adding Custom Fields in the Problem Form

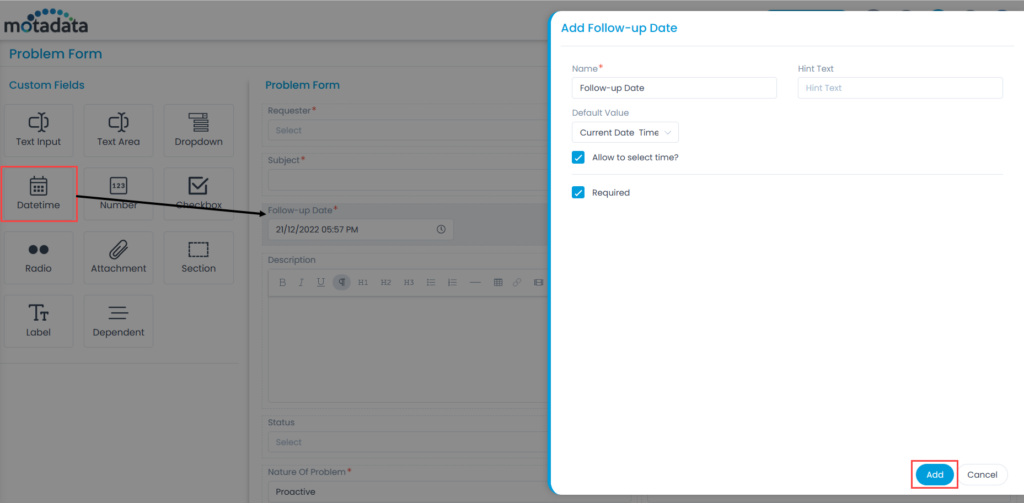
Enter the following details:

  • Name: Enter the name of the field.
  • Hint Text: Enter the text to appear by default. It appears in grey color.
  • Default Value: Select the default value of the field. The options are: Current Date and Custom.
  • Allow to Select Time?: Enable to allow the user to select time along with the date.
  • Required: Enable to make the field mandatory.

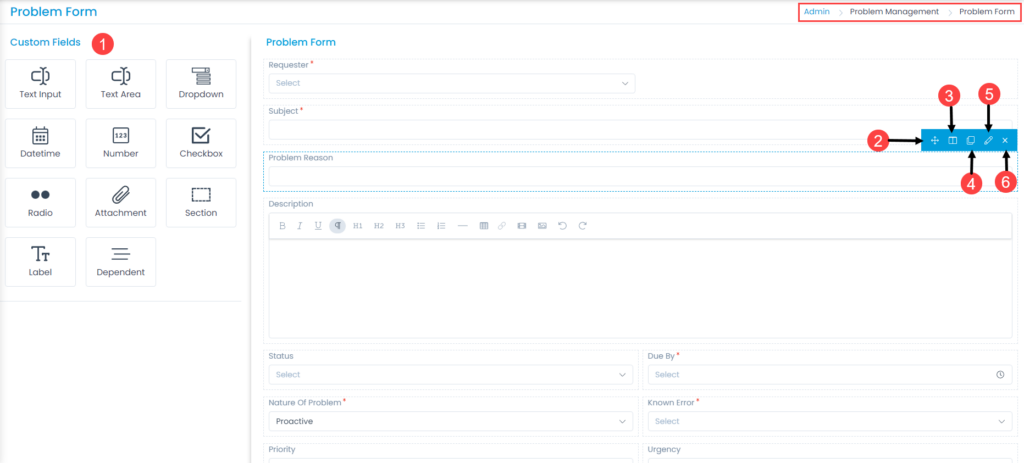
Once done, click Add. You can then re-arrange its location, create a duplicate field, expand/collapse its width, edit, or delete it if required. Similarly, you can add other custom fields. For more details, refer to the link Request Form.

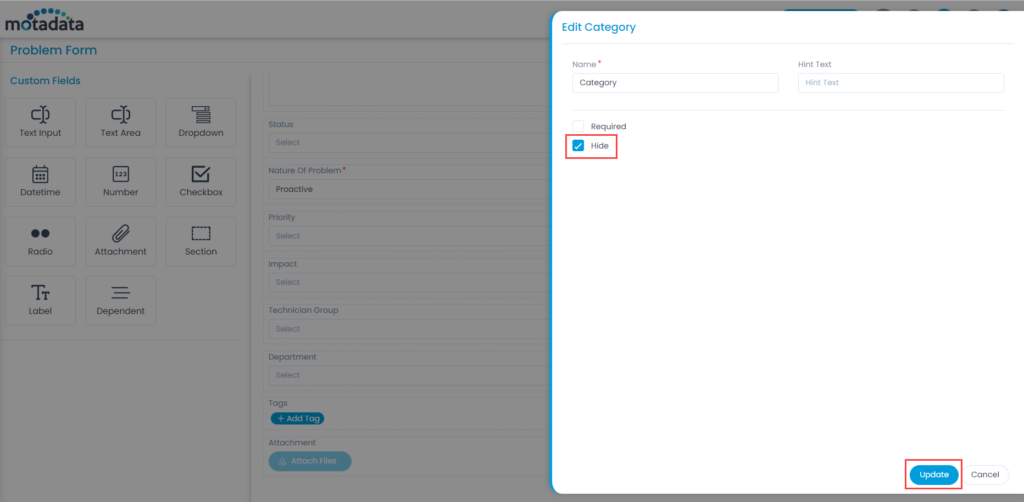
System Fields like Location, Category, and Department can be hidden, by enabling the Hide option as shown below. Once enabled, the field will not be available at the time of problem creation.

Hiding System Fields

On this Page