Motadata Docs

Decline Patches

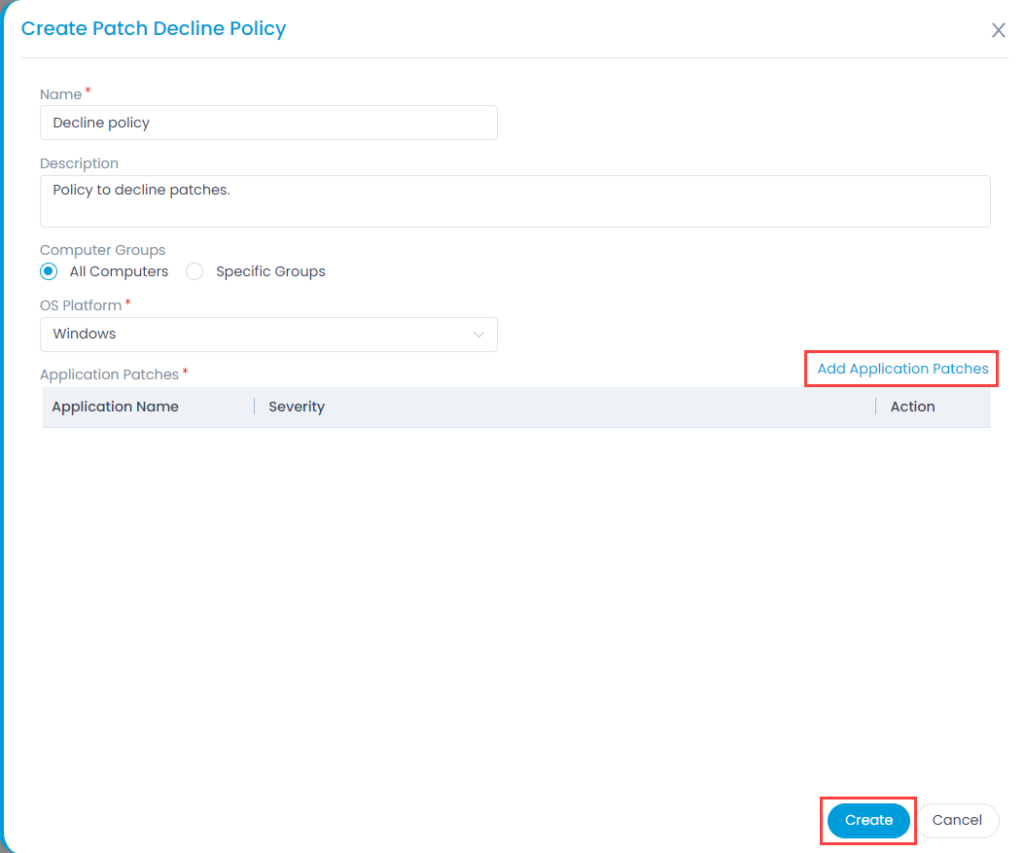
Decline Patch Configuration allows you to automate the process to ignore Patches for a specific set of Computers which is different from manual ignoring.

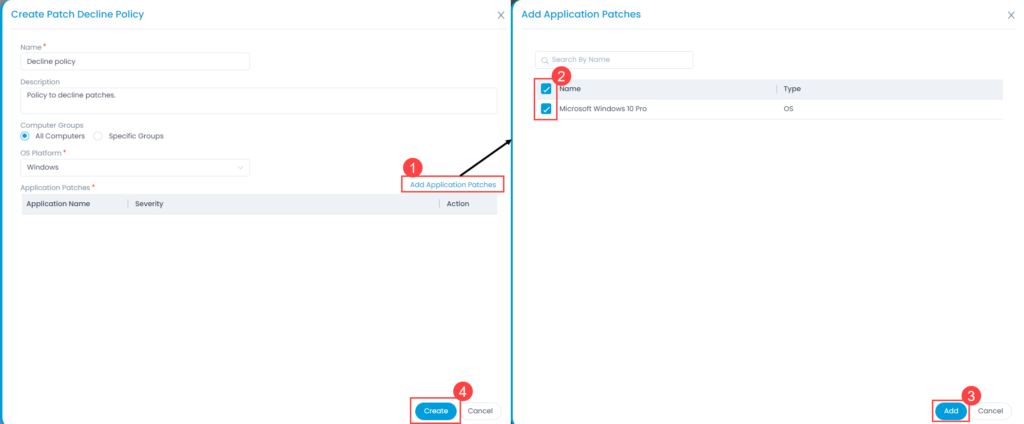
A decline configuration jumps into action whenever a Computer demands a Patch. It checks whether the Patch is a part of any DC and updates the Patch database accordingly. Patches ignored automatically are also added to the global ignored list, but you can drill down to the specific Computers where they have been ignored using the UI features.

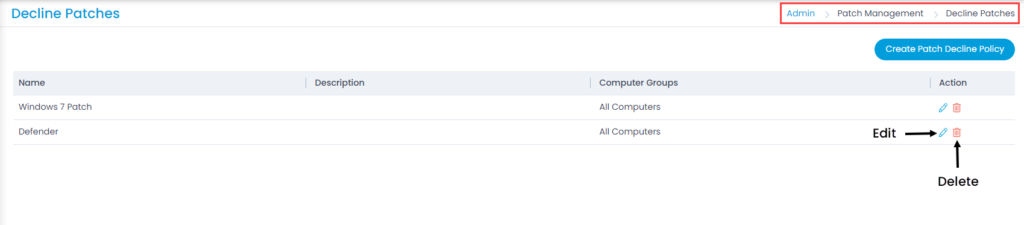
To view the Decline Patches page, navigate to Admin > Patch Management > Decline Patches.

Decline Patches page

Here, you can view, create, edit, and delete the patch decline policy.

Create a Patch Decline Policy

To create a patch decline policy, follow the below steps:

  1. Click the Create Patch Decline Policy button and a popup appears.
Create Patch Decline Policy
  1. Enter the below details:
    • Name: Enter the name of the policy.
    • Description: Enter a short description about the decline policy.
    • Computer Groups: Select the groups of computers on which the policy should be applicable. the options are:
      • All Computers: Select if you want to decline the policy for all the computers.
      • Specific Groups: Select if you want to decline the policy for some specific groups of computers only. If selected, select the desired Computer Groups from the dropdown.
    • OS Platform: Select the OS platform on which the policy is to be applied. The options are: Windows, Linux Ubuntu, Linux Mint, Linux CentOS, Linux Redhat, Linux Opensuse, Linux Debian, and Linux Oracle.
    • Application Patches: Select the application patches on which the policy will be applicable. To add patches, click the Add Application Patches link and a popup appears as shown below. Select the required patches and click Add.
Add Application Patches
  1. Once done, click Create and the decline policy gets created.