The page displays two types of fields:
- Default Fields: These are the primary fields that come with the fresh installation. The field names can neither be changed nor deleted.
- Custom Fields: These are the additional fields added from the pallet. The fields can be renamed and deleted.
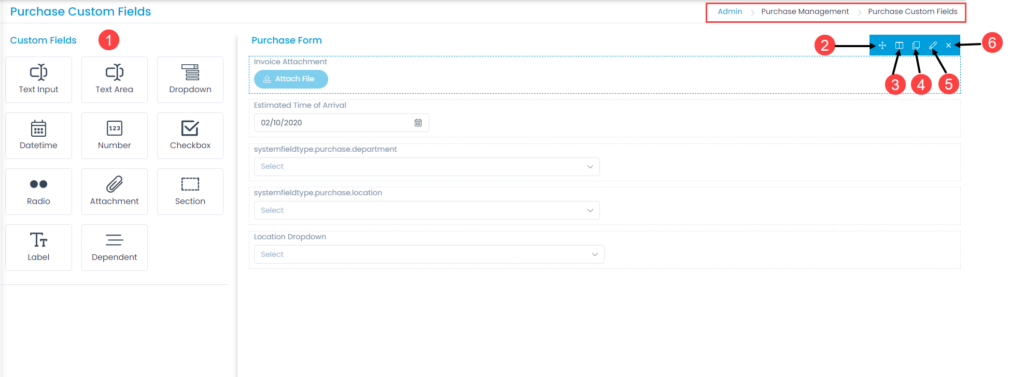
Here, you can customize the form using the below options:
- Field Pallet: You can drag and drop the fields from the pallet to add into the form.
- Re-Order: You can drag and drop the fields to change the order of the form.
- Expand/Collapse: You can expand and collapse the fields to show 1 in a row or 2 in a row. If collapsed, the width of the field will get reduced to half.
- Duplicate: You can create duplicate fields from the custom fields.
- Edit: You can edit the fields, make them mandatory, or change their characteristics.
- Remove: You can delete the custom fields.
Example Scenario: For example, every purchase in an organization requires a version for newer purchase follow-up date. This is the version by which a purchase Manager and other Teams can identify the purchased updated version of the upcoming purchase.
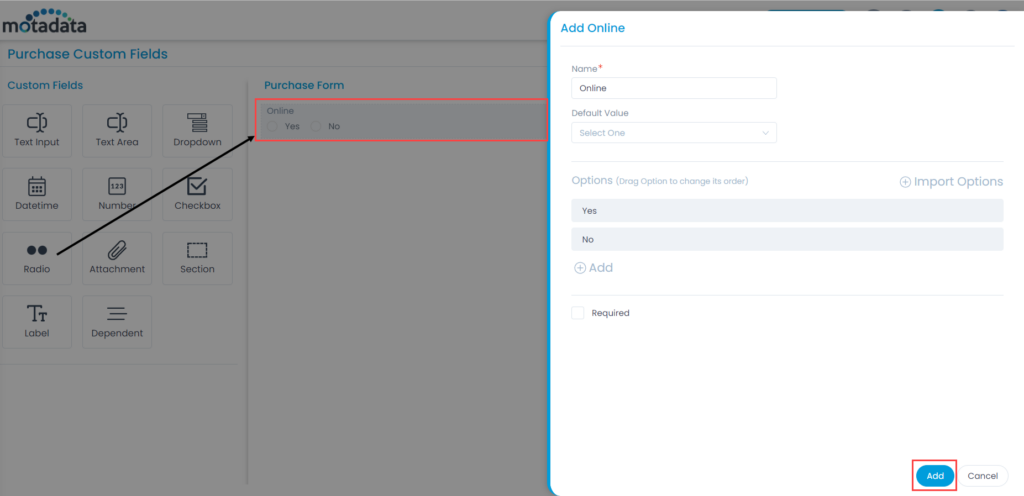
Radio
To add the Radio custom field, drag and drop it on the form in the right-hand side, and a popup appears.