Motadata Docs

Patch Settings

Here, you will be able to make various configurations related to Patch. Patch Settings comes within the domain of Endpoint System Management. It is the process of the acquiring, testing, and deploying patches across the administered IT Assets (generally workstations and servers) in a systematic way. It also includes the administrative decision of deciding which patches are appropriate for deployment and documenting procedures like required configurations.

To view the Patch Settings page, navigate to Admin > Patch Management > Patch Settings.

Patch Settings Page
Patch Settings Page

Update Patch Database

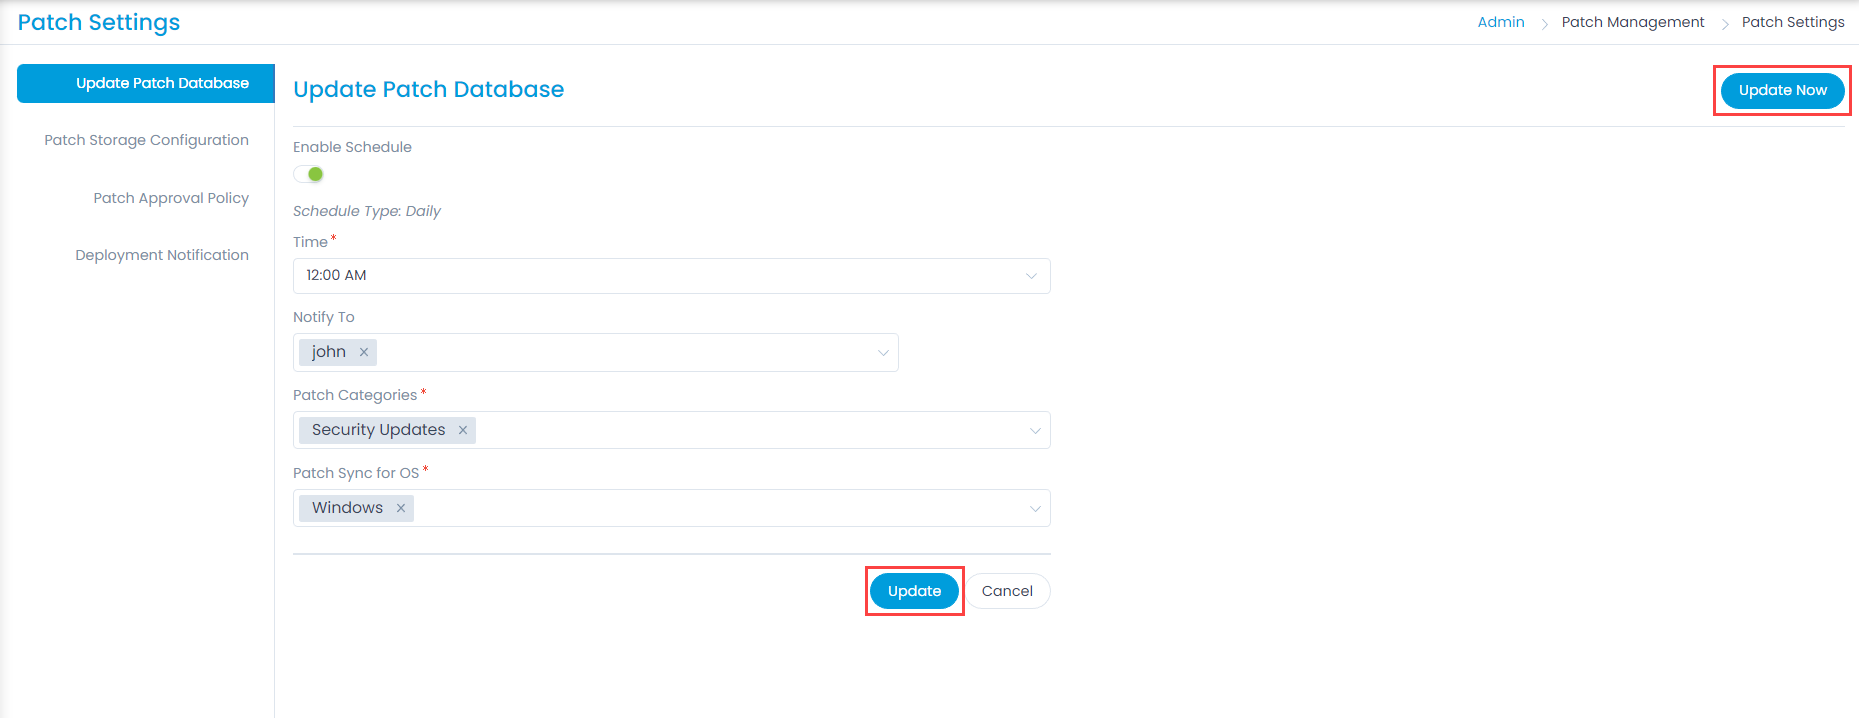
This tab allows you to synchronize the local patch database with the central patch repository. You can update the patch database either manually or based on a schedule. It also displays the date and time when the patch was last updated at the top-right corner of the page.

Update Patch Database

You can update the patch database manually using the Update Now button. Once clicked, a message “Process is running” appears. Once completed, a confirmation message is displayed.

Enable Schedule to update the patch database at a particular time. The following parameters appear.

Parameter Description
Schedule Type The schedule runs on a daily basis.
Time Select the time at which the schedule should run and start the update process. It is a mandatory field.
Notify To Select the technicians to whom an email notification should be sent once the update process is completed.
Patch Categories Select the categories to which a patch belongs. Multiple patch categories can be selected. It is a mandatory field.
Patch Sync for OS Select the OS for which the patch is to be synchronized. The OS supported are:

  • Mac (Supported for Mac OS version 10 and above)
  • Windows
  • Linux Ubuntu
  • Linux Mint
  • Linux Centos
  • Linux Redhat
  • Linux Opensuse
  • Linux Debian
  • Linux Oracle

Click Update and the process begins. Once completed a confirmation message is displayed.

Note: At a time you can run only one instance of the update patch database process.

RedHat Patch Management Configuration

Prerequisites

  • At least one machine must have Internet connection and license subscription should be activated in all the machines.
  • ServiceOps supports RedHat Linux Servers V7 and V8 only.

Configuration

  1. Add device in Endpoint Scope which would act as an agent in Settings > Patch Management > Endpoints Scope.
  2. Under Settings > Patch Management > Agent Nomination, add the device which will be connected to the Internet. This device now acts as an agent.
Agent Nomination
Agent Nomination
  1. While operating systems like Windows and other Linux OSs communicate with Central Repository, the agent installed downloads the data from the RedHat Repository and pushes it into the ServiceOps Patch server deployed on the client site.
  2. When the Repository finishes its sync process, the status gets changed to ‘Success’.

Patch Storage Configuration

The current architecture allows a file server to act as a central storage for the deployment of patches. A file server is the backbone of the desktop automation features, which is why it becomes important for an admin to make sure there is sufficient space in the file server. The Patch Storage Configuration performs two functions:

  • Clean the file server.
  • Generate a notification when the file server reaches a certain storage limit.
Patch Storage Configuration

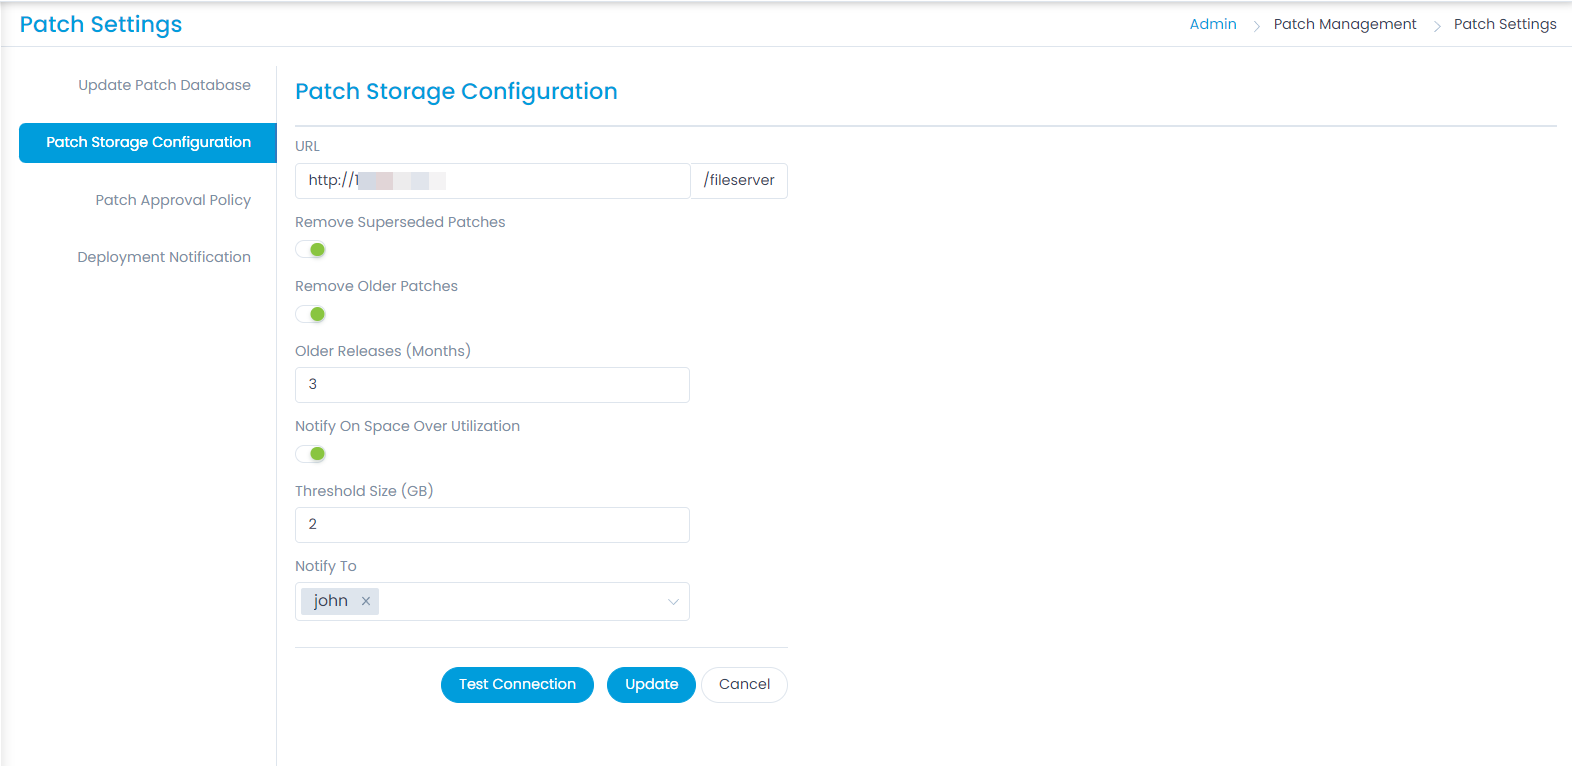
Here, you can perform three functions. The URL of the file server is auto-filled as per the configuration settings of the ServiceOps policy.

  1. Remove Superseded Patches: If a vendor releases a patch that replaces an earlier patch, the new patch is called a superseding patch. Enabling this option allows you to delete the replaced patches over earlier patch. By default, disabled.
  2. Remove Older Patches: Enabling this option allows you to delete patches older than a specified number of months considering only the release date of a patch. If enabled, set the number of months in the Older Releases (Months) field. By default, disabled.
  3. Notify on Space Over Utilization: Enabling this option allows you to set the system to generate a notification when the storage in the file server reaches a certain limit. By default, disabled. If enabled specify the following parameters:

    Threshold Size(GB): Specify the storage limit in terms of GB.

    Notify To: Select the recipients to whom the notification is to be sent. Multiple recipients can be selected. The recipient can be a Requester Group, All Requester Groups, and individual emails.

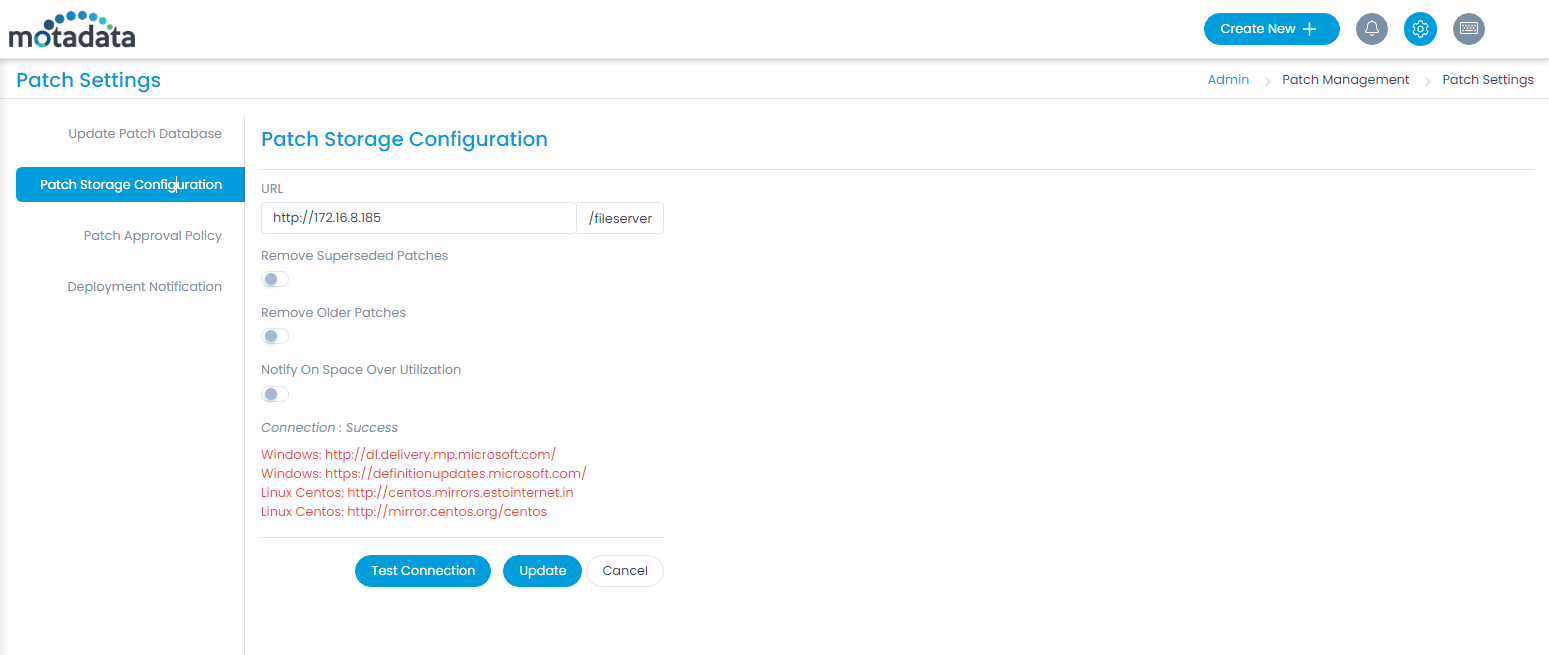
  4. When you are done with the above settings click Update to save the changes. Also, at the end you can check your connection with the file server by clicking on the Test Connection button, and here the inaccessible URLs will get listed as shown below:
Test Connection
Test Connection

Patch Approval Policy

This tab enables you to set the approval policy for patch deployment.

Patch Approval Policy
  1. Pre-Approved: As the name suggests, all the incoming patches (both new and missing) are Pre-Approved by default. A user can manually change the Approval status of a patch to Reject or Approved. The Automatic Patch Test fails to function with this selection. This selection comes into effect for incoming future patches, while it remains ineffective on the already existing patches in the product.
  2. Manually Approve: All new incoming patches have the Approval status Not Approved by default. A user has to change the status manually to either Approved or Reject.
  3. Test and Approve: All new incoming patches have the status Not Approved by default. You can manually set the status. Also, you can create a Test Task. Once enabled, select the Time when the patch is to be tested and approved. A Test Task, also known as Automatic Patch Test, deploys a selected set of patches to a specific set of computers. If deployment is successful in all the computers, the patches are auto-approved after a set number of days. Test Task only works in this setting.

Select an approval policy type and click Update.

Deployment Notification

The page allows you to configure the notification frequency of the patches. The notification can be set to hourly interval. Click Update once done.

Deployment Notification
Note: For precise information, the system also displays the Next Execution Time after you update the hour interval.