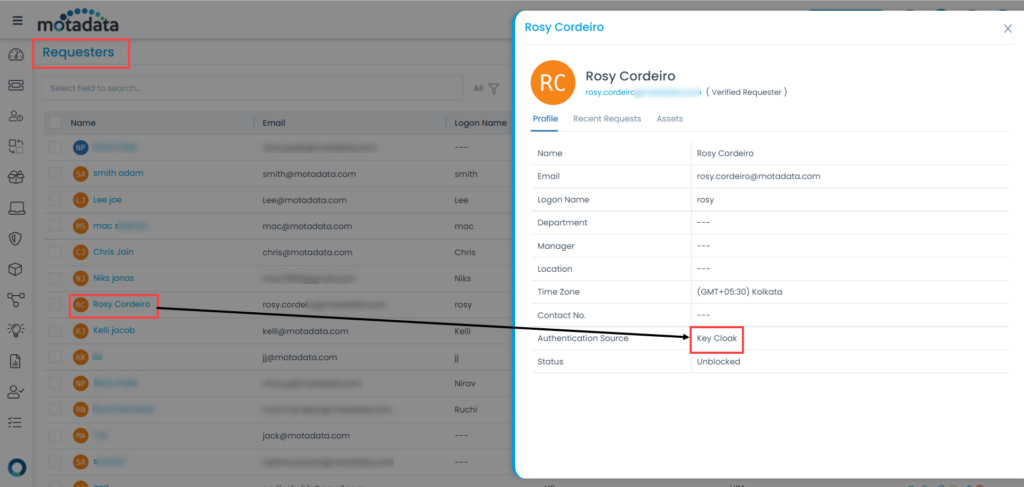
Key Cloak
ServiceOps offers support for SAML 2.0, which facilitates integration for Single Sign-On. ServiceOps acts as the Service Provider (SP) and it integrates with Identity Providers (IdP) using SAML 2.0. The integration basically involves supplying details about SP to IdP and vice-versa. Once you integrate ServiceOps with an IdP, the users simply have to sign-in to IdP and then, they can automatically sign-in to ServiceOps from the respective identity provider’s GUI without having to provide credentials again. ServiceOps supports integration with Key Cloak.
To configure SSO with the Keycloak service, follow the below steps:
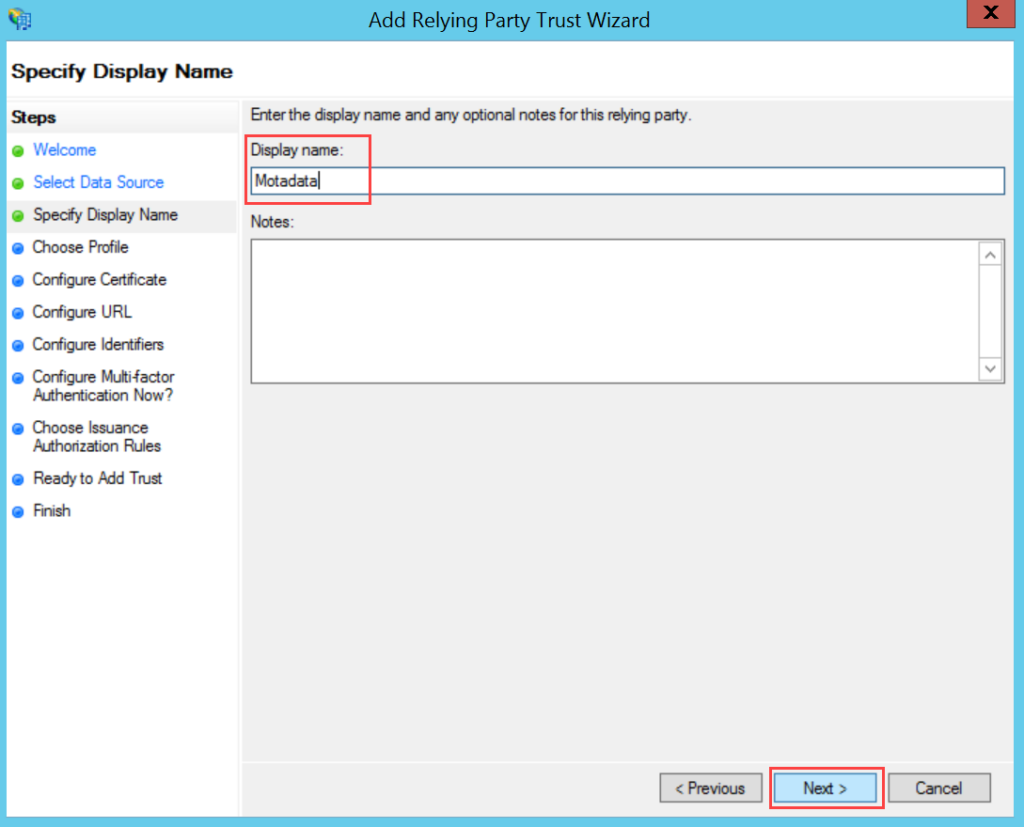
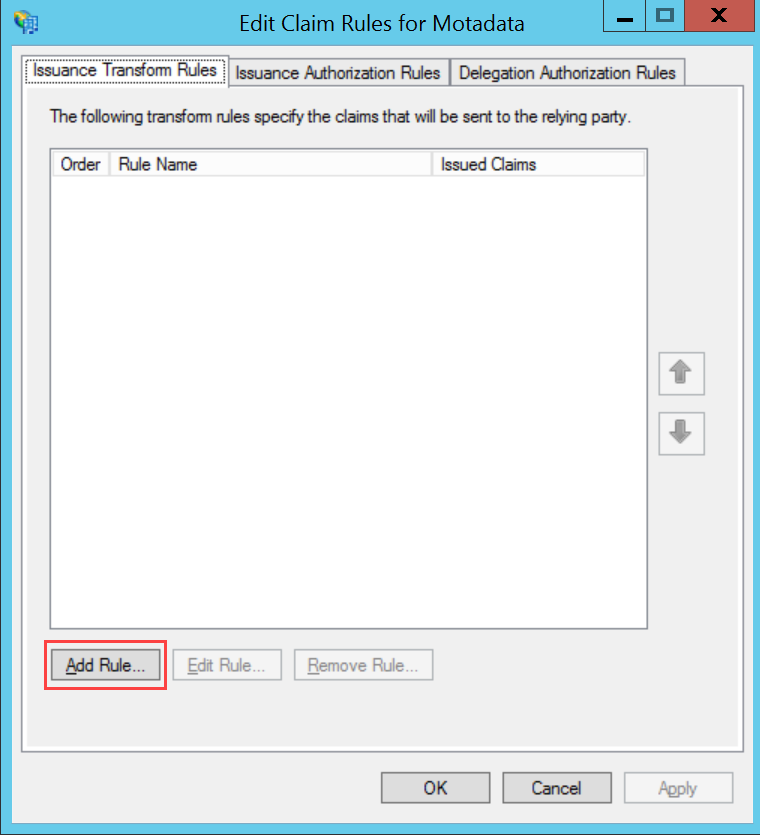
- Sign-in to the ServiceOps portal as a Technician.

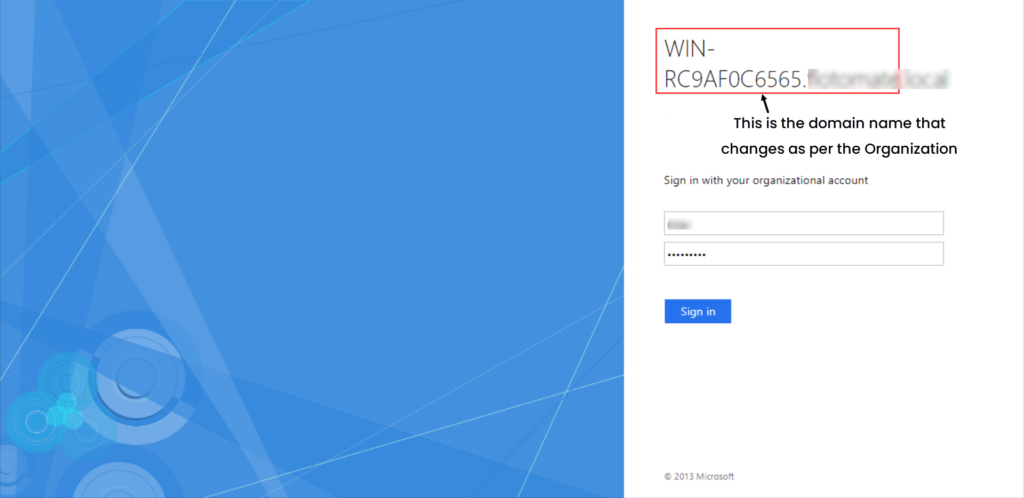
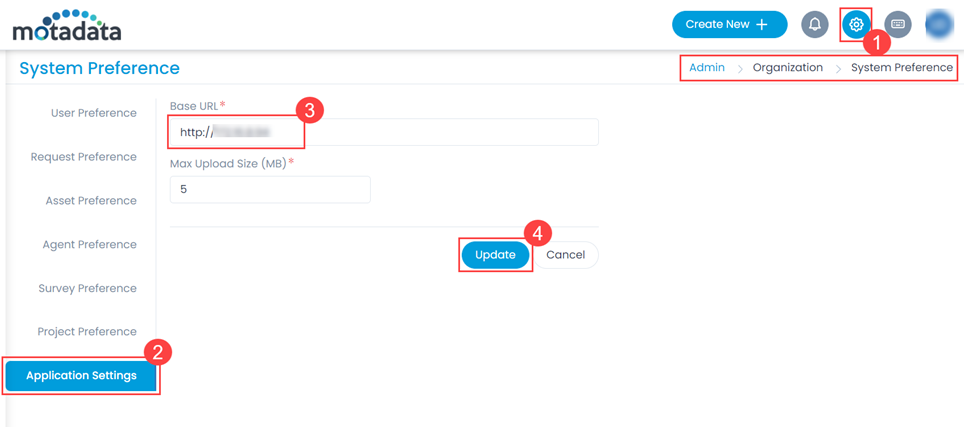
- Navigate to Settings > Admin > Organization > System Preference > Application Settings tab, and the following page appears.Verify that the Base URL (3) is the same as the portal URL. If it has default IP Address, update it, and click Update (4) as shown below.
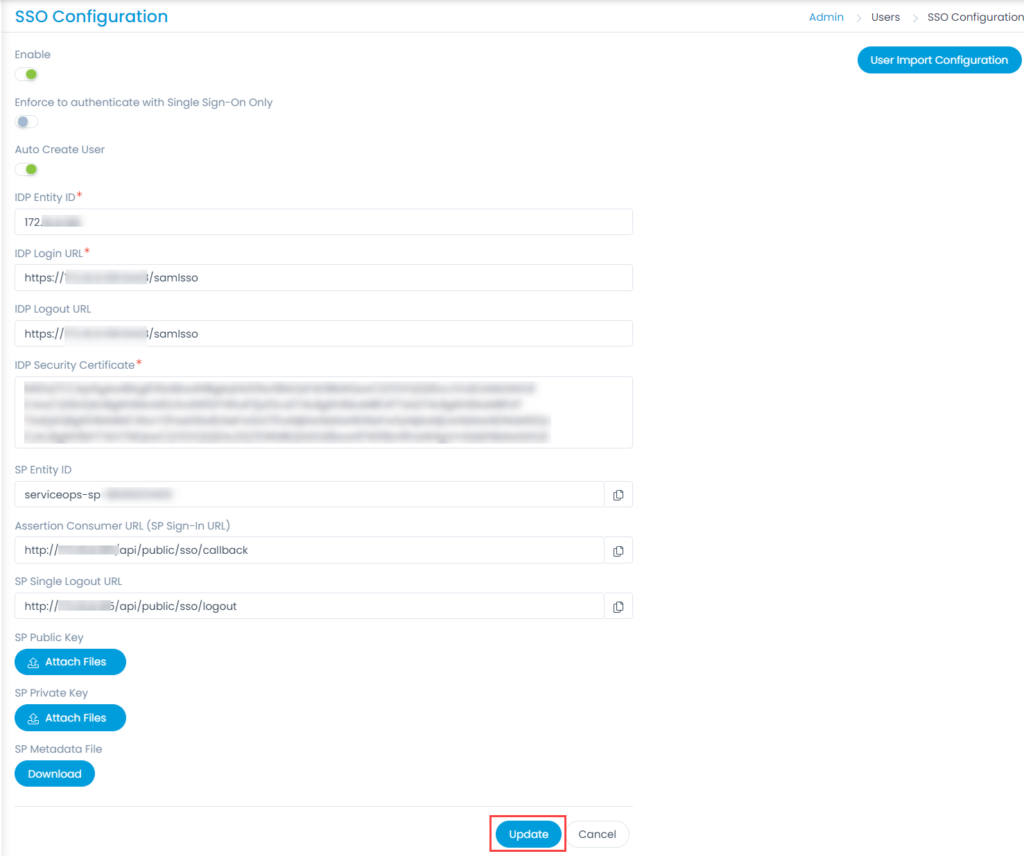
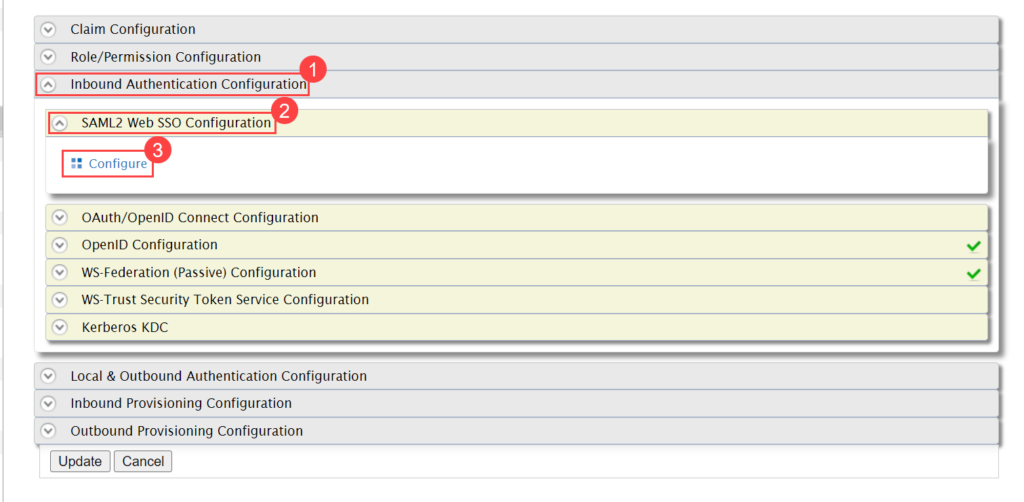
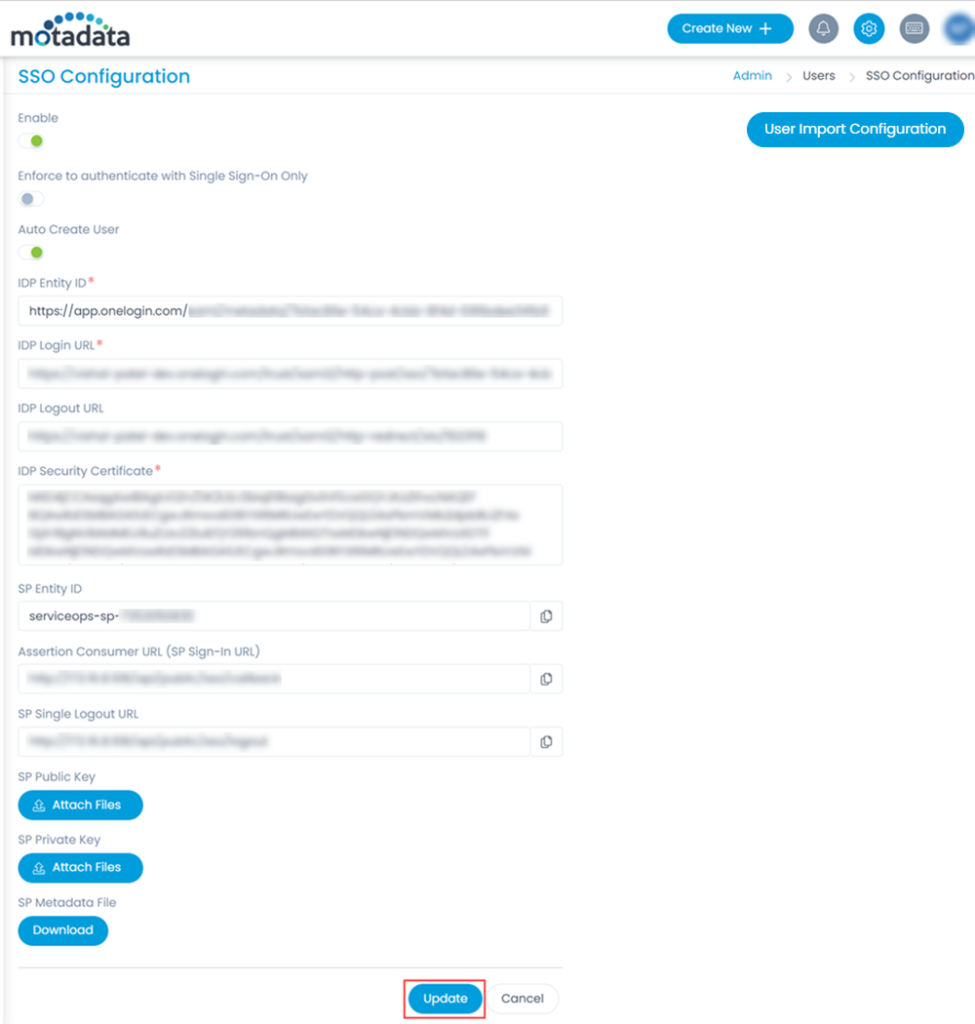
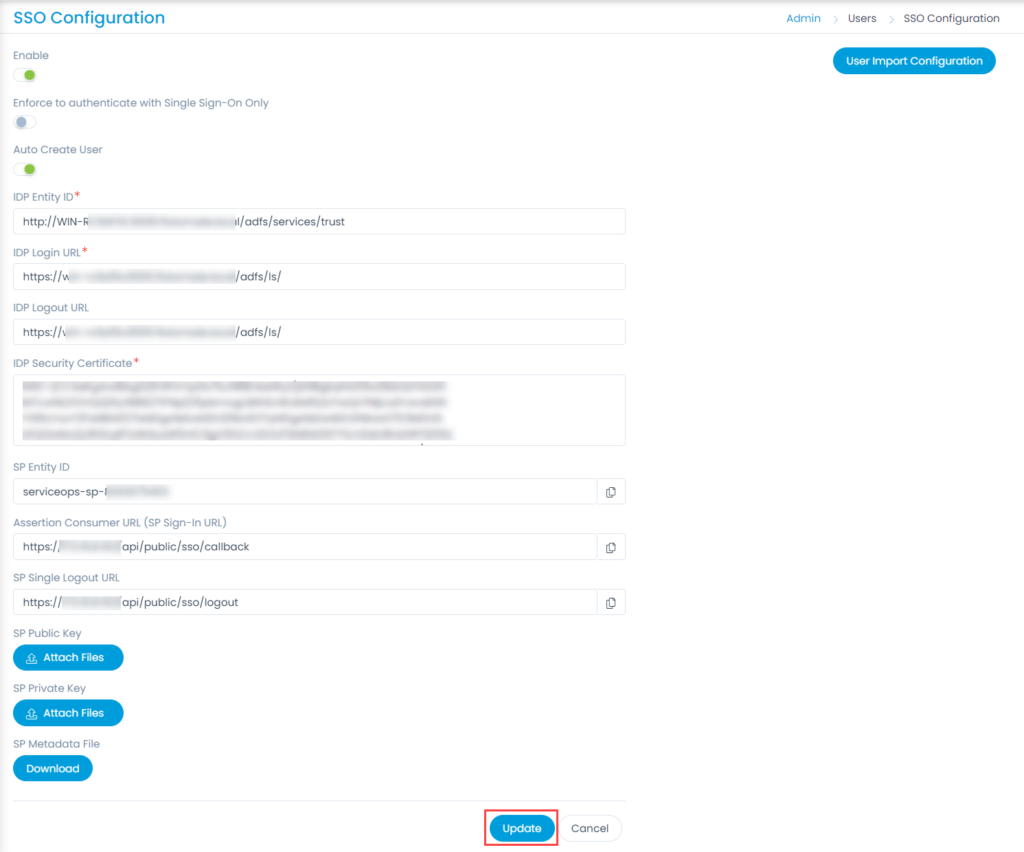
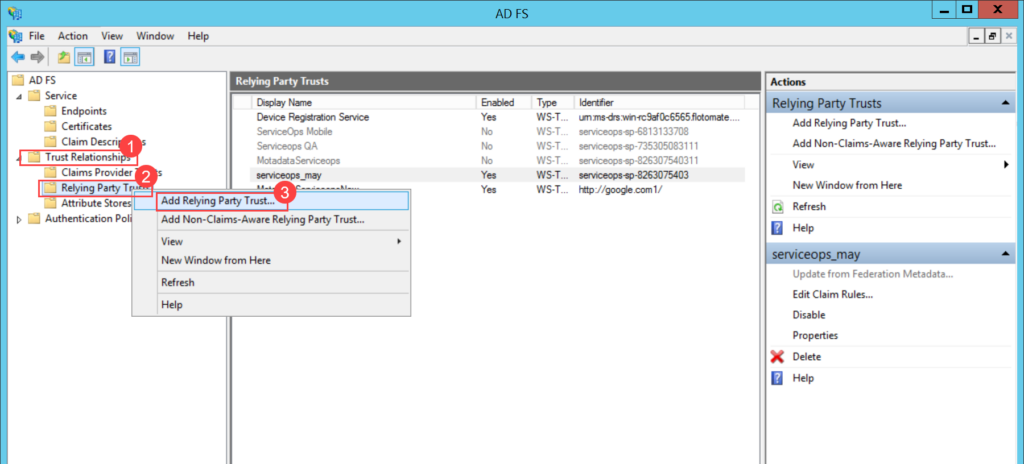
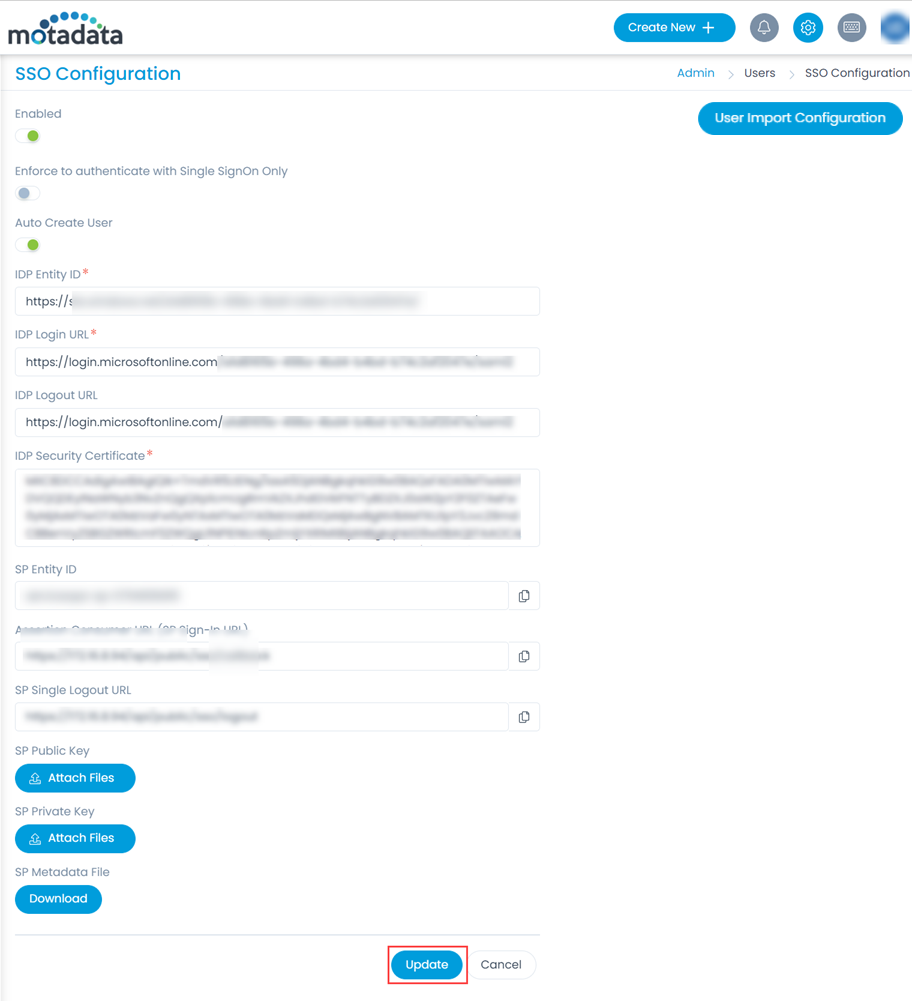
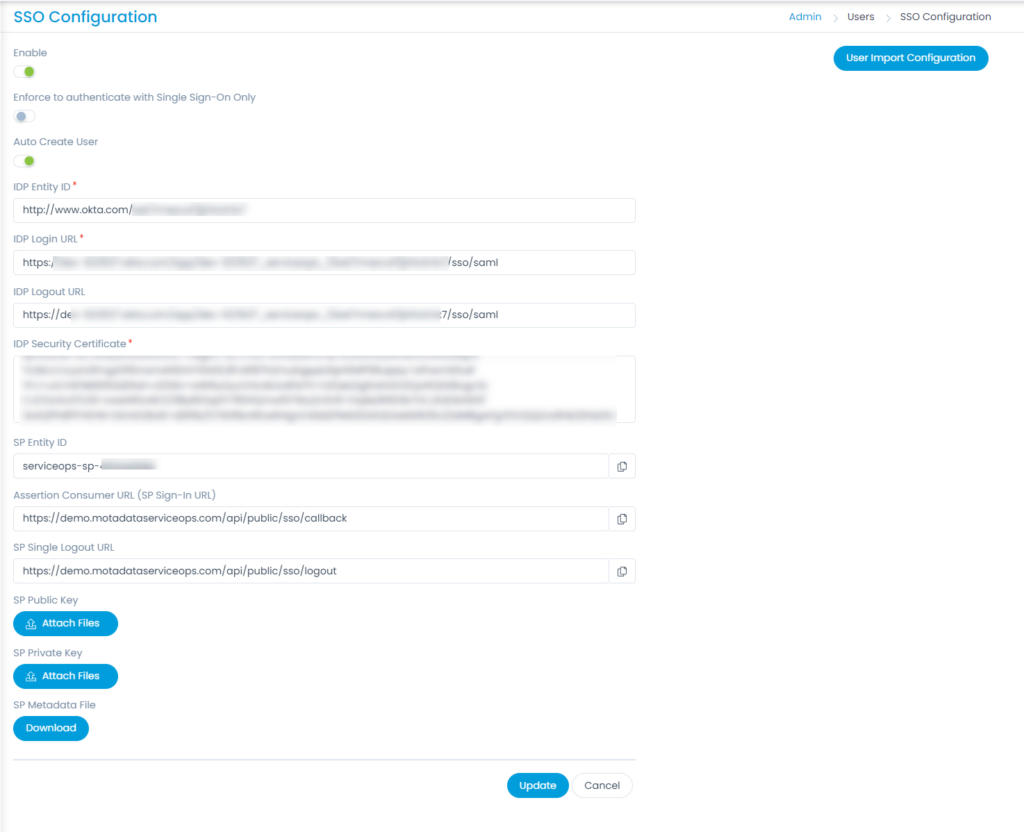
- Navigate to Settings > Admin > Users > SSO Configuration and the below page appears.
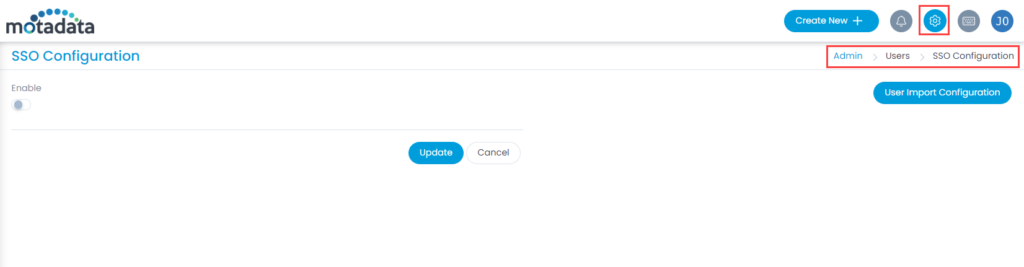
- Enable the SSO functionality, and the following parameters appear. The parameters are available only if the SSO functionality is enabled. By default, it is disabled. In this, the IDP details of Key Cloak are to be configured in the ServiceOps and the ServiceOps SP details in the Key Cloak.
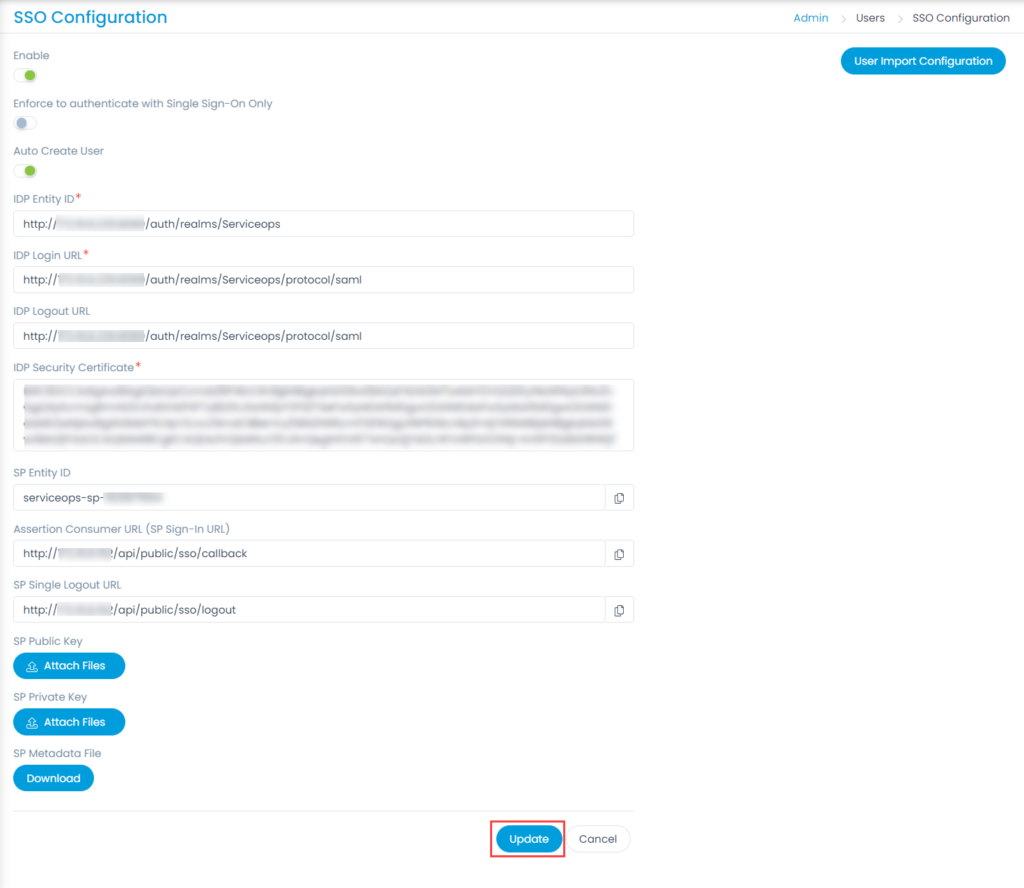
- Provide the following details:
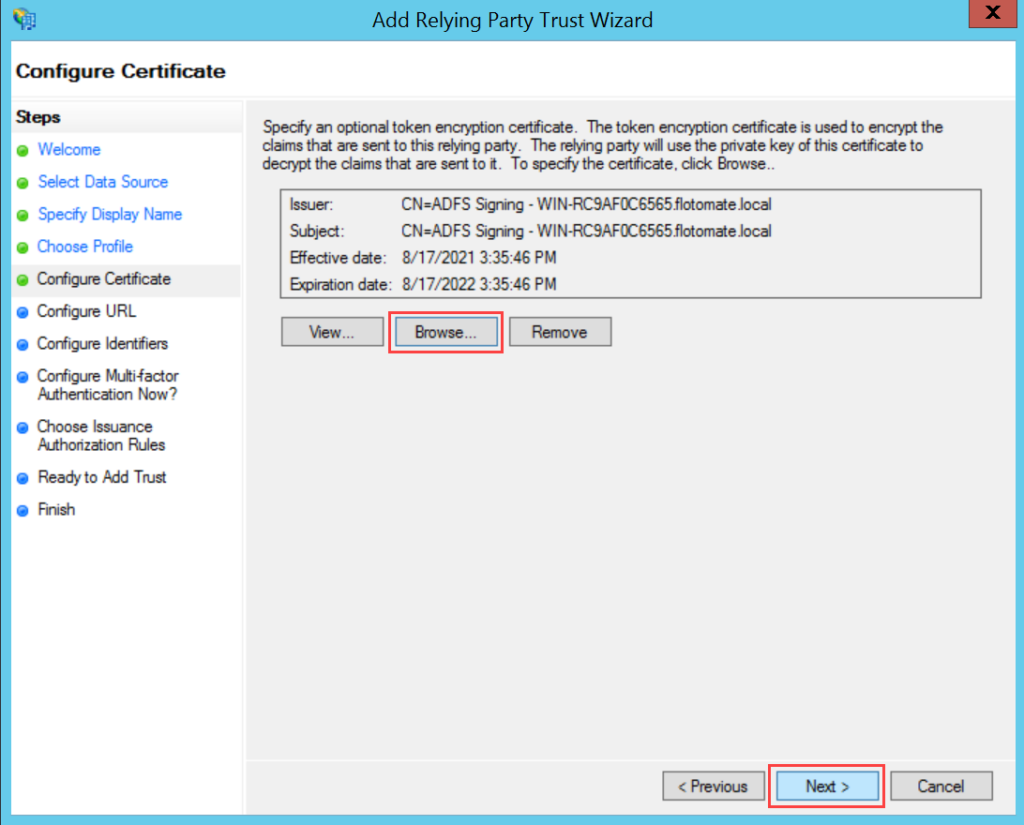
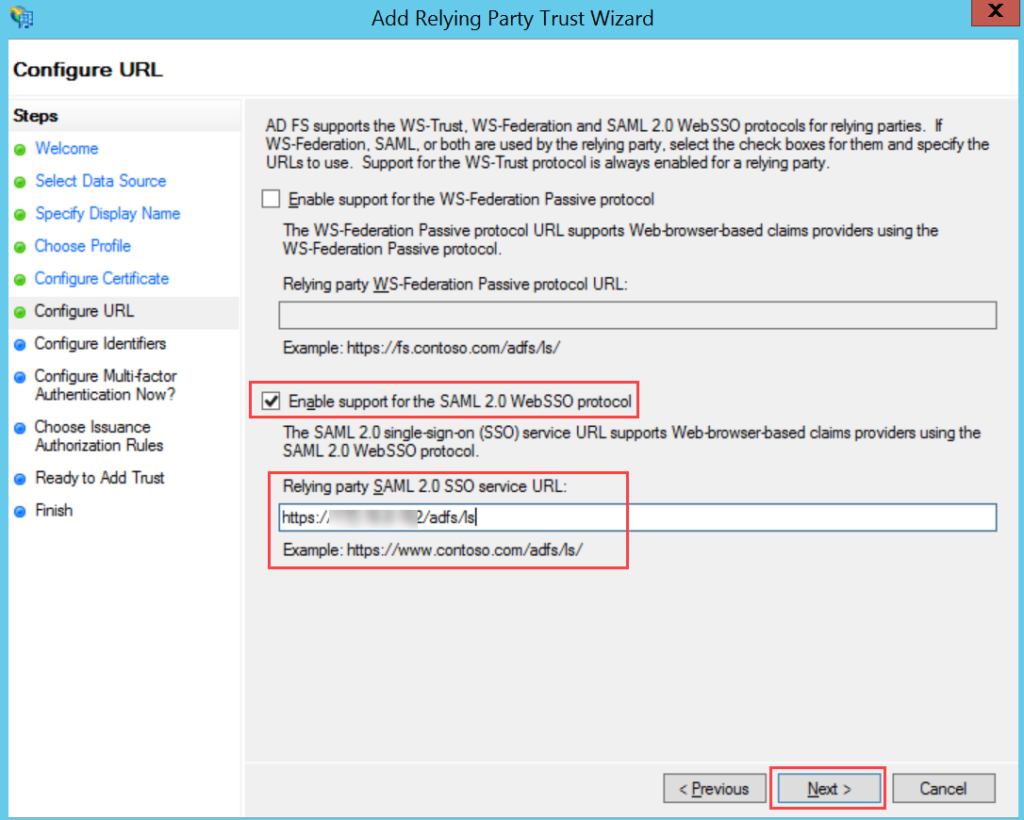
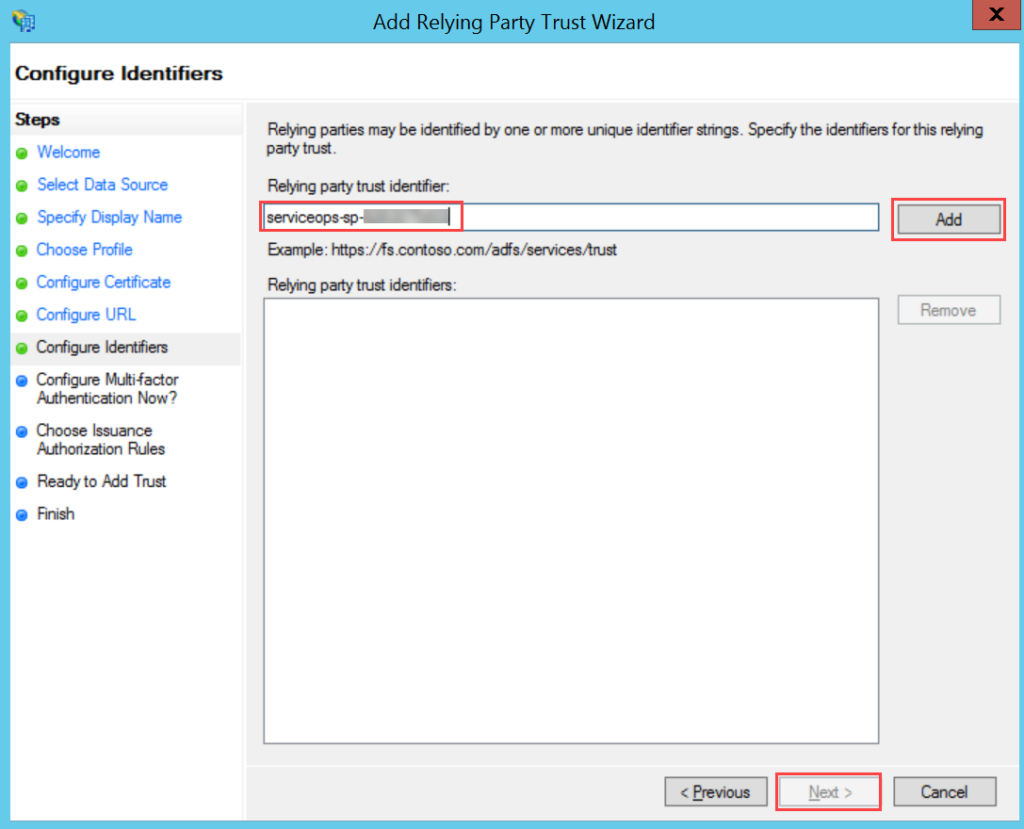
Parameter Description Enforce to authenticate with Single Sign-On only (Refer Note) This parameter indicates that the users created in the system must be authenticated and allowed via SSO Login only. If enabled, the Login button (for local authentication) will be hidden for all the users. Also, the parameter Excluded Technicians will be available for configuration. By default, it is disabled. Note: Once the SSO is enabled, the user can only log in via SSO using valid configurations and credentials.Auto Create User Enable if the user is to be created automatically, if not available in the system. By default, disabled. Excluded Technicians Select the technicians to exclude from using the Single Sign-On functionality. You can select multiple technicians. Also, you can search for the desired technician. Here, chosen technicians having Local Authentication mode will be allowed to use SSO login mechanism. IDP Entity ID Enter the Entity ID of the IDP. It is a mandatory field. IDP Login URL Enter the login URL of the IDP on which the user will get redirected. It is a mandatory field. IDP Logout URL Enter the logout URL of the IDP on which the user will be redirected once signing-out from the ServiceOps portal. If not provided, the user will remain on the same page. This field is optional. IDP Security Certificate Enter the certificate that IDP provides for integration. The response sent by the IDP is validated using it. SP Entity ID It displays the entity ID of the Service Provider. Assertion Consumer URL It displays the endpoint of the ServiceOps application where the IDP posts the SAML responses. SP Single Logout URL It displays the URL to which the user gets redirected after sign-out. SP Public Key It is provided by the Service Provider. SP Private Key It is provided by the Service Provider. SP Metadata File Download the metadata file provided by the Service Provider. It contains all the details about the interaction of the Service Provider and the SAML enabled entity.
Notes:
- Super admin (Tenant registered User) is always allowed to login normally without SSO even if not added in the exclusion list.
- The Login button is always visible whether this option is enabled or not.(If any super admin user wants to update/configure, then one can login and update).
- If this option is enabled, no one can login using “Login” button. Also, an error message “You are not allowed to Login from here. Try login from Single Sign on Login page.” is displayed. (Except Tenant user).
- Click Update, and a confirmation message “SSO Configuration has been updated successfully” will appear.
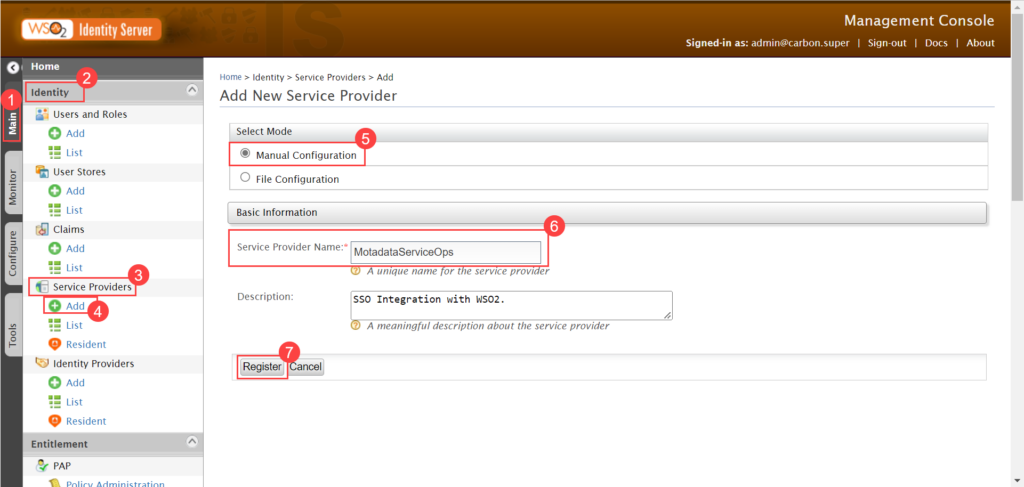
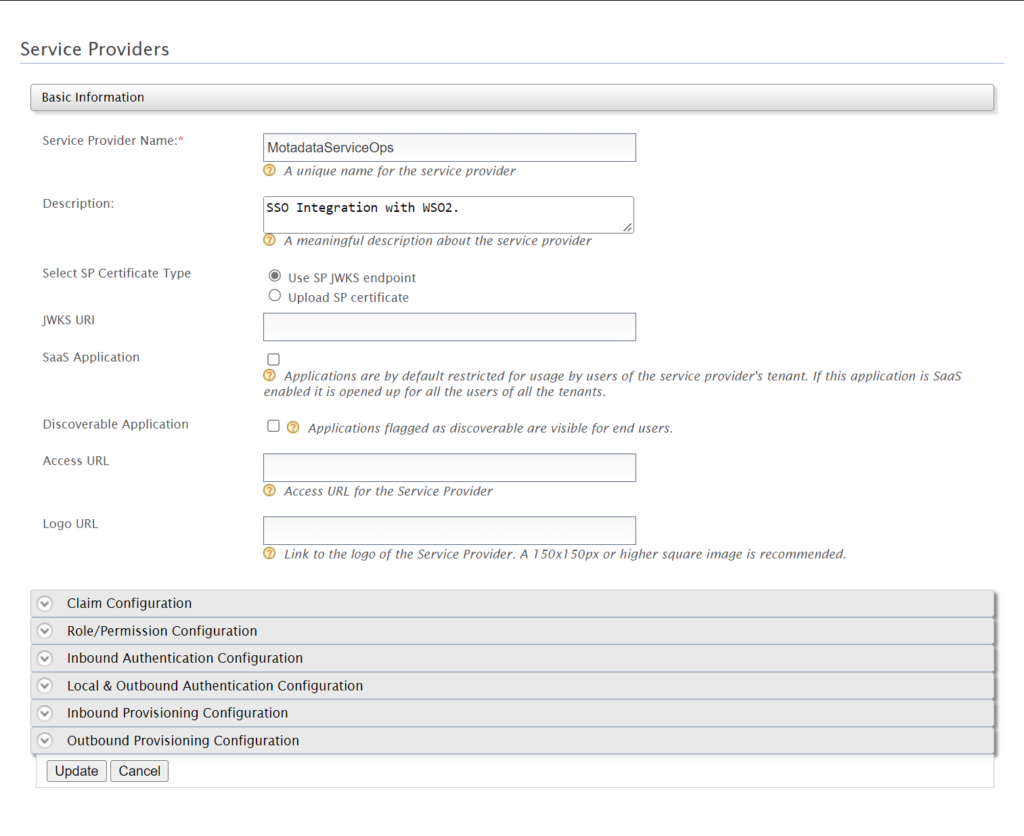
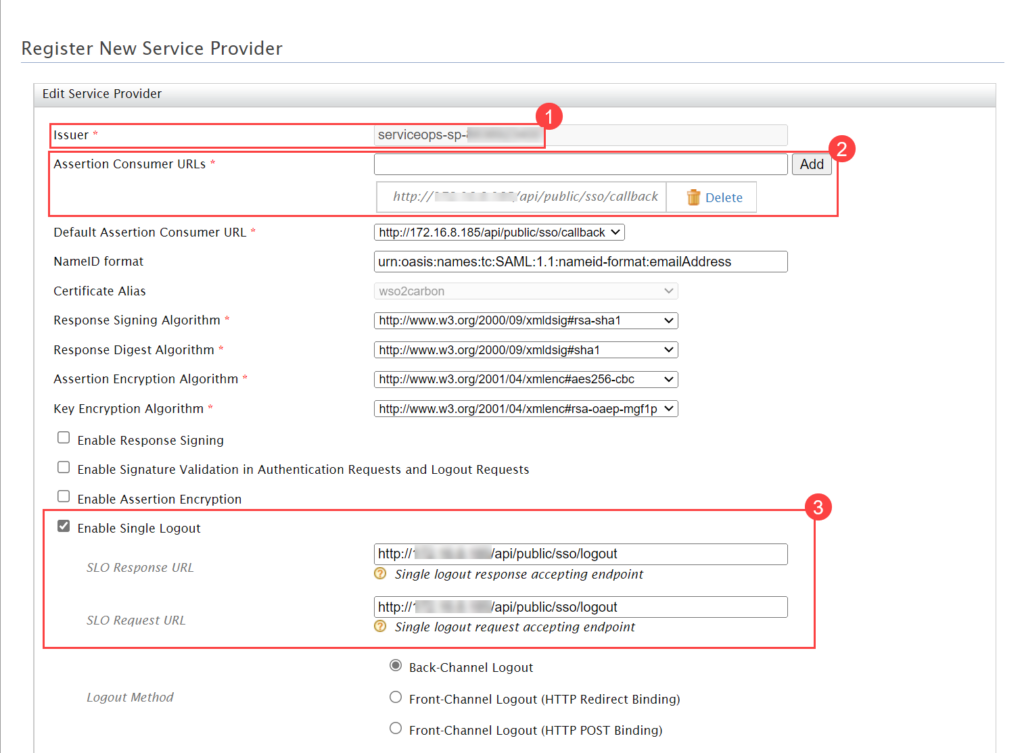
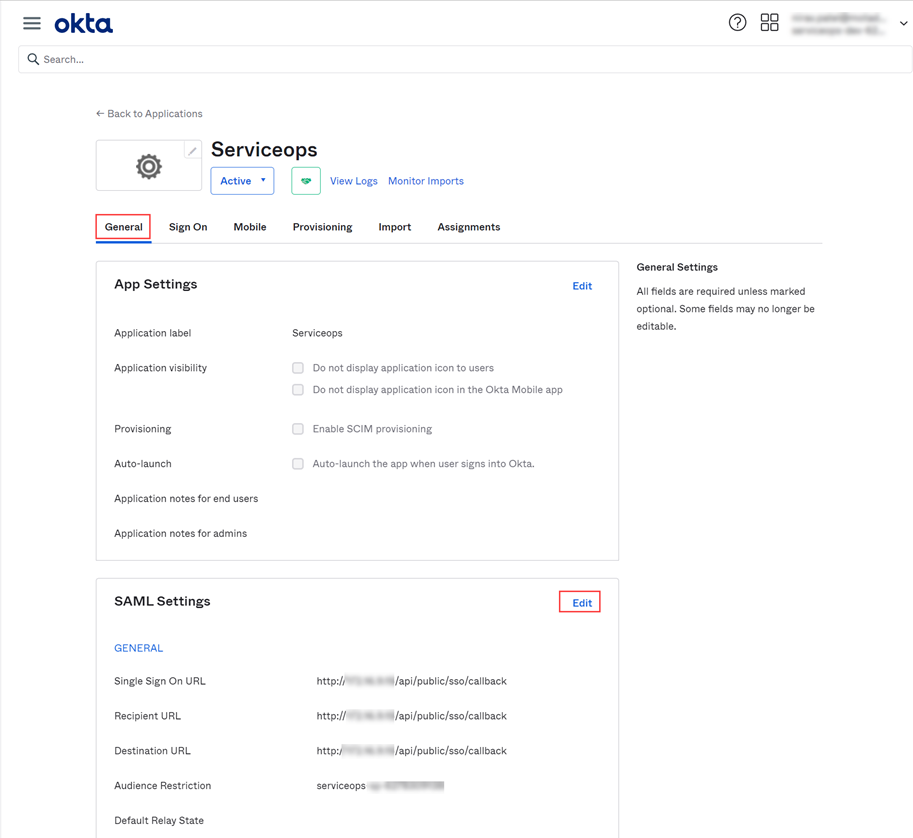
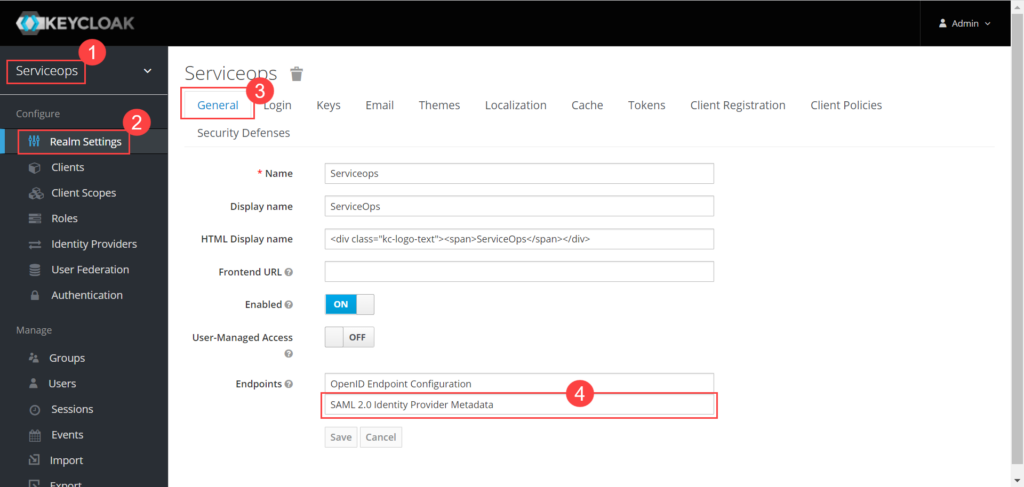
- In Key Cloak, navigate to ServiceOps (Realm) > Realm Settings > General tab, and the below page will appear:
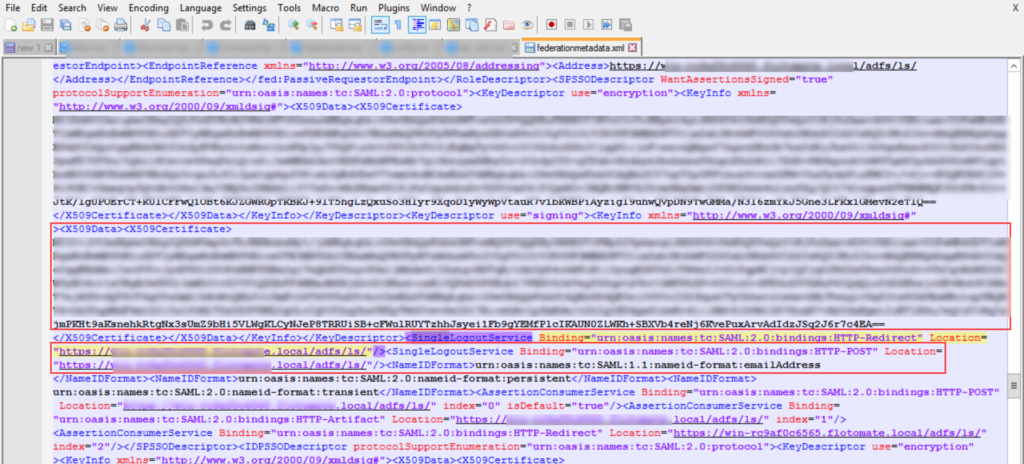
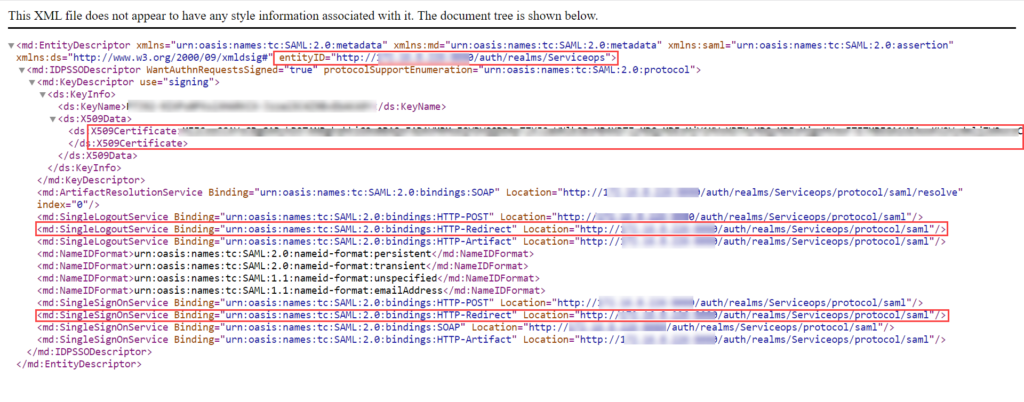
- Click the SAML 2.0 Identity Provider Metadata, and the XML file appears as shown below. Copy the highlighted Entity ID, Login URL, Logout URL, and the Security Certificate from here and paste them into the ServiceOps.
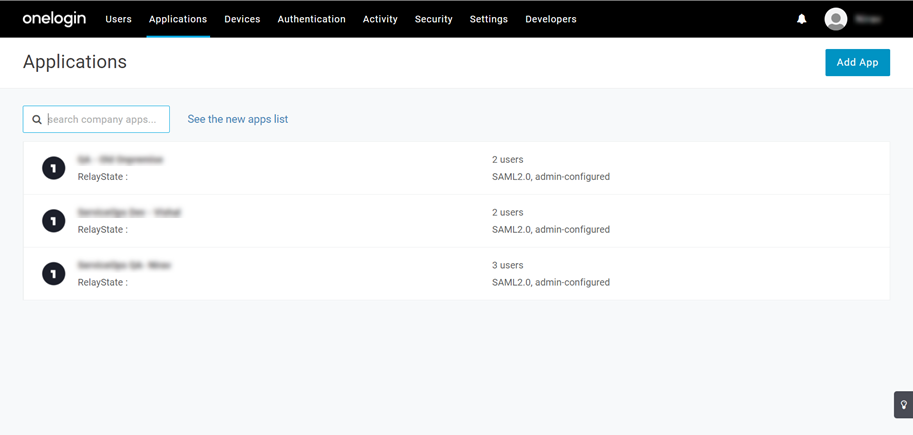
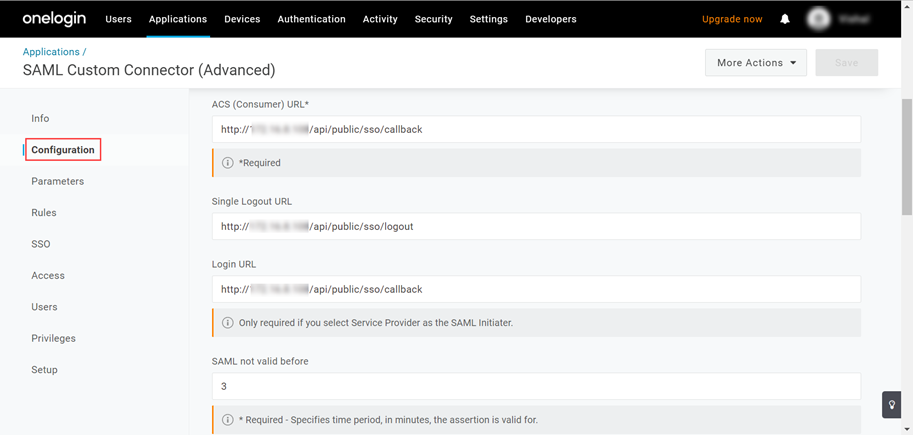
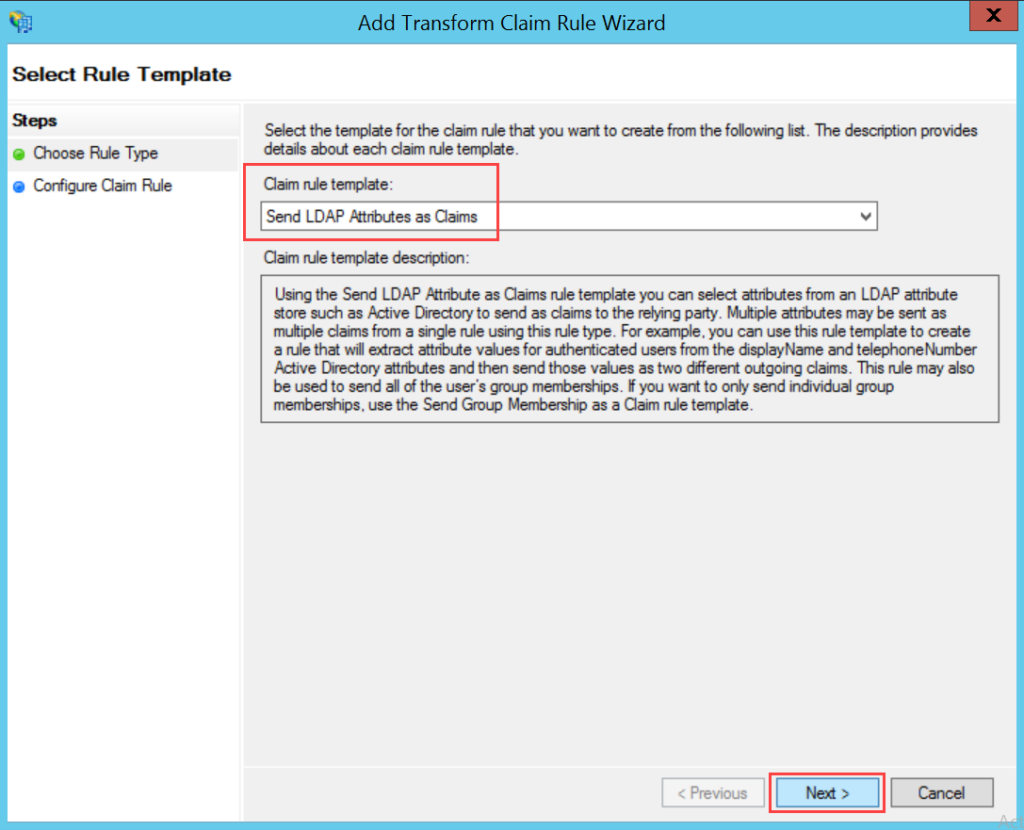
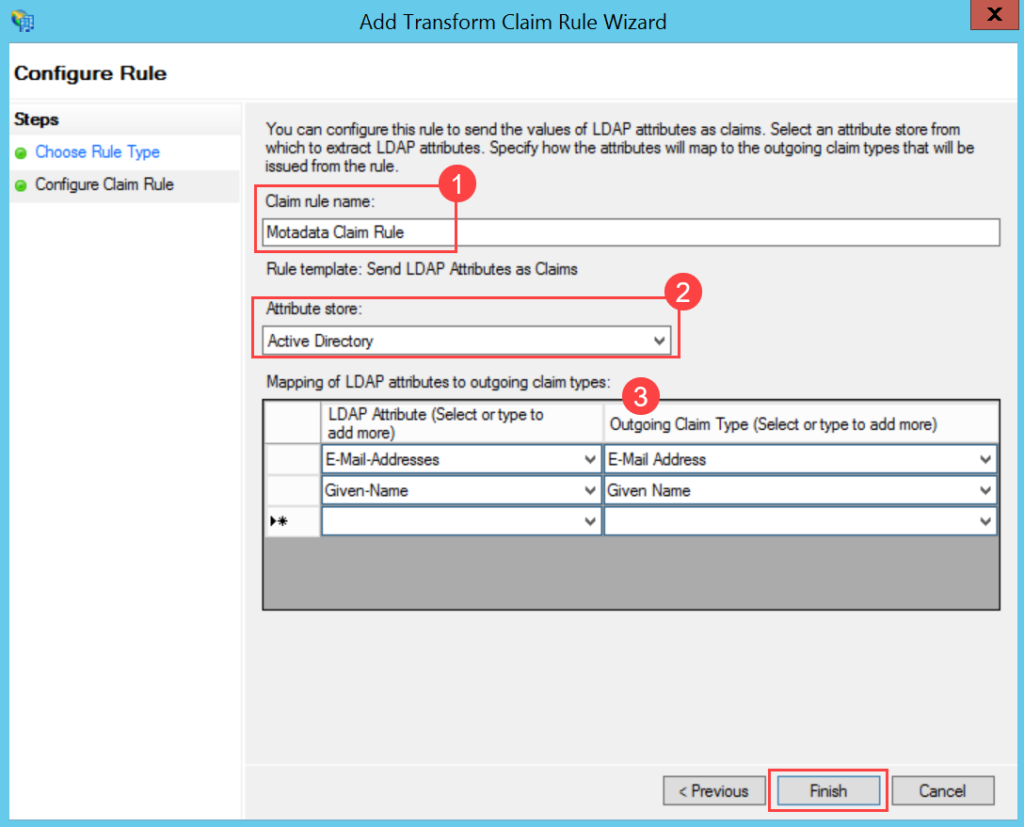
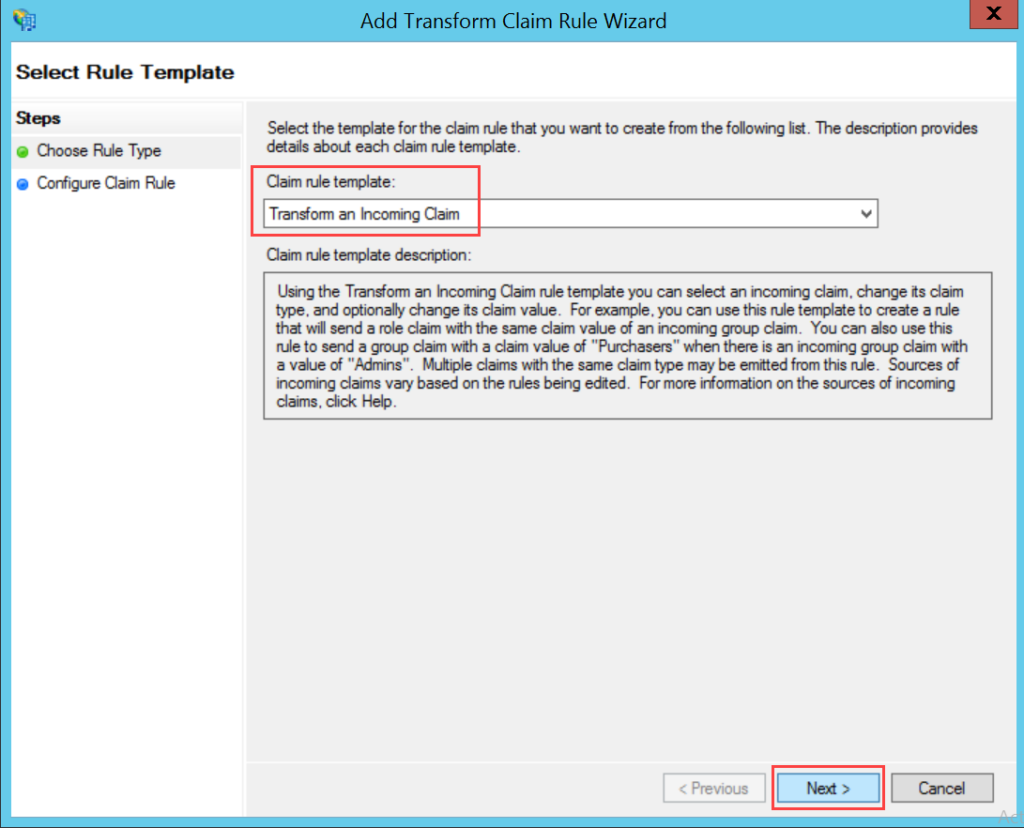
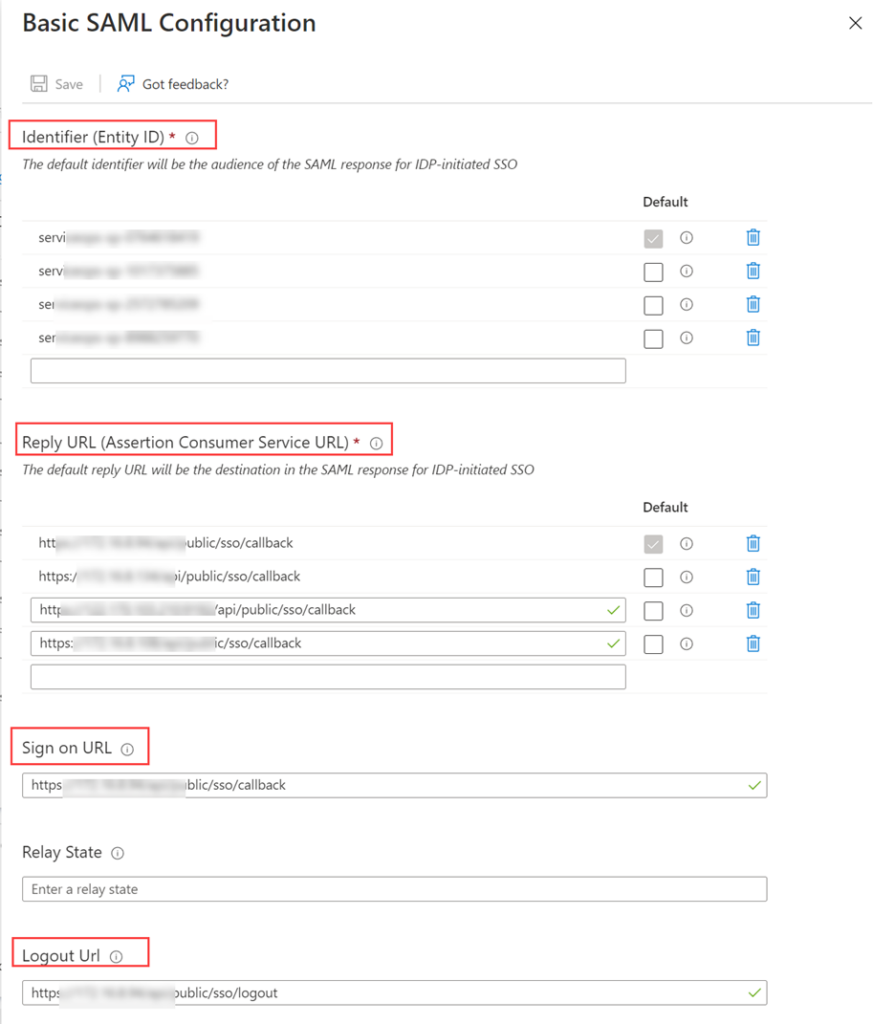
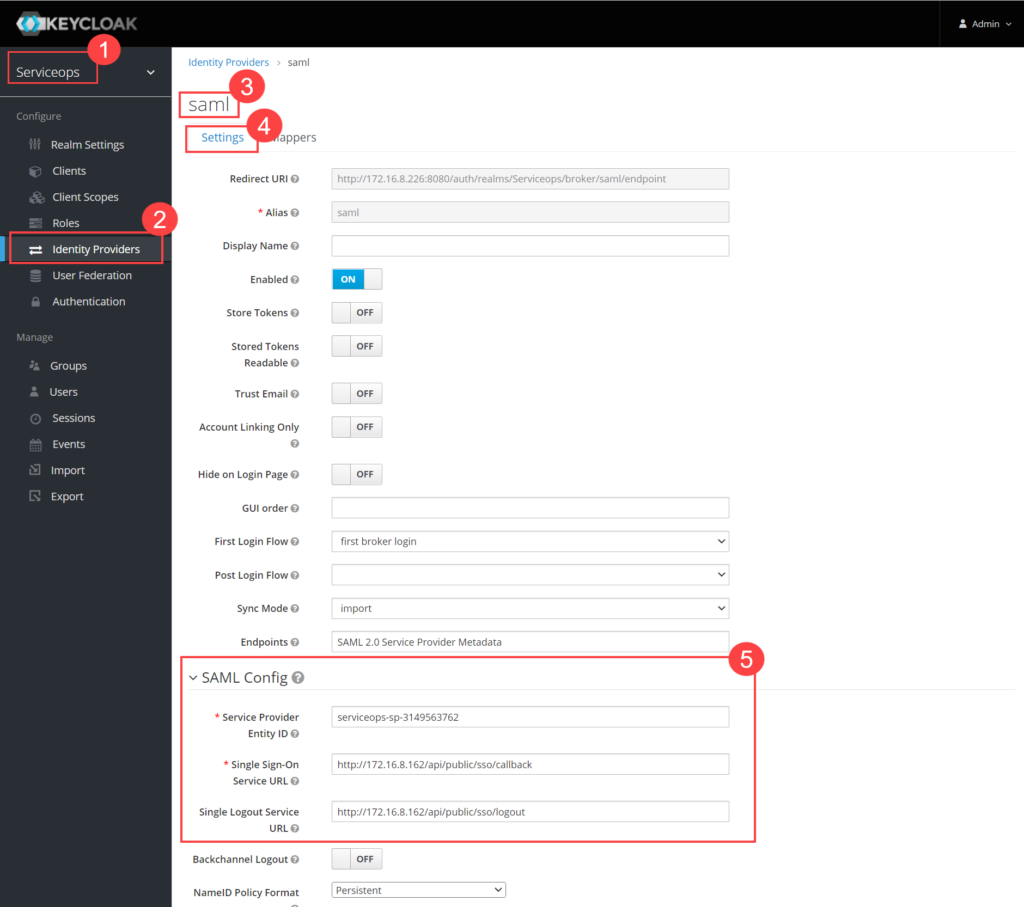
- Navigate to Serviceops (Realm) > Identity Providers > saml > Settings tab, as shown below. Configure the following details:
- Service Provider Entity ID
- Single Sign-On Service URL
- Single Logout Service URL
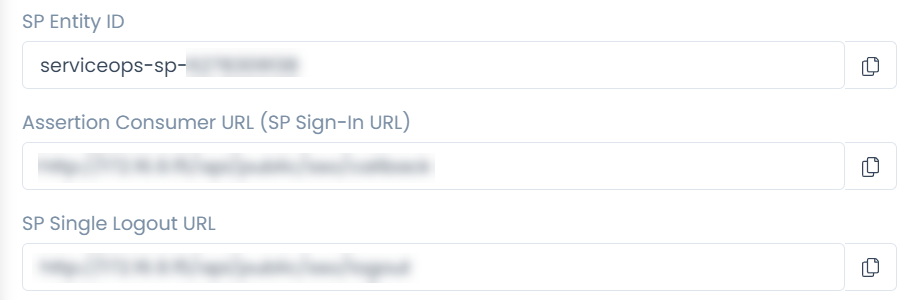
Navigate to the ServiceOps Home page > Admin > Users > SSO Configuration page to access these details
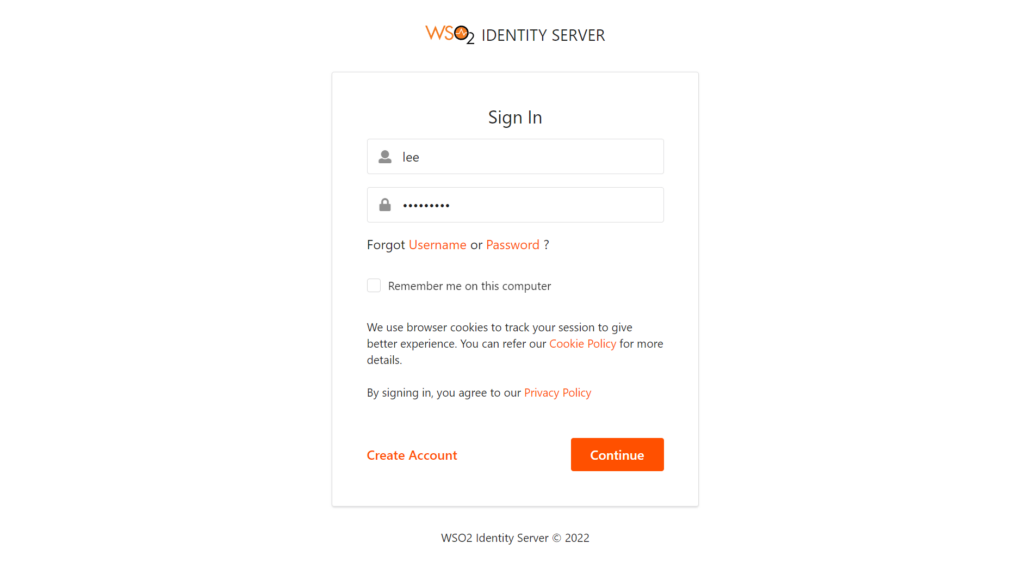
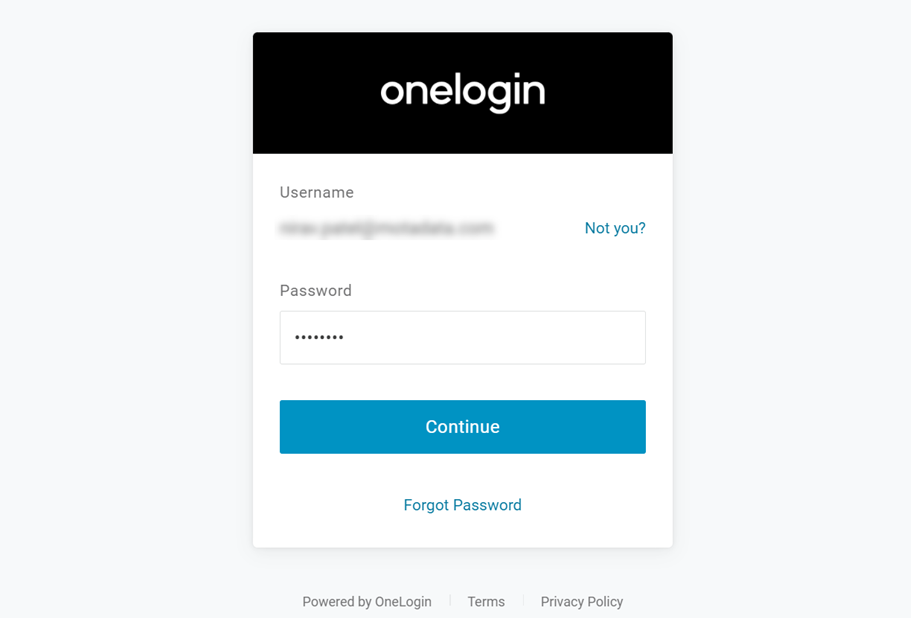
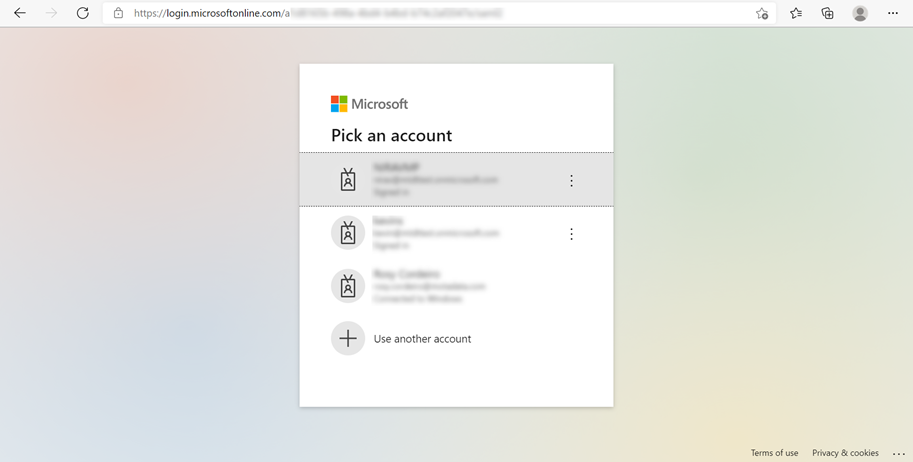
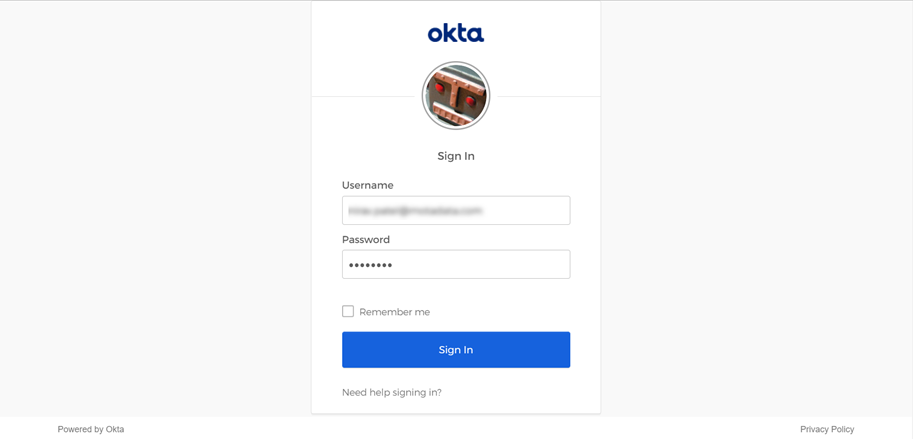
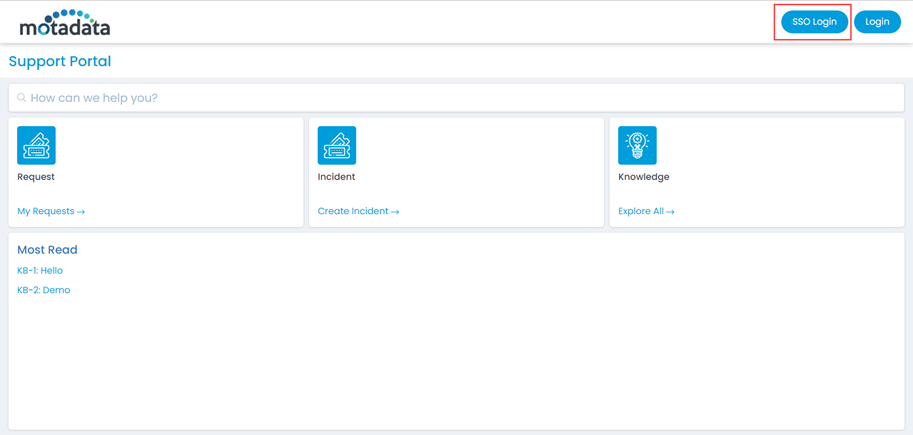
- Open the ServiceOps Portal and sign-in using the SSO login button, as shown below.
- You will be redirected to the Key Cloak Sign-in page, as shown below.
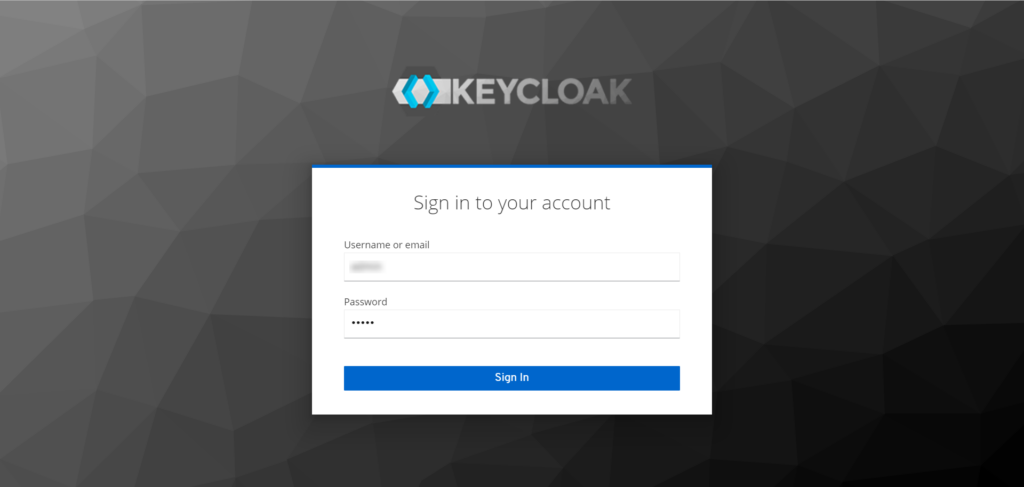
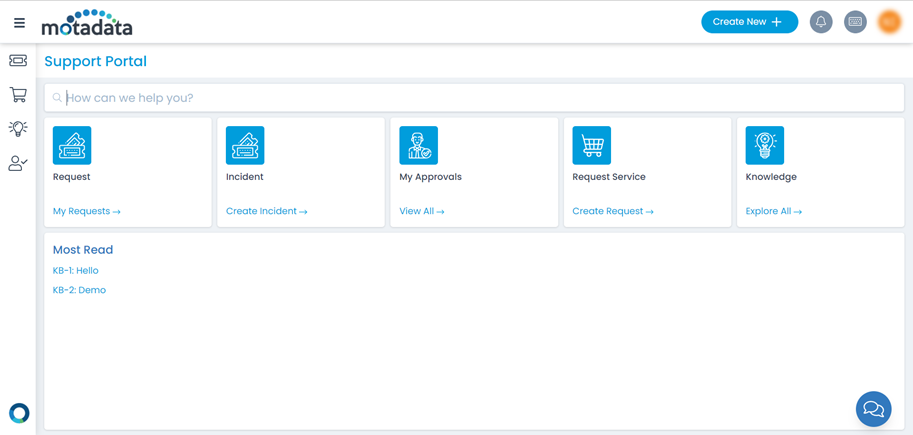
- Sign-in to Key Cloak, and you will be redirected to the ServiceOps portal as shown below.

- To sign-out, click on the username, and click Sign-Out. You will be redirected to the Key Cloak page again or remain on the portal as per the configured SAML logout URL.

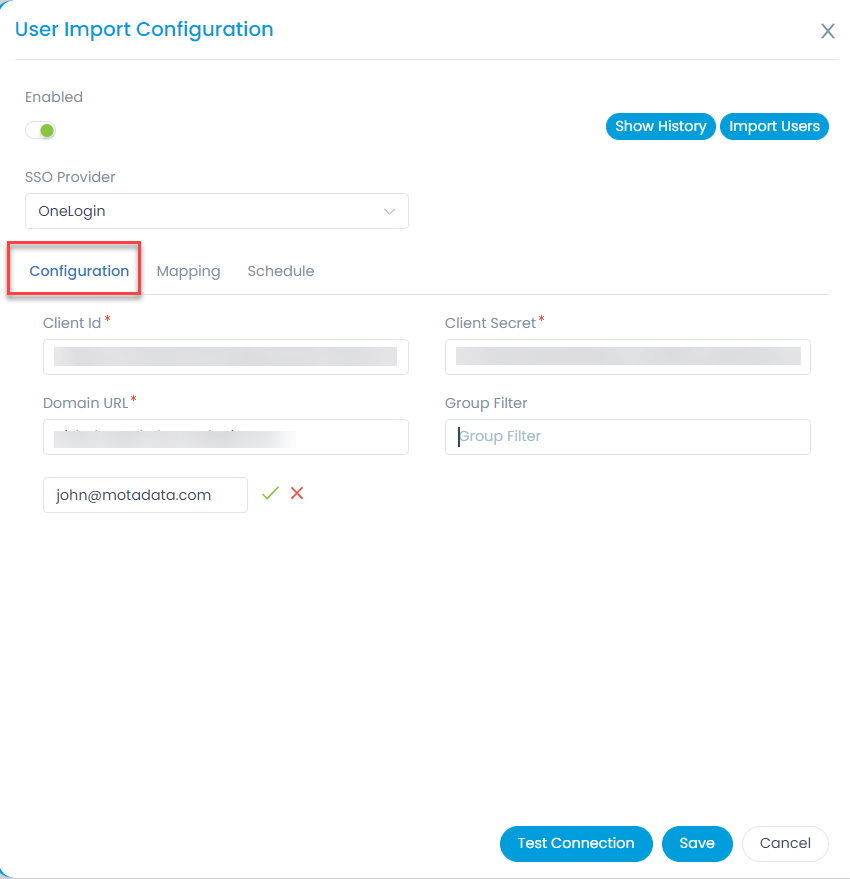
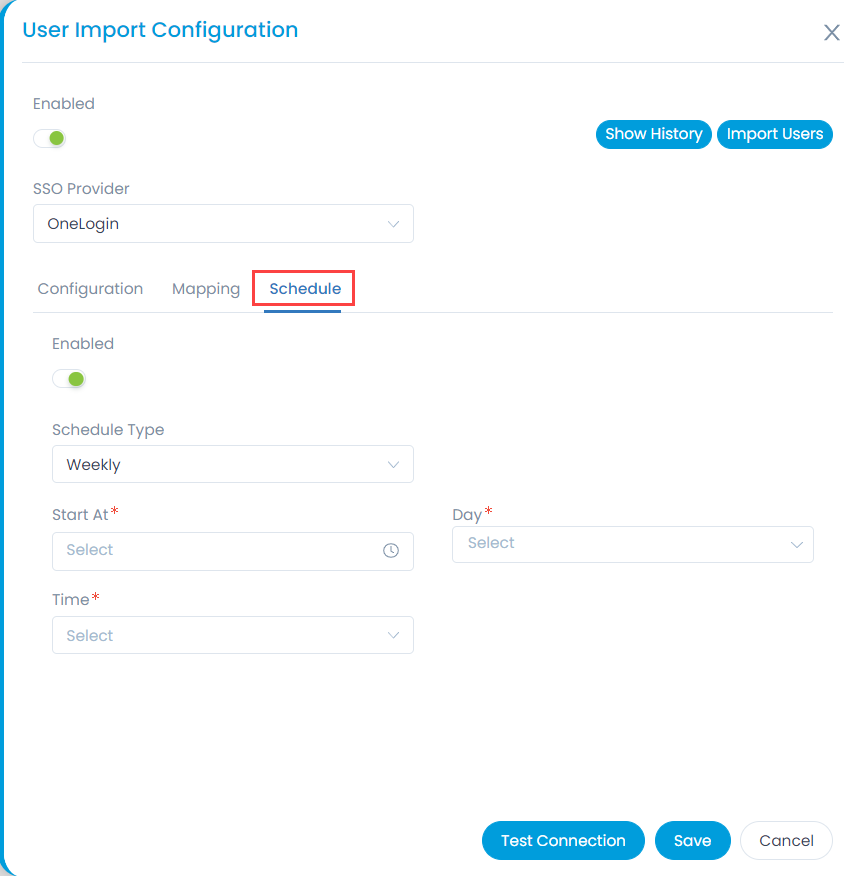
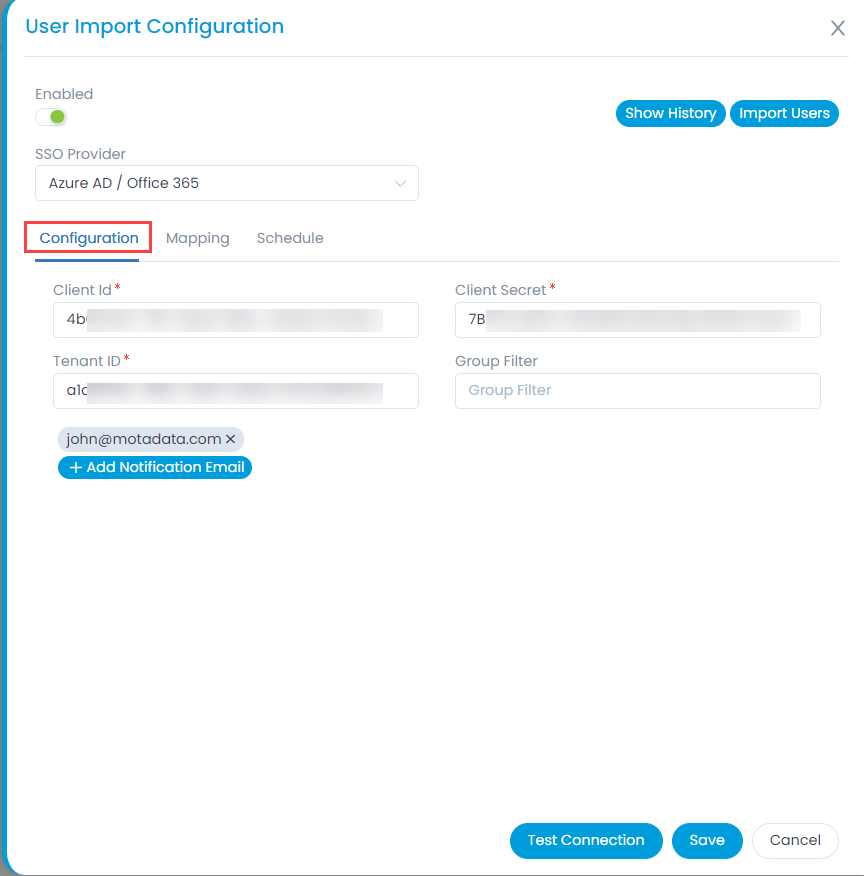
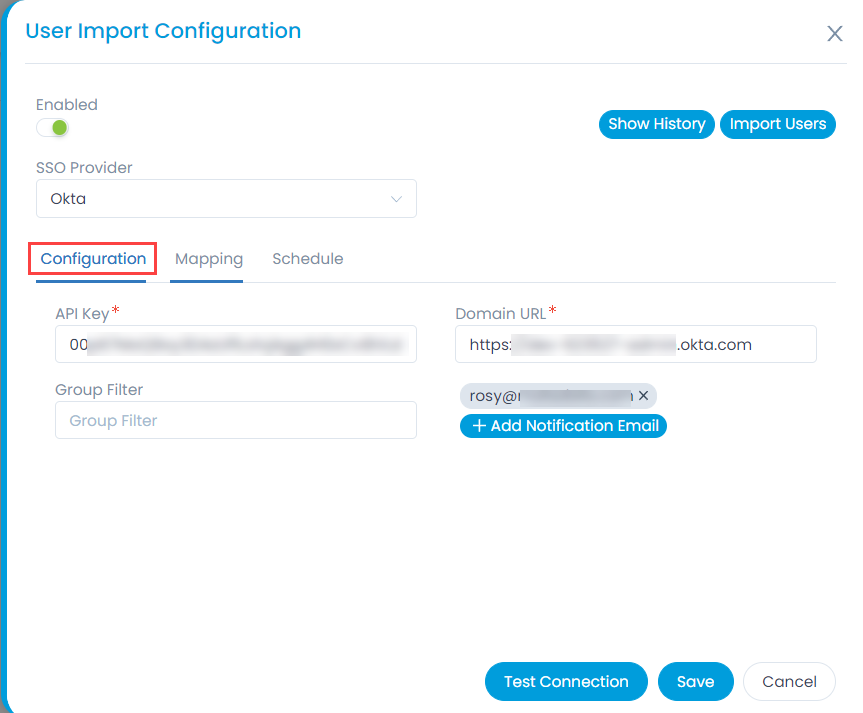
- To import users, click the User Import Configuration button, and a popup appears.
Enter the following details:- Enable the functionality. By default, disabled.
- SSO Provider: Select the provider of SSO functionality.
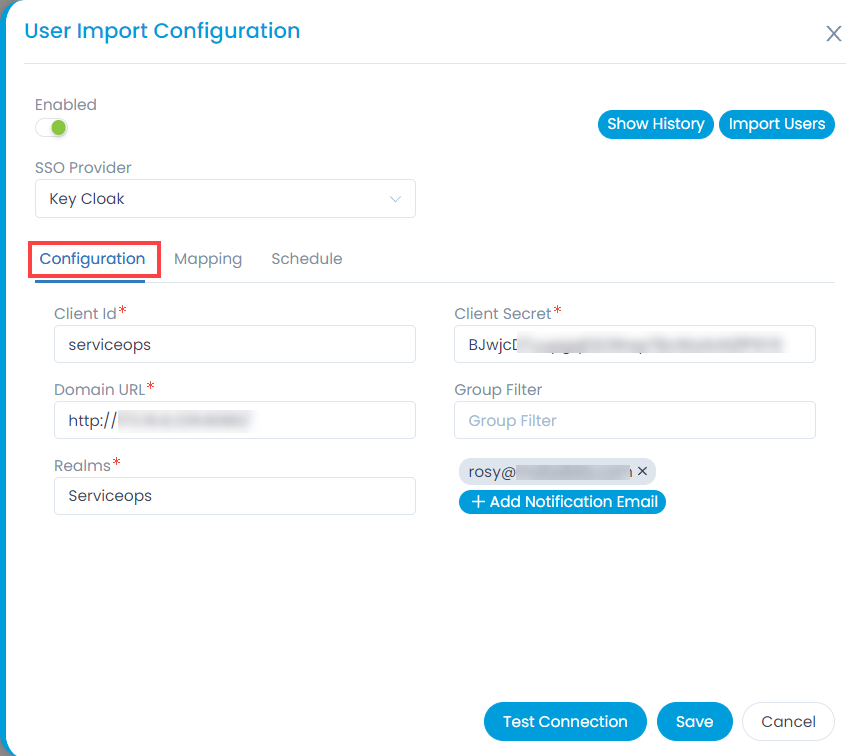
- In the Configuration tab, configure the following parameters:
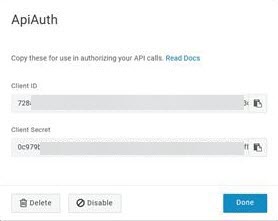
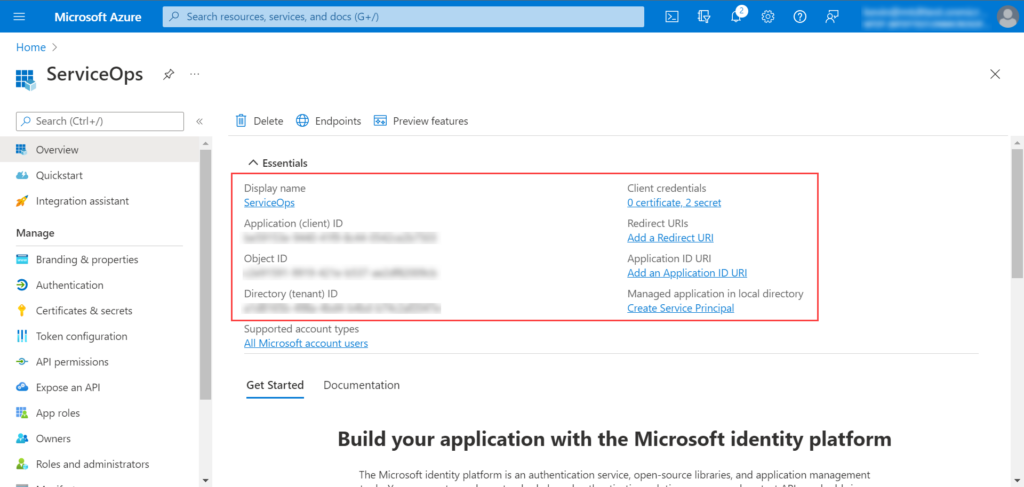
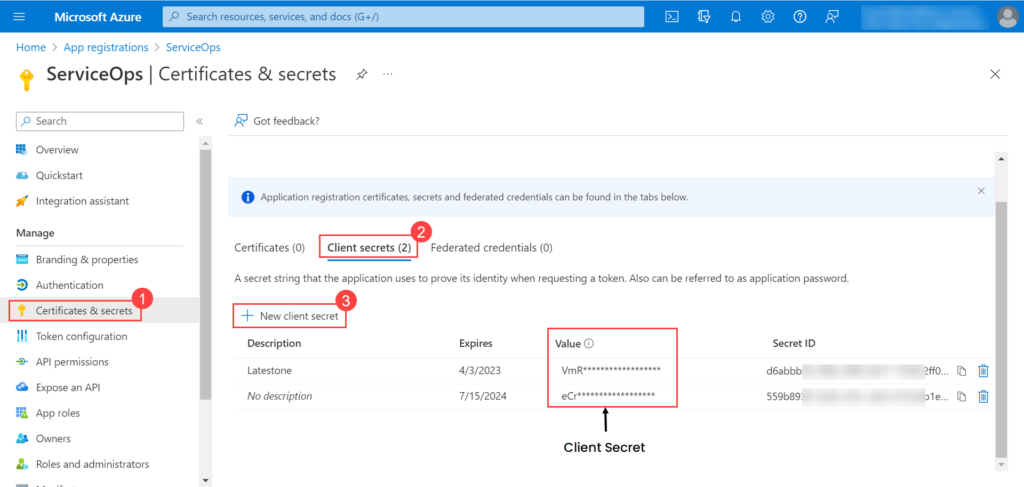
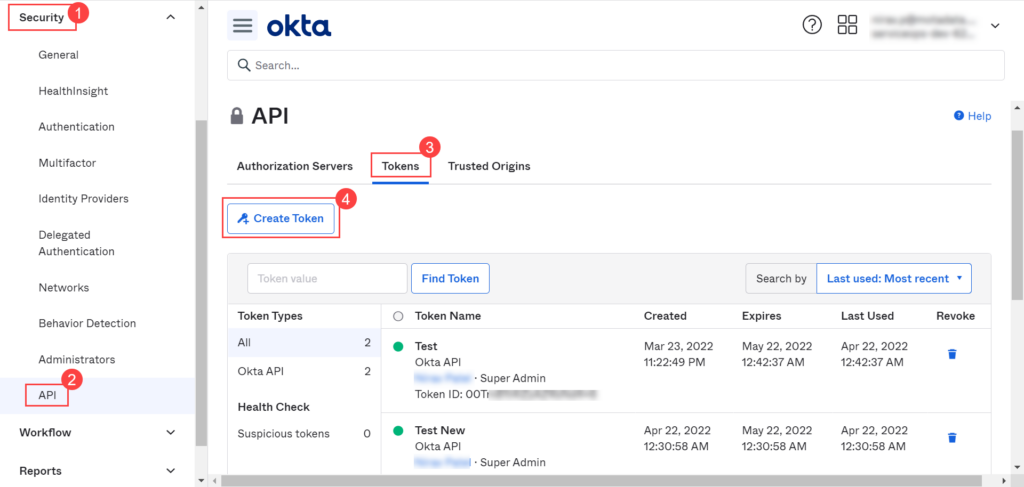
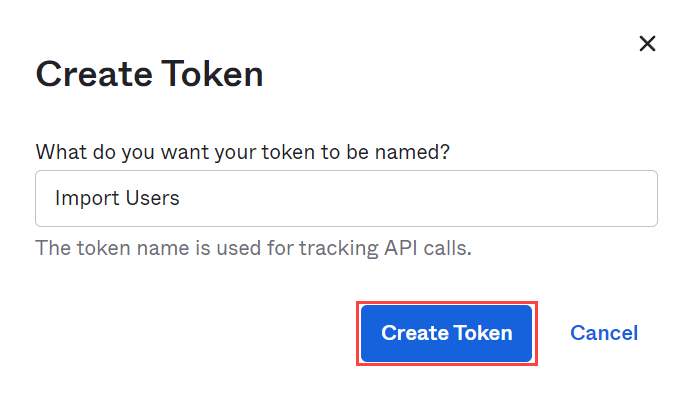
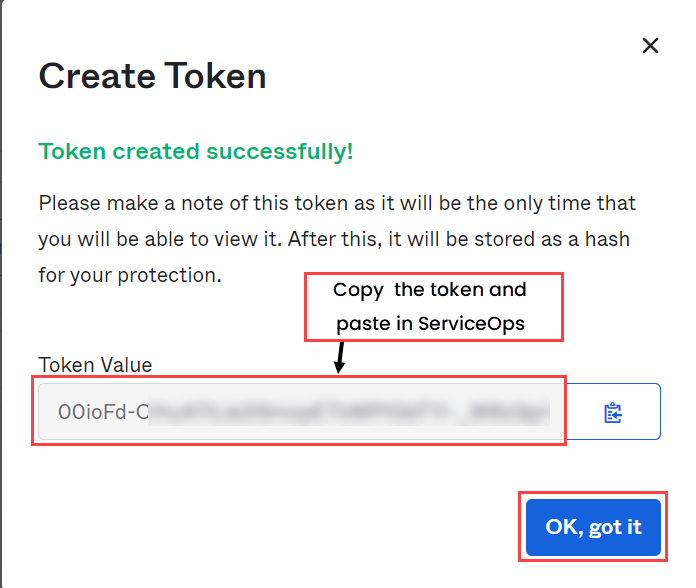
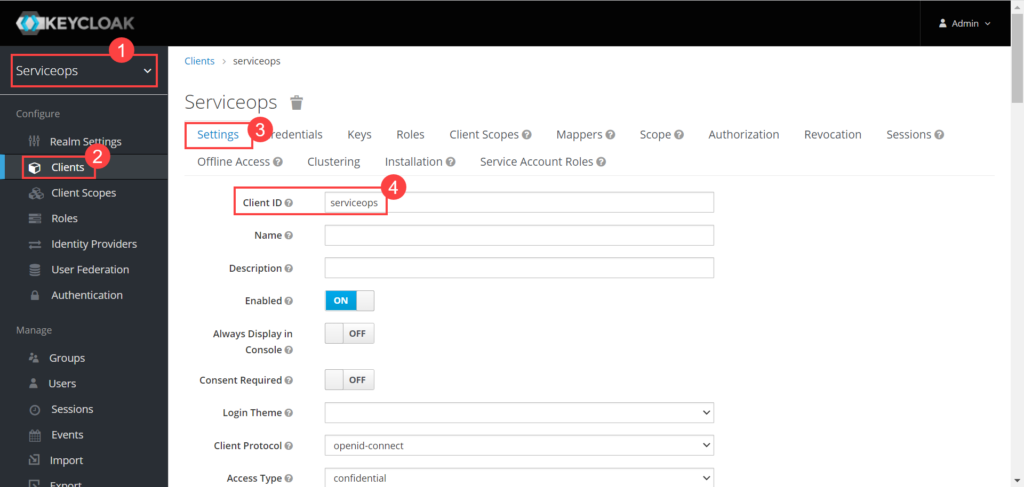
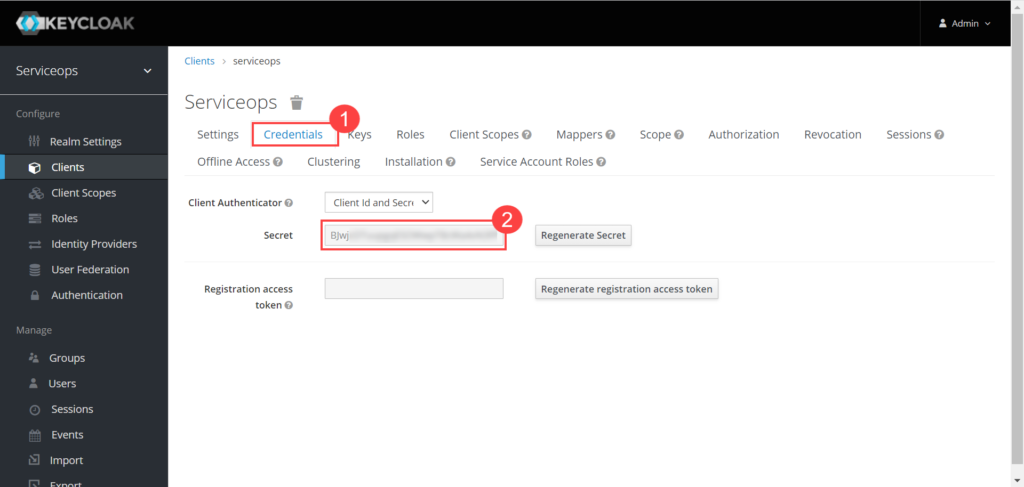
- Client ID: Enter the Client ID. You can get the client id from the Key Cloak, as shown below.
- Client Secret: Enter the Client Secret. You can get these details from Key Cloak, as shown below.
- Domain URL: Enter the domain URL of the Key Cloak client.
- Group Filter: Enter the Group Filter whose users you want to import from the Key Cloak.
- Realms: Enter the realms name created in Key Cloak.
- Add Notification Email: Add the email address of the users who should be notified about the import.
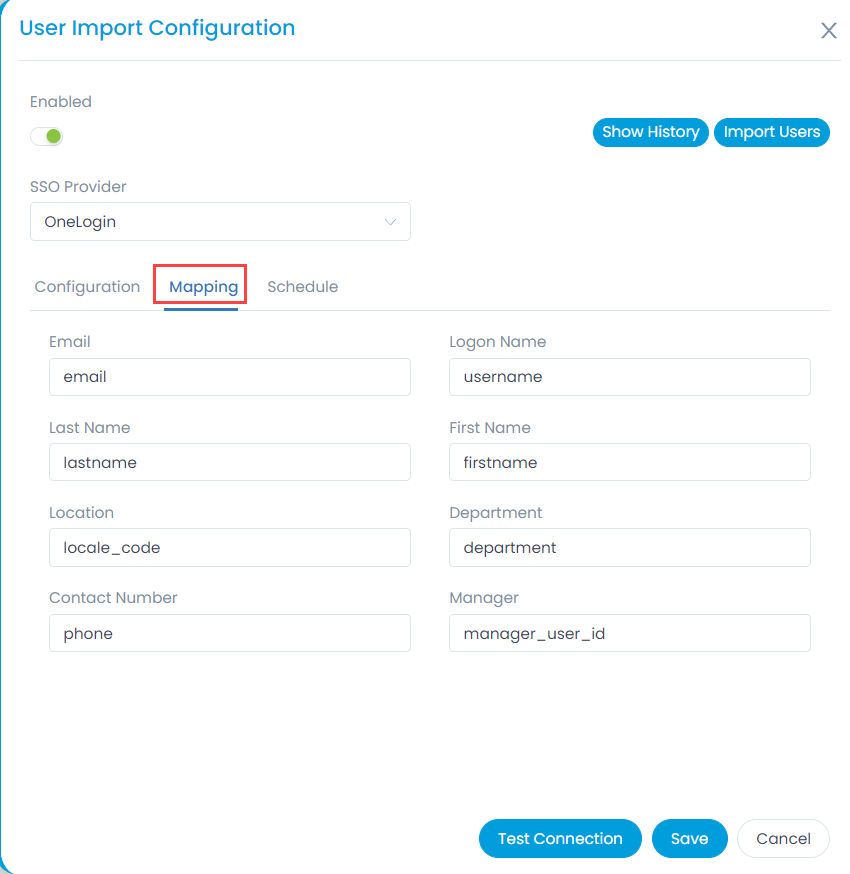
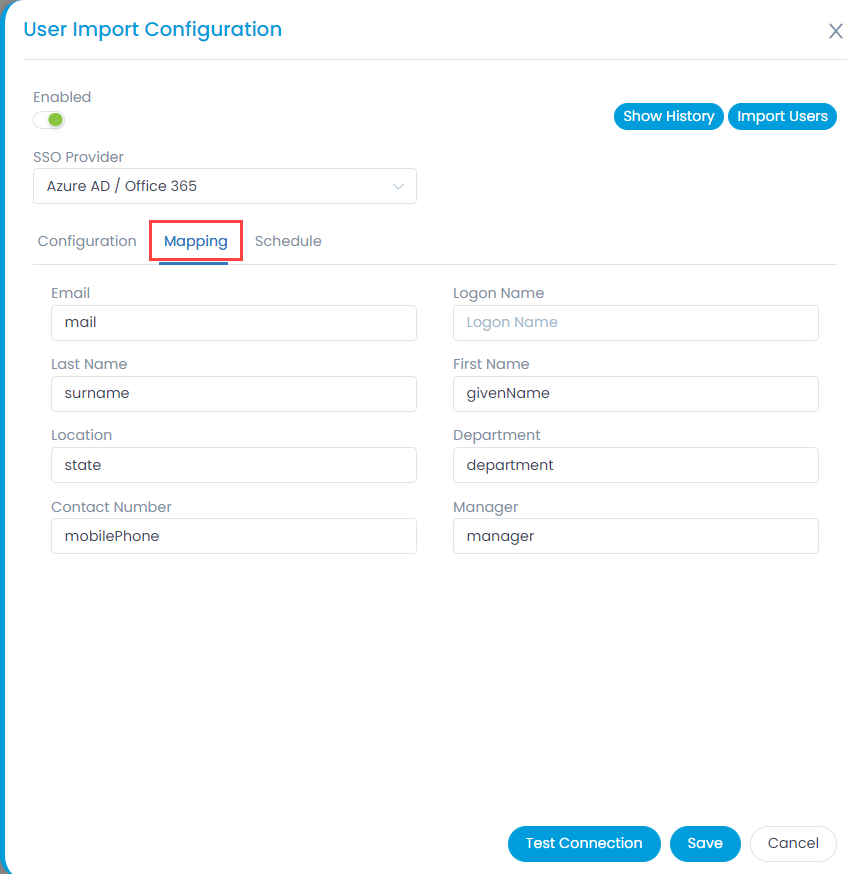
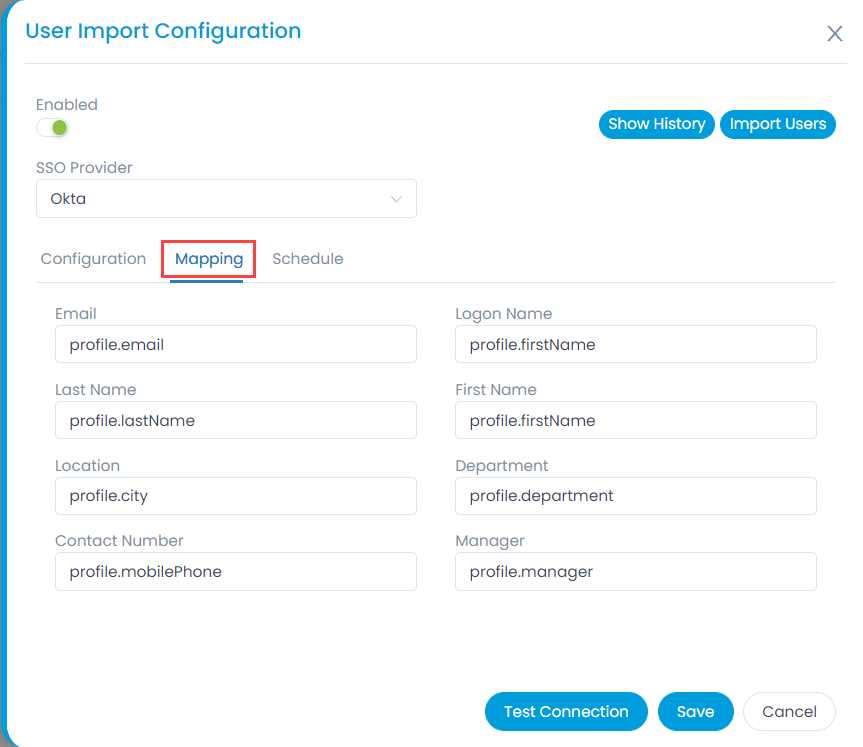
- In the Mapping tab, map the fields which are required to be imported, as shown below. The custom fields created in the Key Cloak need to be prefixed with attributes word. For Example: attributes.Location.
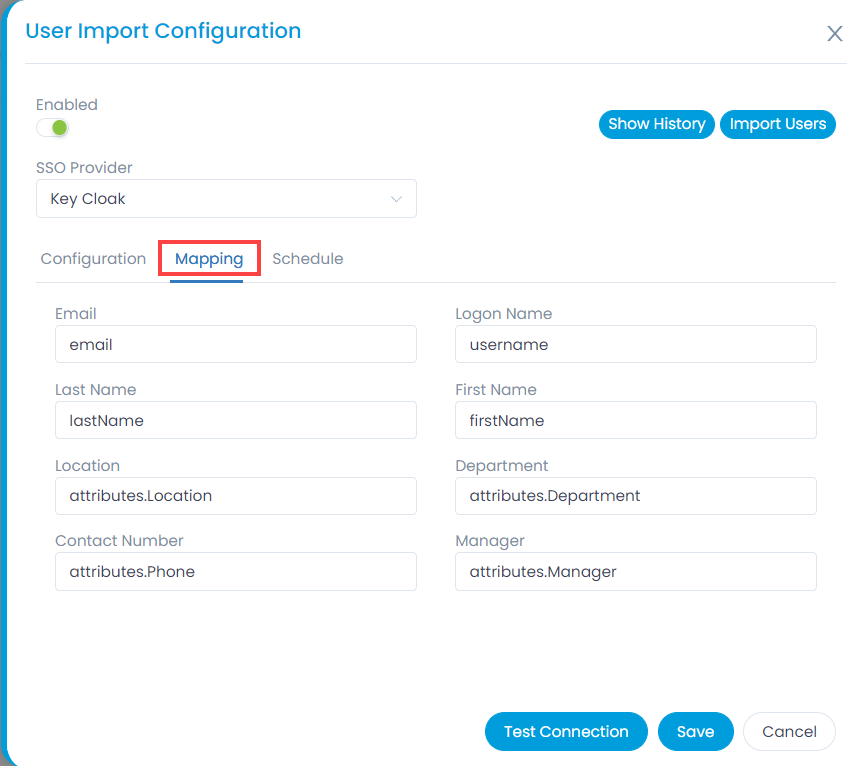
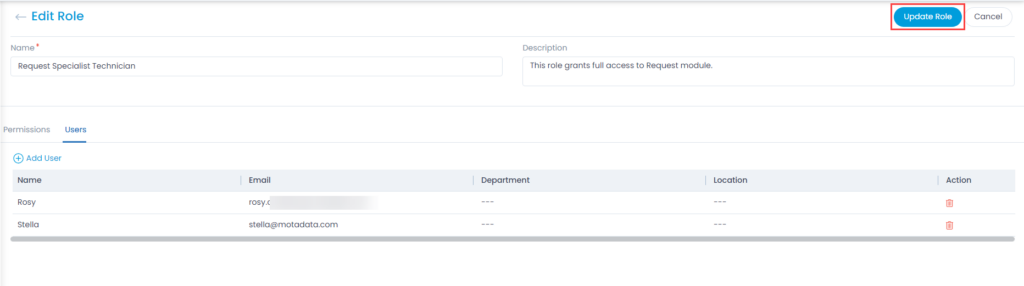
Key Cloak provides limited user details. Hence, to map additional fields, you need to create custom fields in Key Cloak. To do so, select the required realm, and navigate to Users > User (Rosy) > Attributes tab. In this case, Realm is Serviceops.
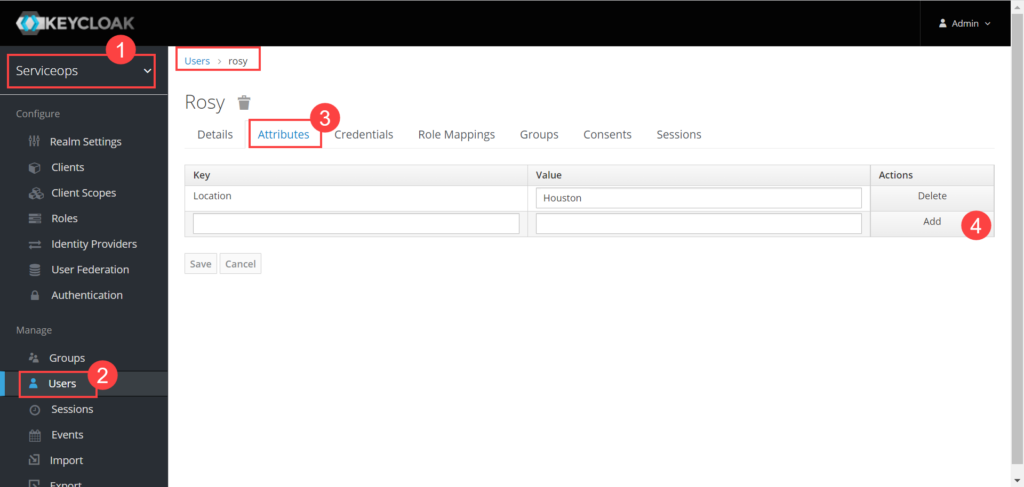
Enter the Key name and value in the table, and click Add. You can now use this field to map by adding the prefix “attributes.” to the key name.
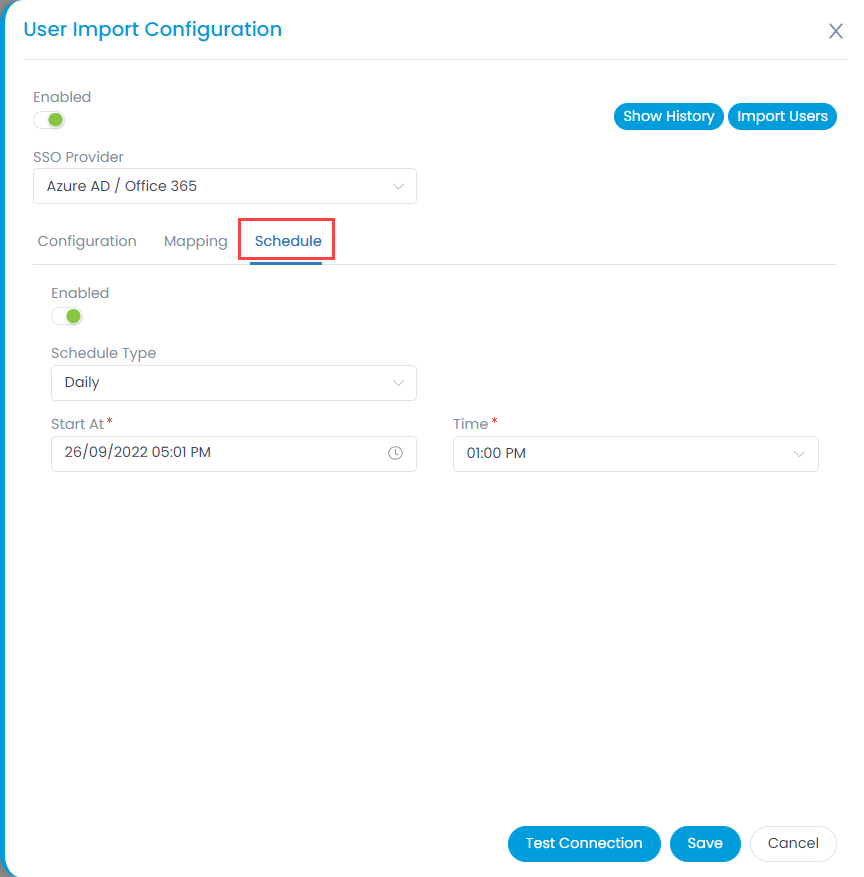
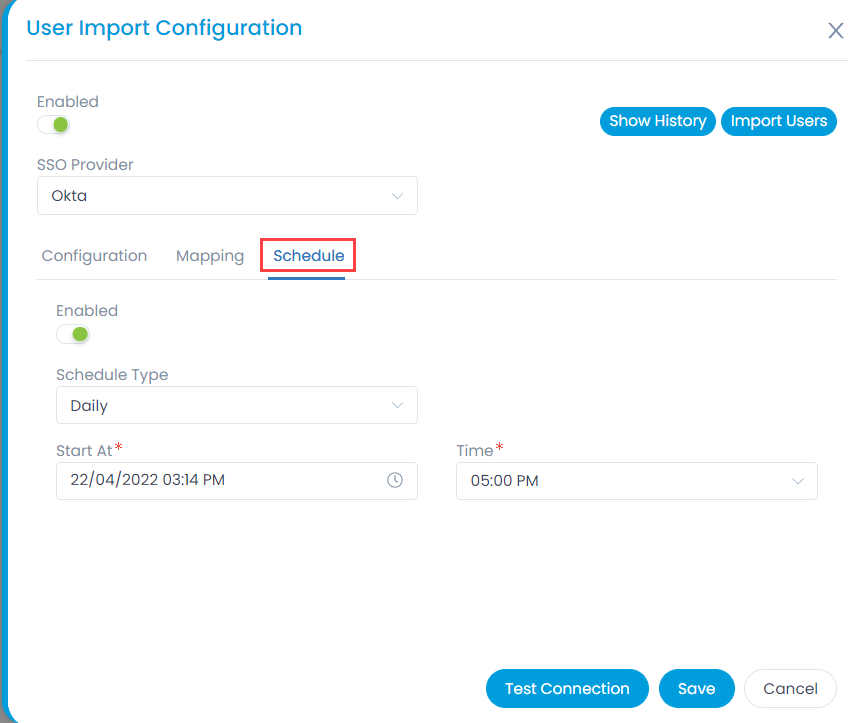
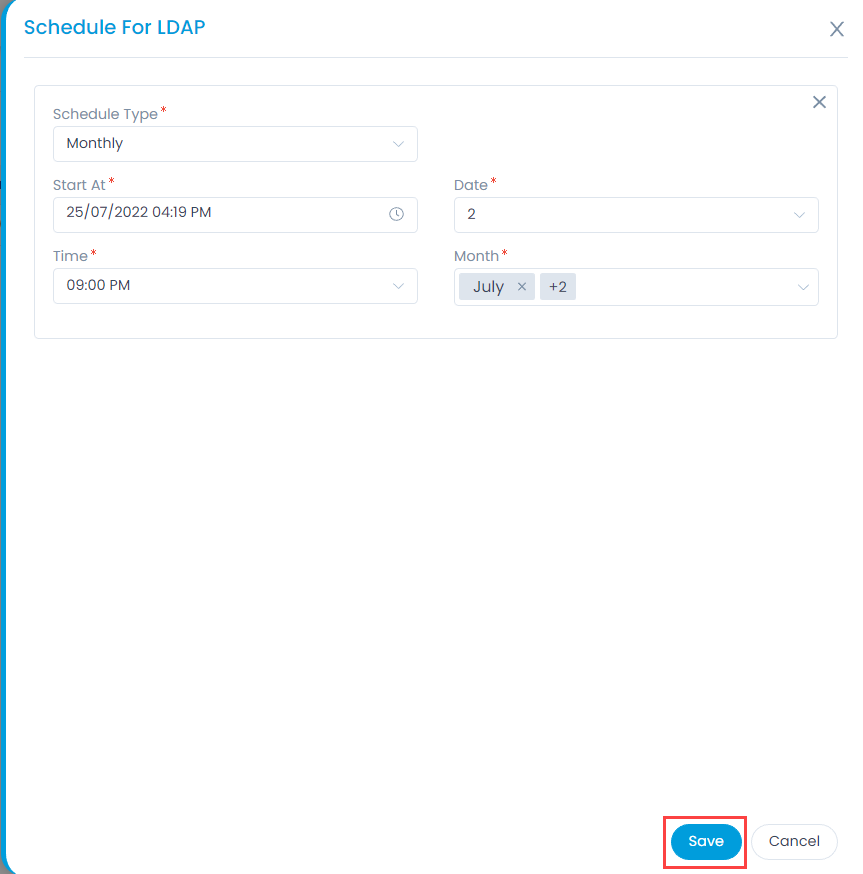
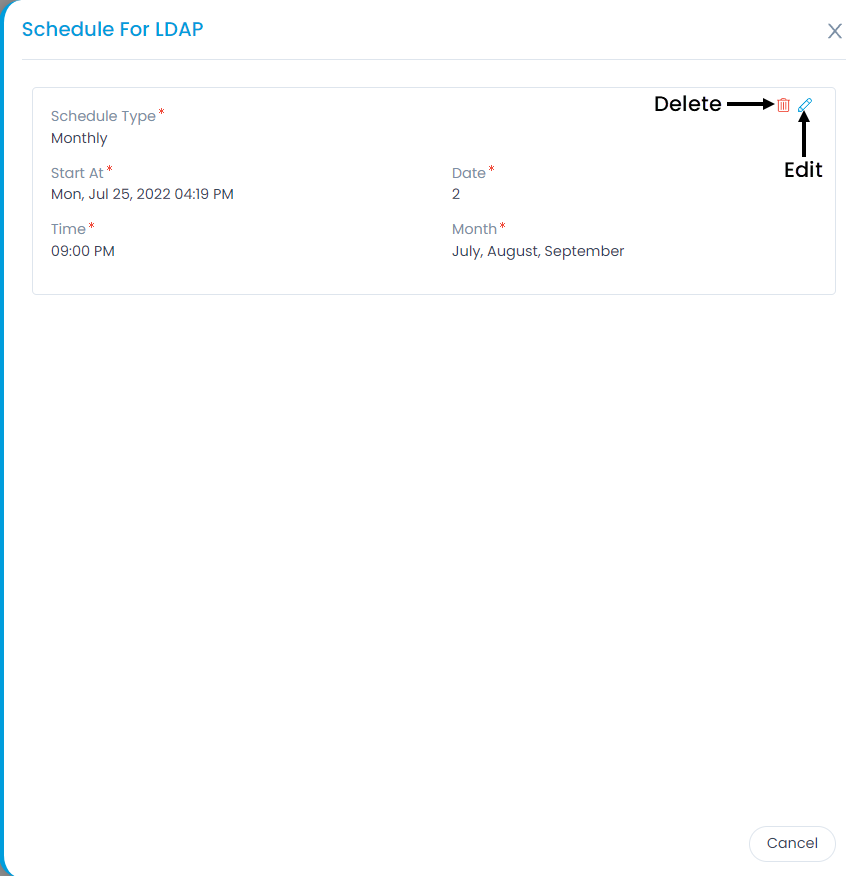
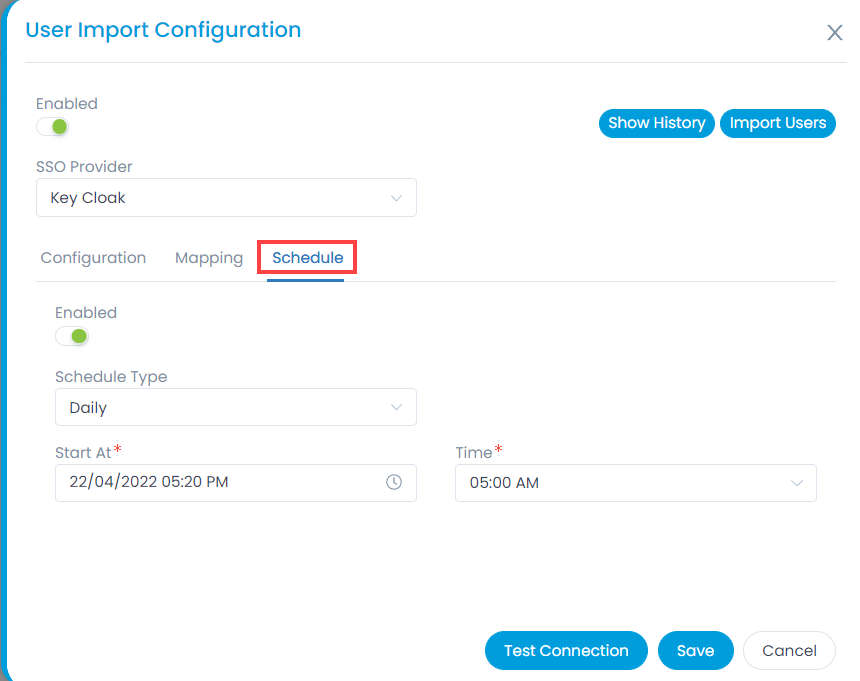
- In the Schedule tab, enable the scheduler, select the schedule type, and select the date and time you want the users to be imported automatically.
- Once all the details are filled, click Save. You can also check the connectivity by clicking the Test Connection button.
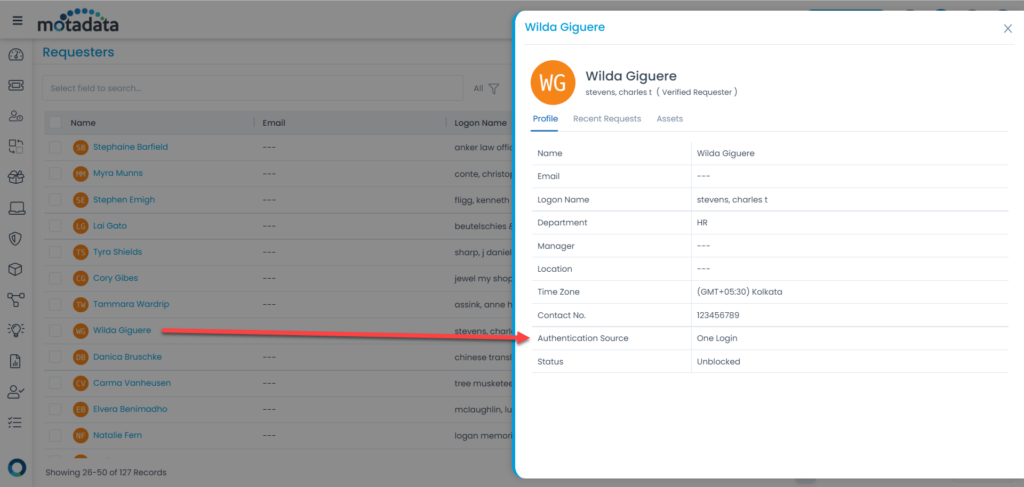
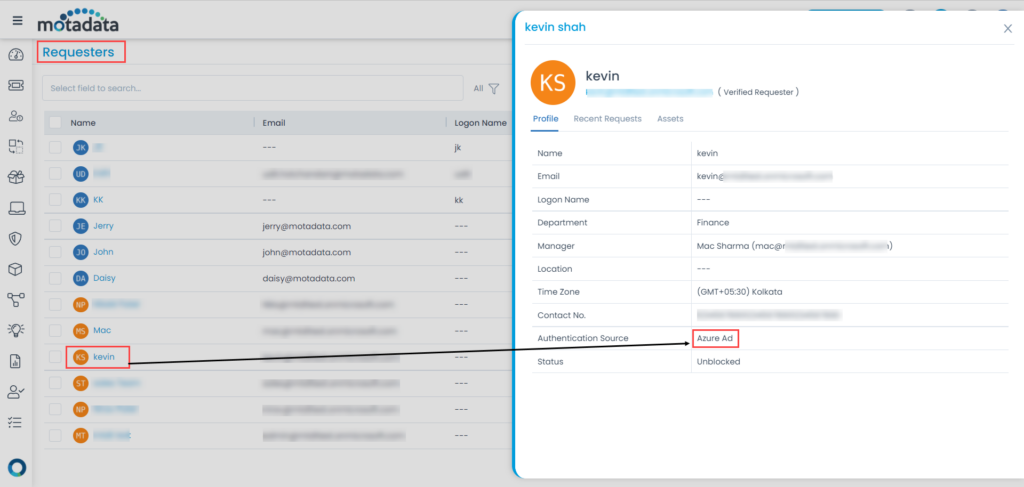
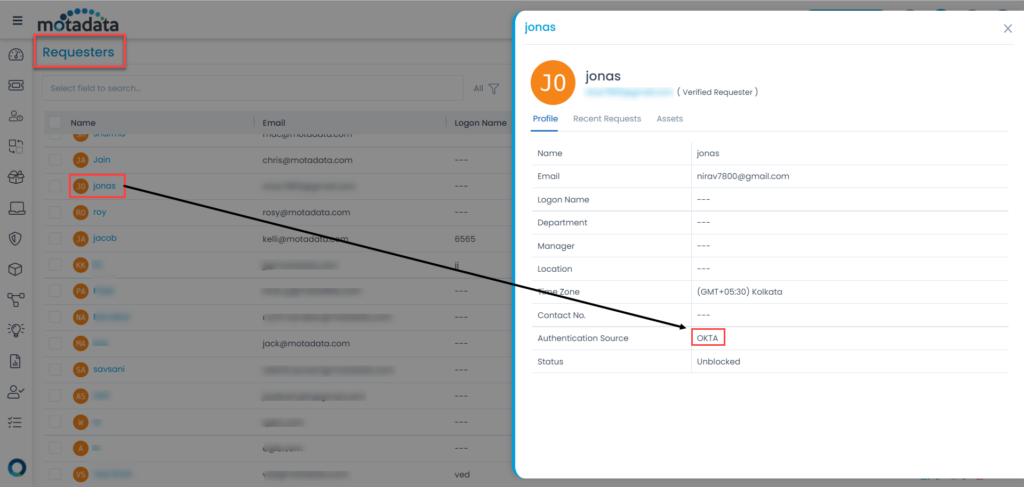
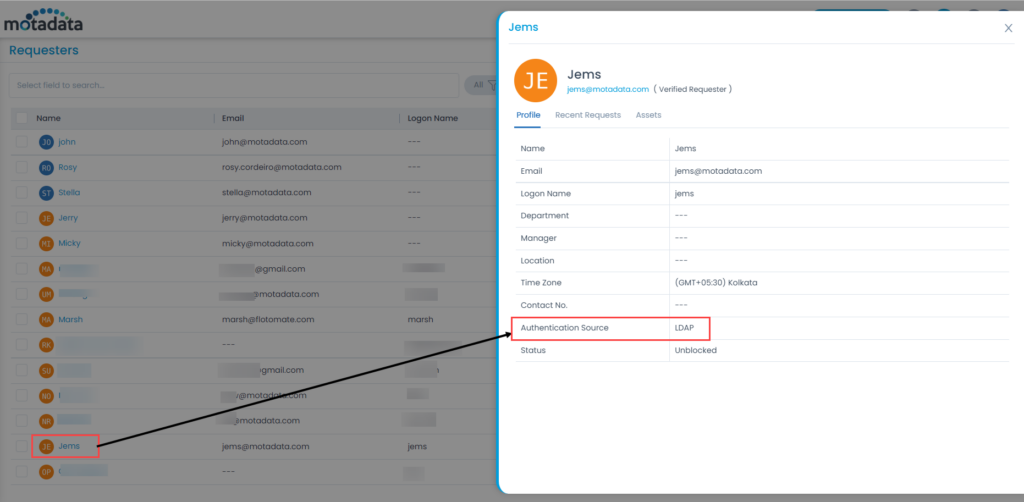
- Once the connection is successful, click the Import Users button, and the imported users get added as requesters in the ServiceOps as shown below:
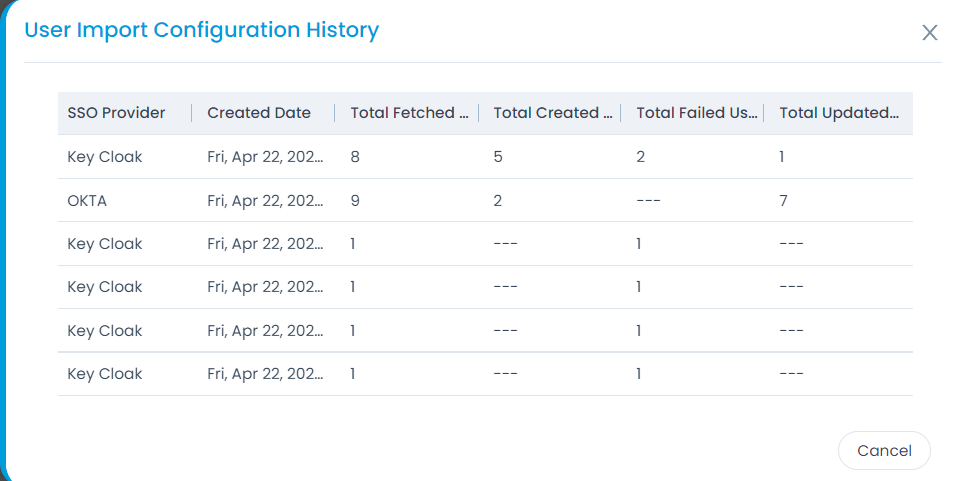
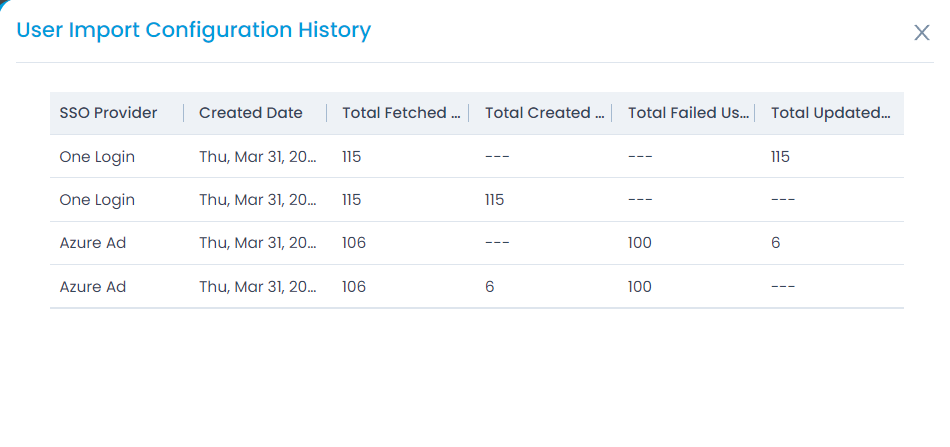
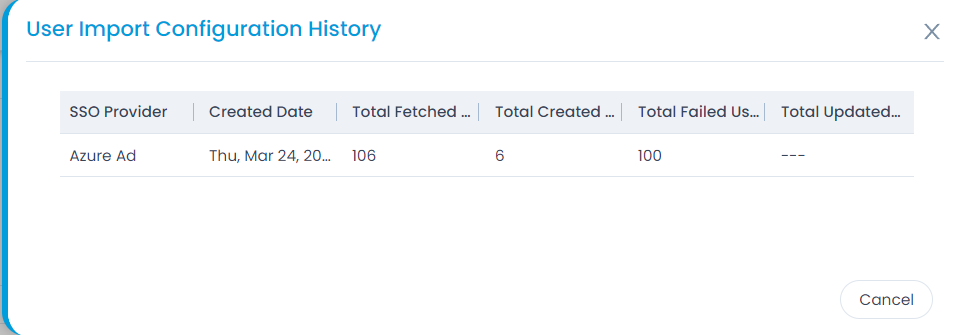
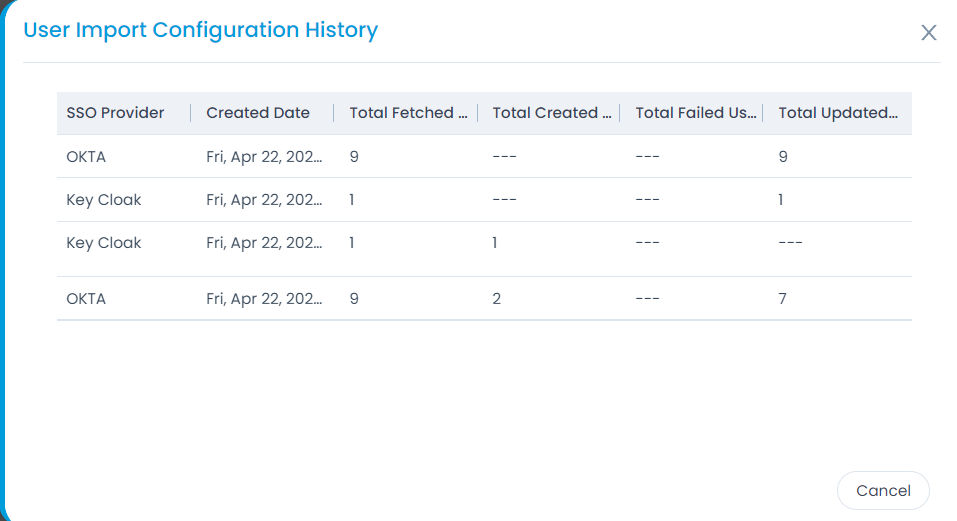
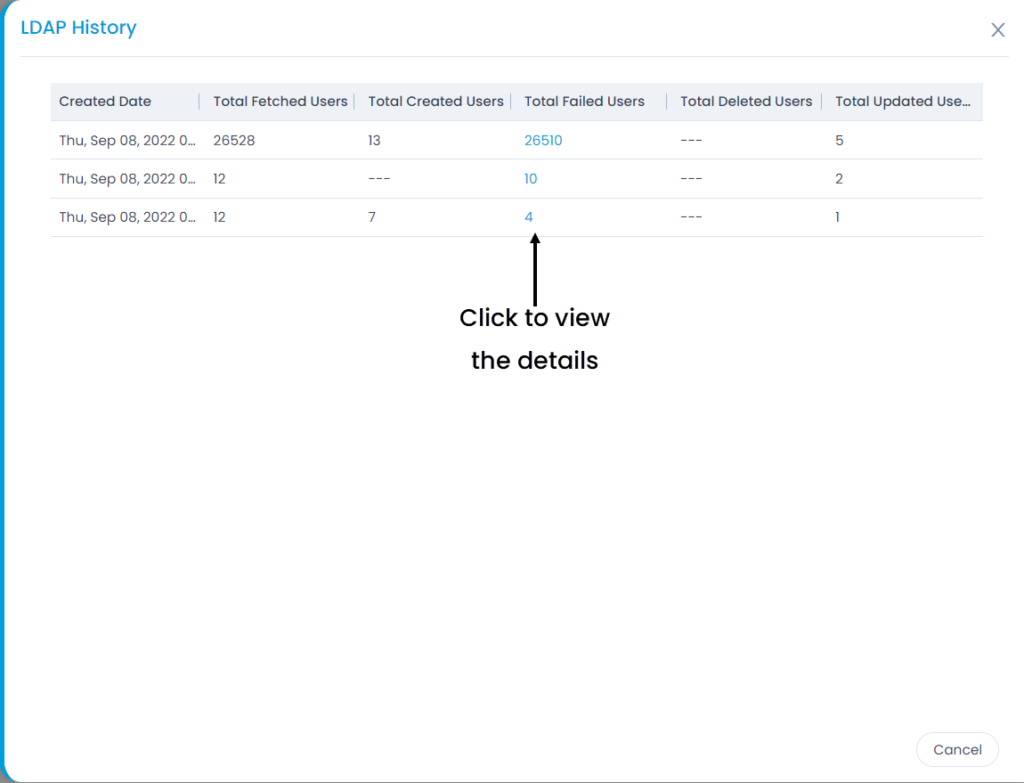
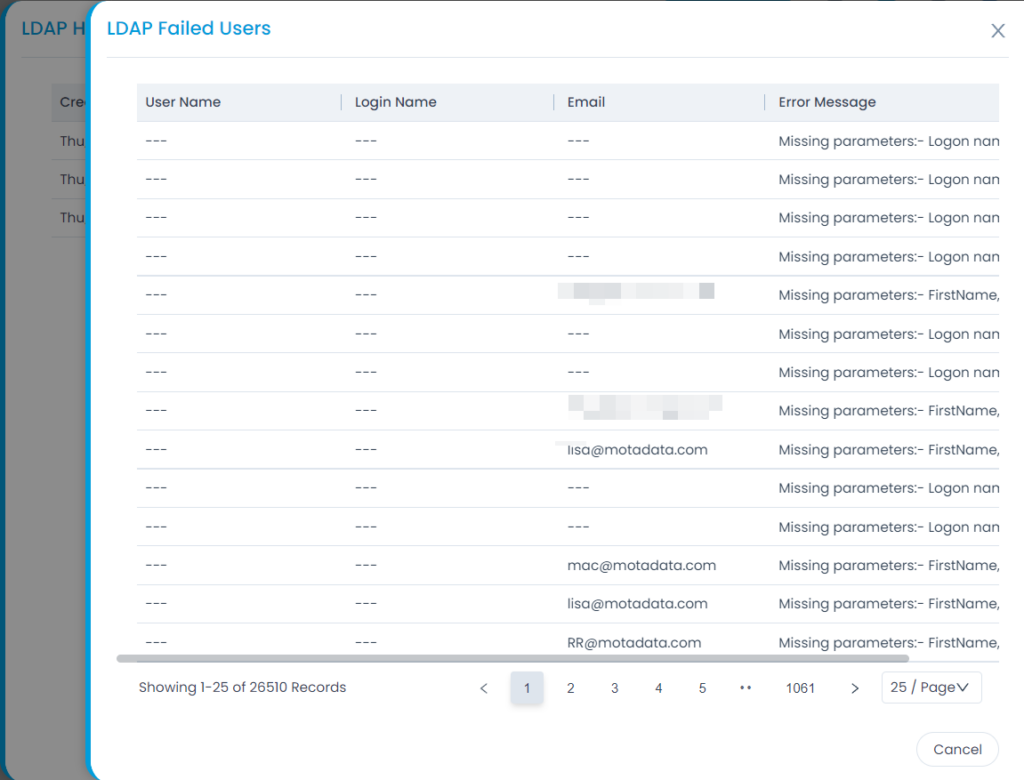
- Here, you can also click the Show History button to view the User Import Configuration history.