HTTP/HTTPS Metric Plugin
Overview
*****************************
Navigation
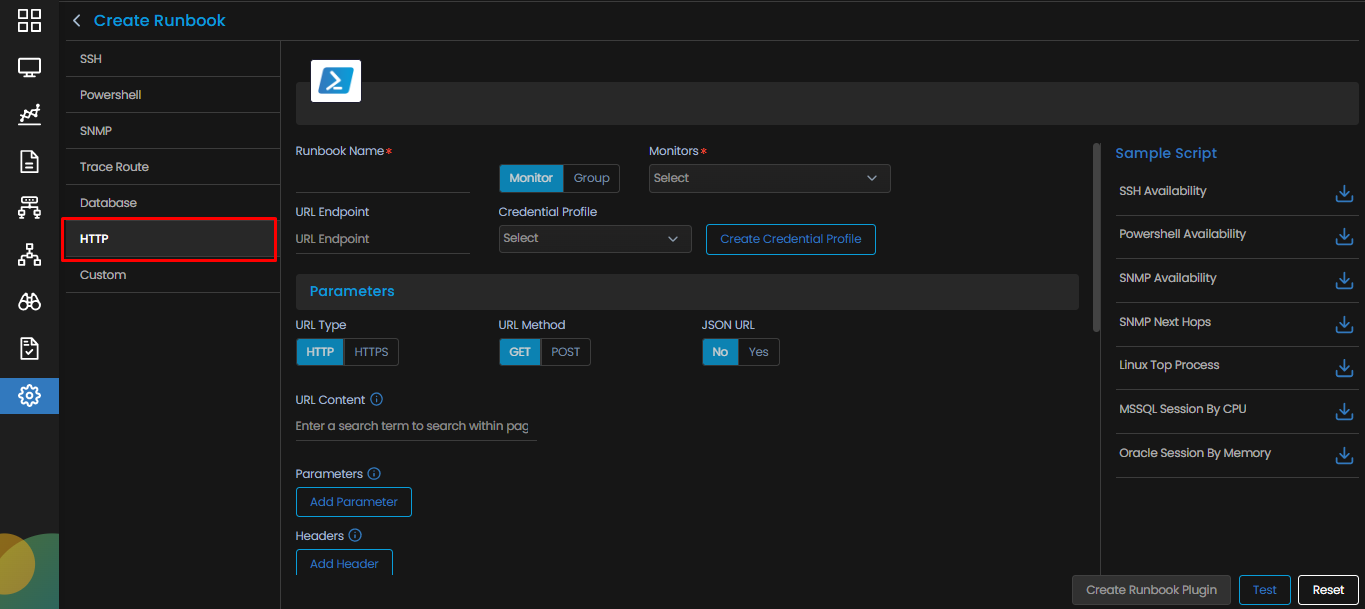
After selecting ![]() , a screen appears to create a metric plugin.
, a screen appears to create a metric plugin.
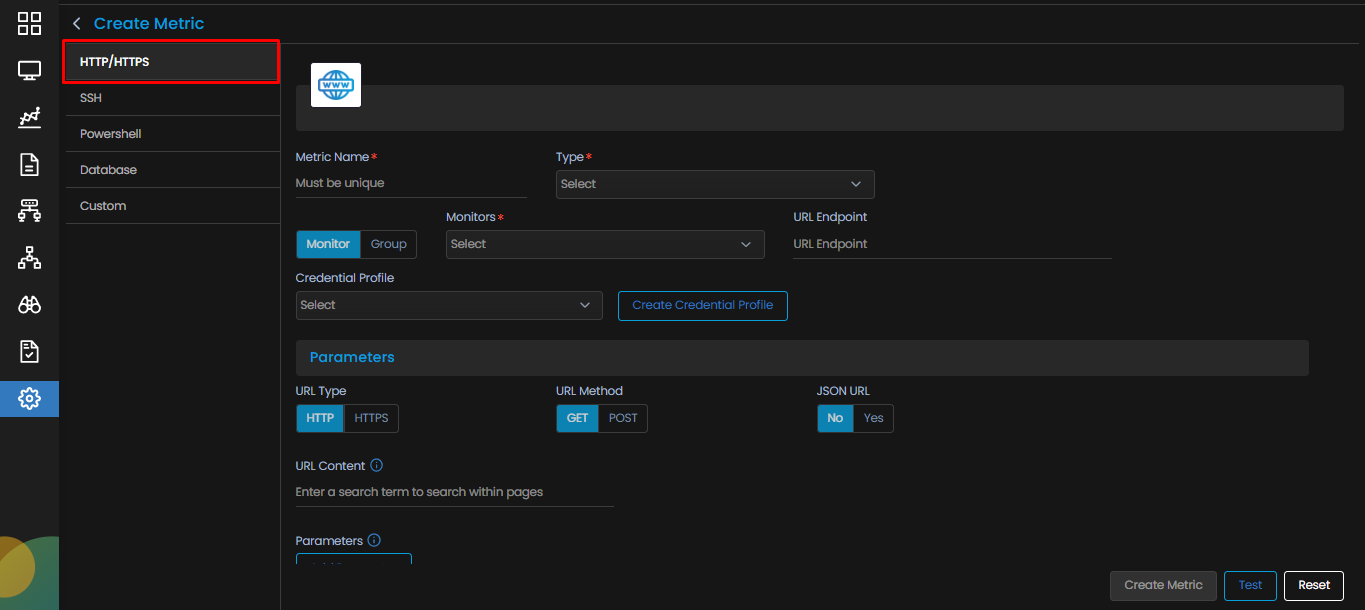
HTTP/HTTPS is selected by default.
Parameters for the HTTP/HTTPS Metric Plugin Creation
The following parameters appear on the Create Metric screen for HTTP/HTTPS.
| Metric Name | Enter a unique name of the metric you wish to create. The name should be given logically based on how the metric is defined. |
| Type | Select Type of the monitor from the dropdown. |
| Monitor/Group |
Select a Monitor or Group based on your requirement.
|
| Credential Profile | Select the credential profile so that your plugin is able to access the monitor using the appropriate credentials and perform its task on the monitor. |
| Create Credential Profile | Select this option if you wish to create a new credential profile. |
| URL Endpoint | Enter the URL Endpoint. |
| URL Type | Select the type of connection(HTTP/HTTPS) for which you want to create the plugin. |
| URL Method | Select the method(GET/POST) using which you want to create this plugin. |
| JSON URL | |
| URL Content | Enter a keyword to search within the page mapped to the URL. |
| Add Parameter | |
| Add Header | |
| Script Language | Select the language (GO or Python) in which you write your script. |
| Parsing Script | Enter the script to parse the output received after executing the SSH script. |
| Add variable | Add a variable, if needed to be used in the parsing script. |
Select the Create Metric button to create the metric based on the parameters entered.
Select the Test button to validate the credential profile.
Select the Reset button to erase all the current field values, if required.
Note: The Create Metric option is enabled only after the Test is successfully completed.
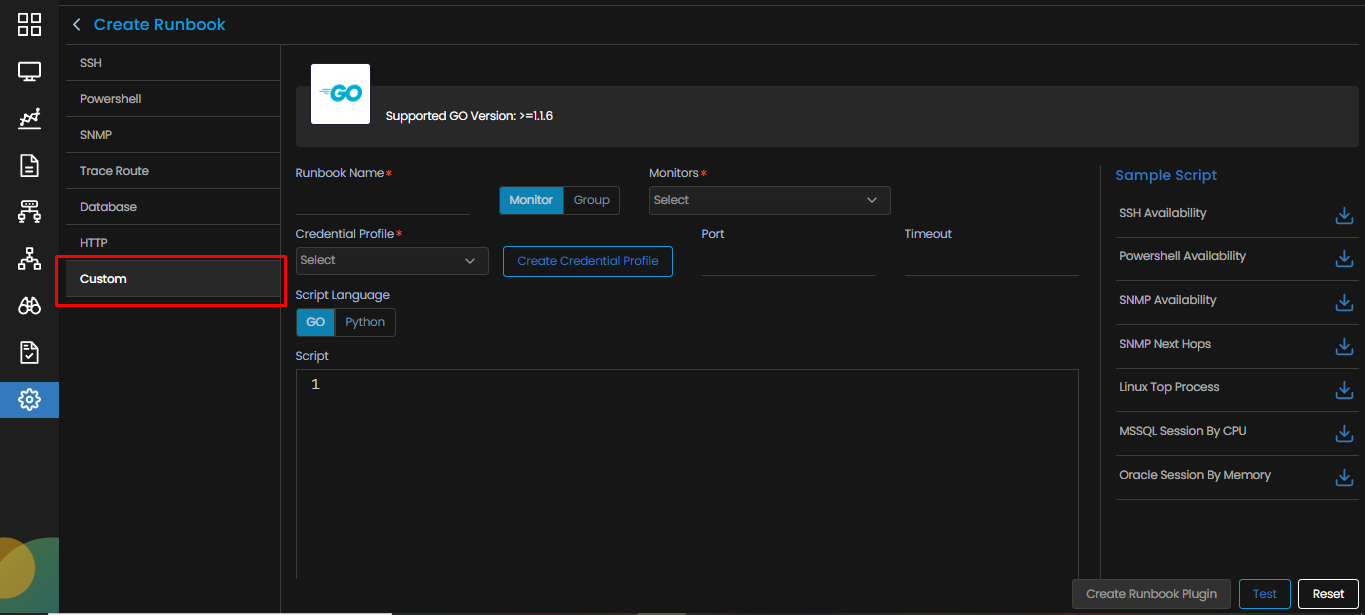
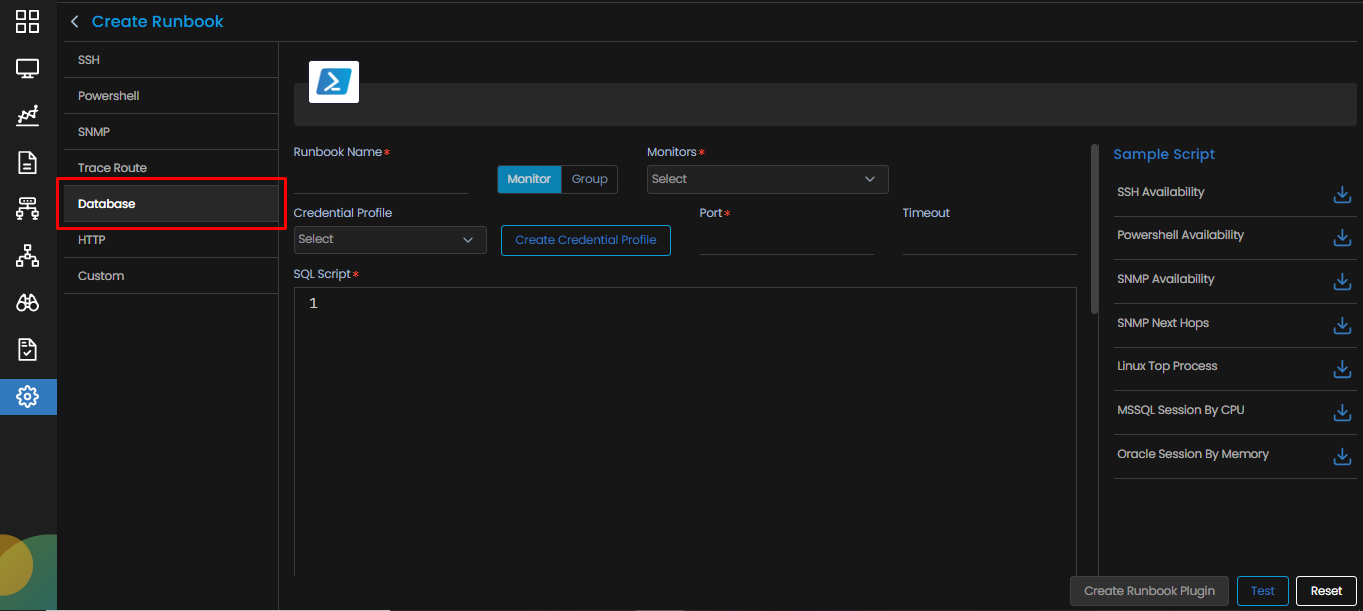
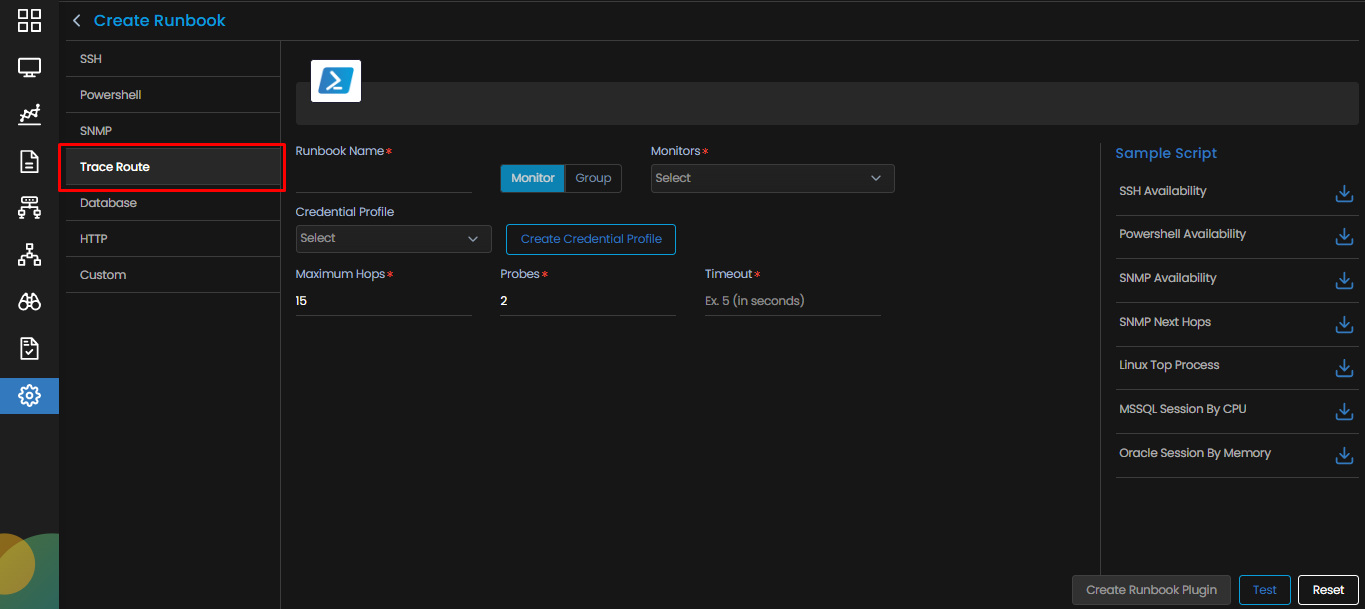
 , a screen appears to create a Runbook.