How to Use the Find Command in Linux with Practical Examples
A partition crosses 90% on a production host and nobody can say which directory grew. Does the answer come from opening directories one at a time, or from a single command that returns it in seconds? The difference between those two responses is usually fluency with a single utility.
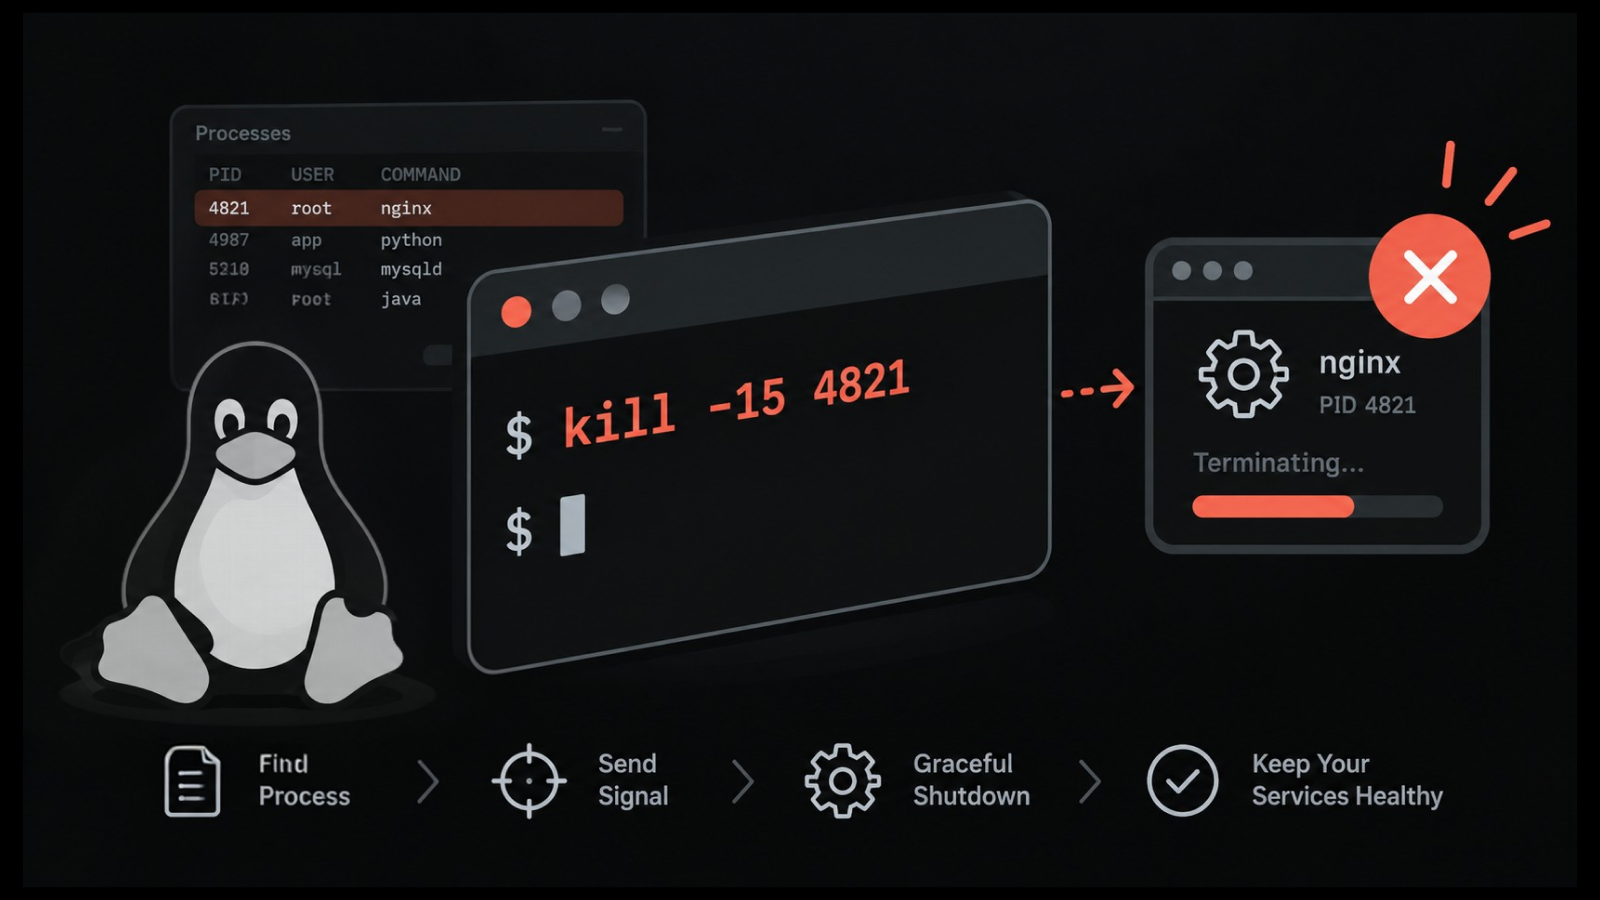
The Linux find command searches a filesystem in real time and can act on every match it returns. It ships with every mainstream distribution, needs no index, and never reports a file that has already been deleted. Most administrators learn three flags and stop there, which leaves the more useful half unused: searching by timestamp, matching on permissions, and running commands on the results.
If you already diagnose from the terminal, this pairs with a journalctl reference for the logging side of the same investigation. In this blog, you will see the full syntax of the find command in Linux, every filter worth knowing with a working example, the execution patterns that scale safely, and the point where a per-server search stops being enough.
What Is the Linux Find Command and What Does It Do?
The Linux find command searches a directory tree in real time and returns every file, directory or link that matches the conditions you supply. It descends recursively from a starting path, tests each entry against your expression, and prints or acts on the ones that pass.
Live traversal is what separates find from tools such as locate, which answer from a database built at some earlier point. Find caches nothing, so its results describe the filesystem as it exists the moment you press enter.
Accuracy: Results never include stale entries from a database that has not refreshed
Breadth: Conditions cover name, type, size, timestamps, ownership, permissions, depth and inode links
Action: Matches can be piped, batched or handed straight to another command
Availability: GNU findutils is present on effectively every Linux server you will touch
The ability to act on matches is where most of the value comes from. Locating the files is the setup, and doing something to them is the payoff.
What Is the Syntax of the Find Command in Linux?
The syntax of the find command in Linux has three parts: where to start, how to behave while traversing, and what to match. Written out, it looks like this.
find [options] [starting_path...] [expression]
Here is what each part controls.
Part | What it controls | Common values |
Options | Symlink handling and optimization before traversal begins | -L follow links, -P never follow (default), -O2 optimize test order |
Starting path | The directory the walk begins from | . current, / root, /var/log, ~ home |
Expression | Tests, operators and actions applied to each entry | -name, -type, -size, -mtime, -exec, -delete |
Omit the path and GNU find assumes the current directory. Omit the expression and it prints everything beneath that path, which is occasionally useful and more often a mistake on a large volume.
Why the Order of Find Arguments Matters
Find evaluates the expression left to right for every entry it visits. Tests that are quick to run, such as matching a filename, should come before tests that have to read file metadata, such as checking size.
# Slower: stats every file before checking the name
find /var -size +10M -name "*.log"
# Faster: name check rejects most entries before any stat call
find /var -name "*.log" -size +10M
On a directory holding a few hundred files the difference is invisible. On a volume holding several million, the same search can take minutes instead of seconds, which is a long wait in the middle of infrastructure troubleshooting.
How Do You Use the Find Command in Linux to Search by Name?
To use the find command in Linux to search by name, pass -name with the pattern you want matched, wrapped in quotes. The quotes stop the shell from expanding the wildcard before find ever sees it.
Most guides on how to use find command in Linux start here, because the most common Linux find file task is matching a filename or an extension. The five patterns below cover almost every name search you will run.
# Exact, case-sensitive match
find /home -name "report.pdf"
# Case-insensitive match
find /home -iname "Report.PDF"
# All files with one extension
find /var/log -name "*.log"
# Anything starting with a prefix
find /opt -name "backup_*"
# Hidden files and directories only
find /home -name ".*"
What Happens if You Forget the Quotes Around a Pattern
Unquoted wildcards get expanded by the shell in your current directory before find runs. Find then receives those local filenames as its pattern, so it searches for the wrong thing and returns confusing results with no error message.
Correct: find . -name "*.conf"
Broken: find . -name *.conf
Quote every pattern containing *, ? or [ ], and the problem never comes up again.
Matching on Paths and Regular Expressions
When the filename alone is not distinctive enough, match against the whole path instead. This narrows results in deep trees where the same filename appears in many places.
# Match against the whole path, including directories
find / -path "*/nginx/*.conf"
# Case-insensitive path match
find /srv -ipath "*cache*"
# Full regular expression against the whole path
find /etc -regex ".*/ssh.*\.conf"
# Exclude a path pattern from results
find /var -name "*.log" -not -path "*/archive/*"
-regex tests your pattern against the complete path from the starting directory downward, so a pattern written to match only part of the path will fail. That is why most working patterns need .* at both ends.
Name matching tells you where a file is. The next three filters tell you what it is, how large it has grown and how far down the tree to keep looking.
How Do You Find Files by Type, Size, and Depth?
Find files by type, size and depth using -type, -size and -maxdepth, which together answer most capacity questions without any additional tooling. These three filters cover the bulk of day-to-day investigation.
Filtering Find Results by File Type
The -type test restricts results to one kind of filesystem object. Six values cover almost everything you will need.
Flag | Matches | Typical use |
-type f | Regular files | Any search where directories would be noise |
-type d | Directories | Locating config or cache directories |
-type l | Symbolic links | Auditing links after a migration |
-type s | Sockets | Tracing stale application sockets |
-type p | Named pipes | Debugging inter-process plumbing |
-type b | Block devices | Storage and device inventory |
find /var/log -type f -name "*.gz"
find / -type d -name "node_modules"
find /usr/bin -type l
Finding Large Files That Fill a Disk
Size filtering is the fastest route from a full-disk alert to the directory responsible, and it is the one filter worth memorizing. Most of the capacity work covered in a server monitoring guide begins with this question. Use + for larger than, - for smaller than, and a suffix to set the unit.
# Files over 100 MiB anywhere on the system
find / -type f -size +100M 2>/dev/null
# The ten largest files under /var, sorted
find /var -type f -size +50M -exec du -h {} + 2>/dev/null | sort -rh | head -10
# Empty files and directories left behind by a failed job
find /tmp -empty
# Files between 10 and 50 MiB
find /data -type f -size +10M -size -50M
Two details catch people out. A bare number with no suffix means 512-byte blocks instead of bytes, and find always rounds a file's size up to the next whole unit, which is why -size -1M returns only empty files. Everything with content rounds up to at least 1M.
Suffix | Unit | Example |
c | Bytes | -size +1024c |
k | Kibibytes | -size +500k |
M | Mebibytes | -size +100M |
G | Gibibytes | -size +2G |
none | 512-byte blocks | -size +2000 |
Controlling How Deep Find Searches
Depth limits are the simplest way to cut the cost of a search. -maxdepth tells find how many levels down to go before it stops, -mindepth tells it how many levels to skip before it starts reporting, and both belong early in the expression so they take effect before any other test runs.
# Current directory only, no recursion
find . -maxdepth 1 -type f
# Skip the starting directory itself
find /home -mindepth 2 -maxdepth 3 -type d
# Three levels down from /etc
find /etc -maxdepth 3 -name "*.conf"
Decide what a search will ignore before you decide what it will look for. The tree below marks the exact point at which each flag halts the descent.
Type, size and depth narrow a search by what a file looks like today. Timestamps narrow it by what happened to the file, which is what most investigations actually need.
How Do You Find Files by Time in Linux?
Find files by time in Linux using -mtime, -atime and -ctime for day-level tests, or their -min equivalents when you need minute precision. Time filtering is what turns find from a search tool into an investigation tool.
What mtime, atime and ctime Actually Track
The three timestamps answer different questions, and choosing the wrong one produces results that look correct while pointing at the wrong files.
Modification time: When the file's contents last changed
Access time: When the file was last read, often disabled on production mounts for performance
Change time: When the inode metadata last changed, including permissions, ownership and link count
A permission change updates ctime and leaves mtime untouched. That single behavior is the most common reason a change-detection search comes back empty.
Use ctime whenever you are looking for a permission or ownership change. The two states below follow one file's three timestamps through a single chmod.
That distinction matters during root cause analysis, and it is why an audit log and a filesystem timestamp sometimes disagree. The commands below cover the day and minute windows you will reach for most.
# Changed in the last 24 hours
find /etc -type f -mtime -1
# Not touched in over a year
find /archive -type f -mtime +365
# Modified in the last 30 minutes
find /var/www -type f -mmin -30
# Metadata altered in the last two days
find /etc -type f -ctime -2
The Rounding Trap in Day-Based Time Tests
Day arguments count whole 24-hour periods and throw away any partial day, so the boundaries rarely fall where people expect them to. Reading each expression literally is the most reliable way to avoid an off-by-one error.
Expression | Literal meaning | Plain reading |
-mtime 0 | Zero full days old | Modified within the last 24 hours |
-mtime -7 | Fewer than seven full days | Modified in the last week |
-mtime 7 | Exactly seven full days | Modified between 7 and 8 days ago |
-mtime +7 | More than seven full days | At least 8 days old, never 7 |
The +7 row is the one that catches people. A cleanup job written as -mtime +7 will leave a file that is seven and a half days old in place, because that file has not yet completed its eighth full day.
Comparing Against a Reference File or a Date
Counting days backward gets awkward when you care about a specific event instead of a rolling window. Comparing against a marker file or a fixed date is the clearest way to answer "what changed since the deployment".
# Everything newer than a reference file
find /opt/app -newer /var/log/deploy.marker
# Everything modified after an absolute date
find /var -newermt "2026-09-01"
# Between two dates
find /var -newermt "2026-09-01" ! -newermt "2026-09-15"
Dropping a marker file at the start of a change window costs nothing and makes the post-change audit a single command. Time answers what changed, and the next question is usually who can change it.
How Do You Search by Permissions and Ownership?
Search by permissions and ownership with -perm, -user and -group, which is how most filesystem hardening checks get written. Permissions loosen gradually as scripts, deployments and manual fixes accumulate, and nobody notices until an attacker or an auditor does. This is one of the few technical findings that goes straight onto an audit report.
The Three Permission Matching Modes in Find
-perm behaves differently depending on the prefix, and the three modes answer three different questions.
Exact match: -perm 644 returns files whose permissions are precisely 644
All bits present: -perm -644 returns files with at least those bits, plus any others
Any bit present: -perm /644 returns files carrying any one of those bits
# Exactly 644
find /var/www -type f -perm 644
# World-writable files, a standard hardening check
find / -type f -perm -002 2>/dev/null
# SUID binaries, worth reviewing on any internet-facing host
find / -type f -perm -4000 2>/dev/null
# SGID binaries
find / -type f -perm -2000 2>/dev/null
Finding Files by Owner and Spotting Orphaned Accounts
Ownership tests locate files left behind by deleted accounts or by deployment scripts that ran as the wrong user. When an account is removed and its files are not, those files keep a user ID that no longer maps to anyone.
# Owned by a specific user
find /home -user deploy
# Owned by a specific group
find /srv -group www-data
# No matching user account exists
find / -nouser 2>/dev/null
# No matching group exists
find / -nogroup 2>/dev/null
Running the world-writable and SUID checks on a schedule turns them into a standing control instead of a one-off. Pairing them with file integrity monitoring closes the loop between detection and evidence.
How Do You Combine Conditions with Logical Operators?
Combine conditions with -and, -or and -not, using escaped parentheses to control grouping. Find applies -and implicitly between adjacent tests, so most expressions already use it without saying so.
# Implicit AND: both conditions must hold
find /data -type f -name "*.csv"
# OR: either extension matches
find /uploads -type f \( -name "*.jpg" -o -name "*.png" \)
# NOT: everything except one pattern
find /var/log -type f ! -name "*.gz"
# Grouped logic: images OR videos, excluding thumbnails
find /media -type f \( -name "*.mp4" -o -name "*.jpg" \) ! -path "*/thumbs/*"
# Large and old, a typical cleanup candidate query
find /var/backups -type f -size +1G -mtime +90
The backslashes stop the shell from reading the parentheses as a subshell before find sees them. Quoting them as '(' and ')' works identically, and some administrators find that easier to read. Grouping matters because it turns a vague cleanup request into a written rule a manager can approve.
How Do You Run Commands on the Files That Find Returns?
Run commands on matched files with -exec, -execdir or by piping into xargs, and the choice between them changes how many processes get spawned. This is the part of the utility that most guides cover thinly, and it is where the performance difference lives.
The Difference Between Exec With Semicolon and Exec With Plus
Both terminators run the same command. The number of times they run it is not the same.
-exec command {} \;: Runs the command once per matching file
-exec command {} +: Batches as many files as the argument limit allows into each invocation
# One grep process per file
find /etc -name "*.conf" -exec grep -l "listen" {} \;
# A handful of grep processes for thousands of files
find /etc -name "*.conf" -exec grep -l "listen" {} +
On ten thousand matches, the first form spawns ten thousand processes. The second typically spawns a few dozen. On a busy host that difference is the gap between a background task and a visible load spike.
Process count is the number to watch when a cleanup job starts slowing down the applications running beside it. The two lanes below send the same ten thousand files through each form so the difference is countable.
When xargs Is the Better Choice
xargs gives you parallelism and finer control over batching, which -exec does not offer. Always pair it with -print0, which separates filenames using a null character so that a name containing spaces is never split into two arguments.
# Null-separated handoff, safe with spaces in filenames
find /var/log -name "*.log" -print0 | xargs -0 gzip
# Four parallel workers
find /images -name "*.png" -print0 | xargs -0 -P 4 -n 100 optipng
# Cap the number of arguments per invocation
find /data -type f -print0 | xargs -0 -n 50 md5sum
-execdir is the safer version of -exec. It runs the command from inside the directory that holds the match, so a directory renamed during a long search cannot cause the command to act on the wrong path.
Copying, Moving and Changing Permissions in Bulk
Bulk actions are where find replaces a script someone would otherwise write and maintain. The same expression that locates files can correct them in one pass.
# Reset directory permissions across a web root
find /var/www -type d -exec chmod 755 {} +
# Reset file permissions in the same tree
find /var/www -type f -exec chmod 644 {} +
# Copy every config file to a staging directory
find /etc -name "*.conf" -exec cp {} /backup/configs/ \;
# Move old archives onto slower storage
find /data -name "*.tar.gz" -mtime +180 -exec mv {} /mnt/cold/ \;
# Change ownership after a service account migration
find /srv/app -user olduser -exec chown newuser:newgroup {} +
Each of these replaces a maintenance ticket that would otherwise wait in someone's queue.
Deleting Matched Files Safely
-delete is fast and unforgiving, so the discipline around it matters more than the syntax. Three habits prevent almost every accident.
Preview first: Run the identical expression with -print before swapping in -delete
Anchor the path: Never start a destructive expression at / or at a variable that might be empty
Keep the filters ahead of the action: -delete placed before a test will delete before the test is evaluated
# Step one: look at what matches
find /tmp -type f -name "*.tmp" -mtime +7 -print
# Step two: the same expression, acting on it
find /tmp -type f -name "*.tmp" -mtime +7 -delete
# Prompt before each removal
find /tmp -name "core.*" -ok rm {} \;
Anyone working out how to use find command Linux hosts run in production should practice that order until it becomes automatic. For recurring cleanups, a scheduled expression backed by proper log rotation is more predictable than a manually run command, because the retention rule lives in configuration instead of someone's shell history.
Acting on thousands of files at once raises a second question, which is what the search itself costs the server while it runs.
How Do You Keep Find from Slowing Down a Production Server?
Keep find from slowing a production server by scoping the starting path, pruning directories you never need, staying on one filesystem, and lowering the priority of heavy sweeps. A root-level search reads metadata for every inode on every mounted volume, and on network mounts that cost multiplies.
Four Controls That Keep a Find Sweep Cheap
Start narrow: /var/log instead of / removes almost all of the traversal before it begins
Prune expensive subtrees: -prune stops descent into directories you already know are irrelevant
Stay on one filesystem: -xdev prevents the walk from crossing into NFS, bind or container mounts
Deprioritize the sweep: nice and ionice keep a scan behind production work in the scheduler
# Skip node_modules entirely
find /srv -type d -name "node_modules" -prune -o -type f -name "*.js" -print
# Skip several directories at once
find / \( -path /proc -o -path /sys -o -path /mnt \) -prune -o -name "*.conf" -print
# Never leave the root filesystem
find / -xdev -type f -size +500M
# Run a heavy scan at the back of the queue
ionice -c3 nice -n19 find / -xdev -type f -size +1G 2>/dev/null
The 2>/dev/null ending deserves a note of its own. It hides the permission-denied warnings find prints for directories your account cannot open, which would otherwise scroll the results you wanted off the screen.
With the filters, the actions and the guardrails all covered, the remaining question is which combinations you will reach for most often.
What Are the Most Useful Find Command Examples for Linux Administrators?
The most useful find command examples map directly to the four questions that come up during an incident. What grew, what changed, what is exposed, and what can safely be removed. Keeping a short find Linux command reference nearby is how most administrators learn how to use the find command in Linux without ever reading the manual page end to end.
Situation | Command |
Disk filled overnight | find / -xdev -type f -size +500M -mtime -1 2>/dev/null |
Config changed since deployment | find /etc -type f -newer /var/log/deploy.marker |
Old logs eligible for cleanup | find /var/log -type f -name "*.log" -mtime +30 |
World-writable files exposed | find / -xdev -type f -perm -002 2>/dev/null |
SUID binaries to review | find / -xdev -type f -perm -4000 2>/dev/null |
Files owned by a departed user | find /home -user olduser -type f |
Empty directories after a migration | find /srv -type d -empty |
Core dumps consuming space | find / -xdev -name "core.*" -type f -size +10M 2>/dev/null |
Broken symbolic links | find /opt -xtype l |
Archive everything from last week | find /data -type f -mtime -7 -print0 | xargs -0 tar czf weekly.tar.gz |
Count files in a directory tree | find /var/spool -type f | wc -l |
Largest ten files under a path | find /var -type f -printf '%s %p\n' 2>/dev/null | sort -rn | head -10 |
That last example uses -printf, which prints the size and path itself instead of calling another command for every file. It is a GNU extension, so macOS and BSD systems need findutils installed before it works.
How Does Find Compare with Locate, Grep, and Which?
Find compares with locate, grep and which by answering a different question from each of them, and reaching for the wrong one is the most common reason a search feels slow.
Tool | Answers | Speed | Freshness |
find | Which files match these attributes right now | Proportional to tree size | Always current |
locate | Where is a file with this name | Near-instant | As fresh as the last updatedb run |
grep | Which files contain this text | Proportional to file contents | Always current |
which | Which executable will run for this command | Instant | Always current |
The practical rule is short. Use locate when you want a filename fast and can tolerate a stale index, grep when the question is about content, which when the question is about your PATH, and the find command Linux ships with when the question involves size, age, ownership, permissions or an action on the results.
Note on a related search: Anyone looking for the Linux command to find an IP address wants ip addr or hostname -I, since find searches the filesystem and never touches network configuration.
Combining two of them covers most investigations. find /etc -name "*.conf" -exec grep -l "proxy_pass" {} + locates candidate files by attribute, then filters them by content in one pass.
What Does Manual File Investigation Cost an IT Organization?
Manual file investigation costs an IT organization in four places that rarely appear on the same report. None of them show up while the command is running, which is why the total takes so long to become obvious.
Consider a mid-size retailer running forty Linux hosts behind its order platform. Every capacity scare pulls a senior engineer into an hour of terminal work, the answer lives only in that person's scrollback, and the next scare starts from zero.
Engineering hours: Senior people spend time working out something the infrastructure could have reported on its own
Outage exposure: A partition filling during a peak trading window costs revenue, and the cost of downtime is rarely limited to the hour it lasted
Storage overspend: With no growth history, capacity decisions default to buying headroom nobody has measured
Audit exposure: Permission drift discovered during an audit is expensive, while the same drift caught on a schedule is routine
The commands in this article answer every one of those questions accurately. What they cannot do is answer them repeatedly, across the whole environment, without someone present to type them.
That limit is worth stating precisely, because it marks the point where a different kind of tooling starts to pay for itself.
Where Does the Find Command Stop Being Enough?
The find command stops being enough the moment the question spans more than one host or more than one point in time. It describes one machine, at one instant, and only the machine you happen to be logged into.
That model has three limits worth naming plainly, and none of them are flaws in the tool.
No history: A file that grew and was deleted before you ran the command leaves no trace
No fleet view: Answering the same question across forty servers means forty logins, or a script and a shared key to maintain
No alerting: Something has to already be wrong for anyone to think of running it
For a single server during an active incident, none of that matters. When the same capacity question returns every month, and somebody needs the answer before a partition fills, logging into each host becomes the slowest step in the process. The pattern shows up across most Linux monitoring issues that eventually get escalated.
This is where continuous collection earns its place. Motadata ObserveOps polls disk, inode and directory-level growth across every monitored host, keeps the history, and raises a threshold breach before anyone needs to log in.
History you can look back through: Growth curves show when a partition started filling and how fast
One view across hosts: The same capacity question gets answered for the whole environment in one query
Context alongside the file data: Process, memory and network metrics land beside filesystem metrics on the same timeline
Engineers working through capacity planning use that history to forecast ahead of the breach, and storage resource monitoring extends the same view to the arrays underneath.
To be fair about the trade-off, an observability platform will never replace find at the terminal. When you are already on the host with a specific question, nothing beats typing it directly. What changes is how often you need to be on the host at all.
See Every Server at Once with Motadata ObserveOps
Fluency with the Linux find command is worth having, and it stays useful however much tooling runs above it. Every administrator should be able to answer a size, age or permission question from a prompt without reaching for anything else.
What it cannot do is watch. The moment the question widens from "what is filling this host" to "which of our hosts is trending toward a full volume", the answer has to come from something that has been collecting all along.
At the prompt: Ad hoc questions about one host, answered immediately
From the platform: Recurring questions about many hosts, answered before anyone asks
Motadata ObserveOps brings Linux, Windows and virtualized infrastructure into one observability view, with filesystem, process and resource metrics retained long enough to show trends across weeks. Threshold and anomaly-based alerts flag growth before it becomes an outage, and the same platform carries Linux log management so that the file-level view and the event-level view are in one place. If you are formalizing what gets watched, a server monitoring checklist is a practical starting point for deciding which metrics belong on every host.
FAQs
How to use Linux find command to search for a file by name?
Run find /path -name "filename" to search a directory tree for an exact filename, or use -iname to ignore case. Always quote the pattern so the shell does not expand wildcards before find receives them. Add -type f to exclude directories from the results.
What is the difference between find and locate in Linux?
Find walks the filesystem in real time and returns current results, while locate queries a prebuilt database and returns answers almost instantly. Locate is faster but can miss files created since the last database refresh. Find also supports filtering by size, time, ownership and permissions, which locate does not.
How do you find files modified in the last 24 hours?
Use find /path -type f -mtime -1 to list files whose contents changed within the last 24 hours, or -mmin -60 for the last hour. Remember that -mtime counts whole 24-hour periods and discards the remainder. Answering the same question across many servers at once is where an observability platform such as Motadata ObserveOps is quicker than a loop.
How do you safely delete files with the find command?
Run the expression with -print first to review the matches, then repeat the identical command with -delete in place of -print. Anchor the starting path to a specific directory and keep every filter ahead of the action. The -ok flag prompts for confirmation on each file if you want a slower, safer pass.
Can the find command replace a server monitoring tool?
No, because find reports the filesystem only at the moment it runs and only on the host you are logged into. It has no history, no cross-server view and no alerting, which is what an observability platform adds. Platforms such as Motadata ObserveOps collect those metrics continuously so capacity problems surface before they affect service.
Author
Poonam Lalani
Content Strategist
Poonam Lalani is a B2B content strategist and writer with a background in computer engineering and experience across enterprise technology domains, including AI, cloud, DevOps, data engineering, and IT operations. She specializes in creating research-driven content that simplifies complex ideas and supports product education, thought leadership, and business growth.