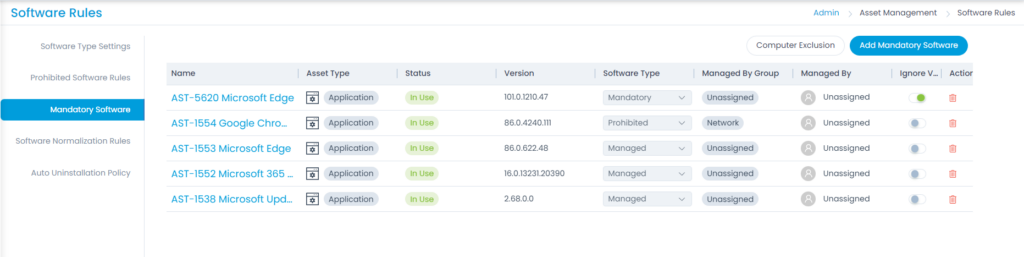
Software Rules
In the Service Based industry there are some pre-defined regulations for all the management softwares that are pre-defined while installation. Here, in the Asset management part, assets are broadly divided in 3 divisions which includes Hardware, Software, and Non IT.
Now, here Software as an asset plays a key role because the management of the software assets sounds to be a very tedious job. Thus, various pre-defined rules allows you to notify fewer violations if they occur.
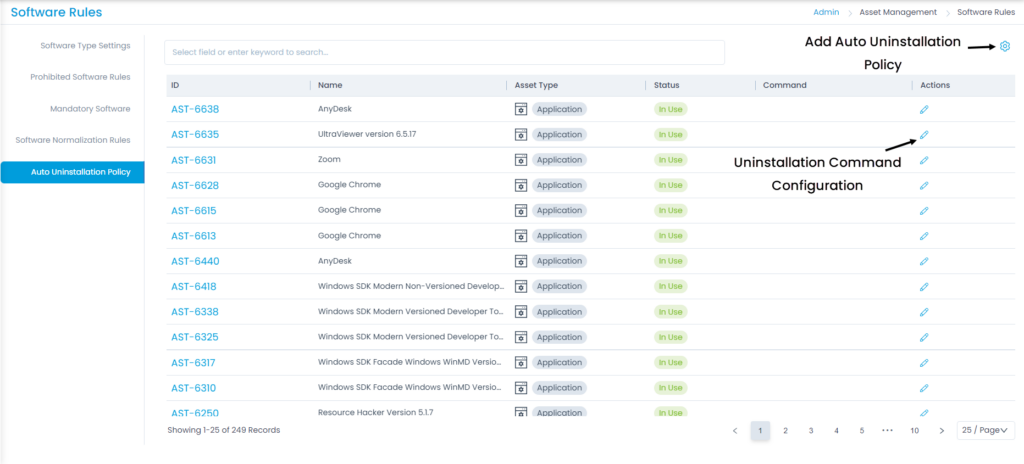
To view the Software Rules page, navigate to Admin > Asset Management > Software Rules.
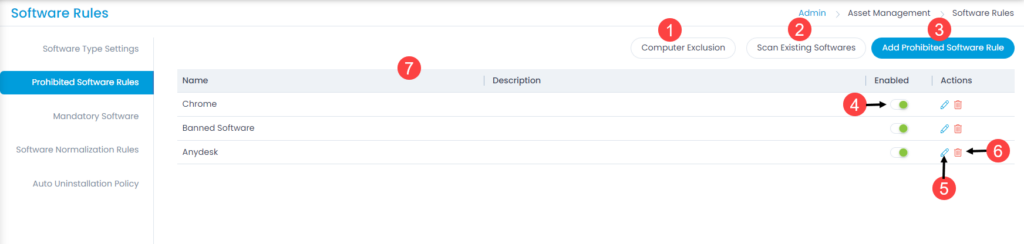
Below is the list of pre-defined software rules:
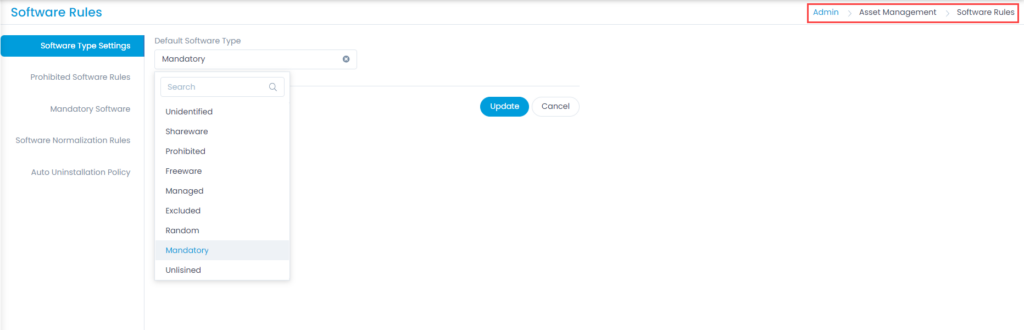
Software Type Settings
This allows you to set the ‘Default Software Type’ to any from the pre-defined types. Thus, if any asset is added or discovered the Software type would be by default the selected one here.