Security
Security deals with securing the application from inside and outside threats. This section enables you to view the different audit logs, user sessions as well as configure the various security policies. You can also blacklist certain IP Addresses from accessing the ServiceOps Portal.
To view the Security page, navigate to Admin > Organization > Security.
It consists of the following tabs:
- Configuration Audit
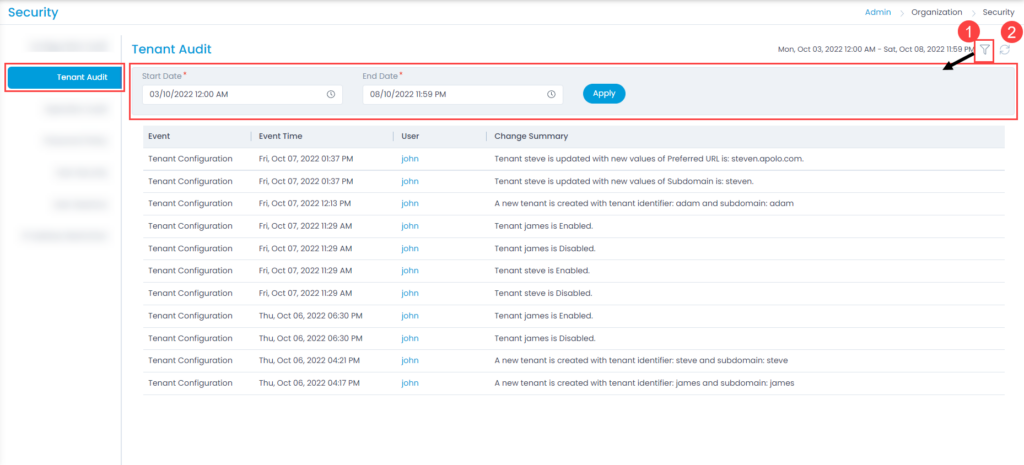
- Tenant Audit
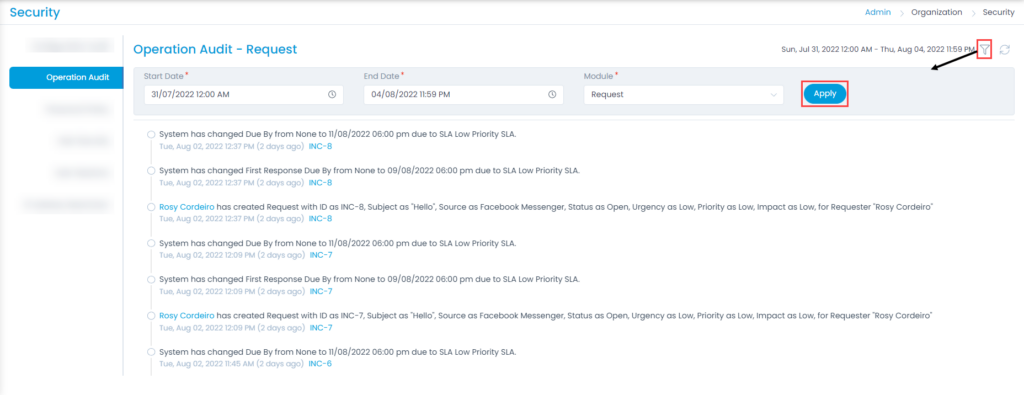
- Operation Audit
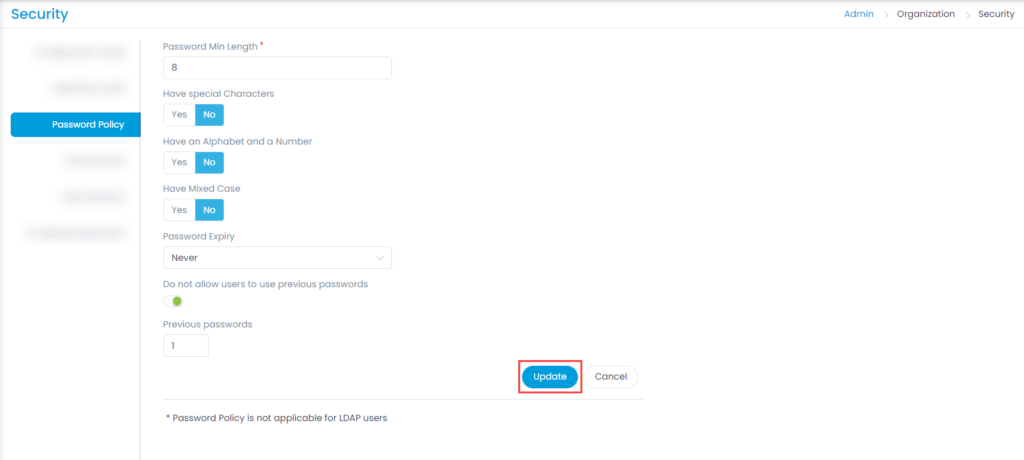
- Password Policy
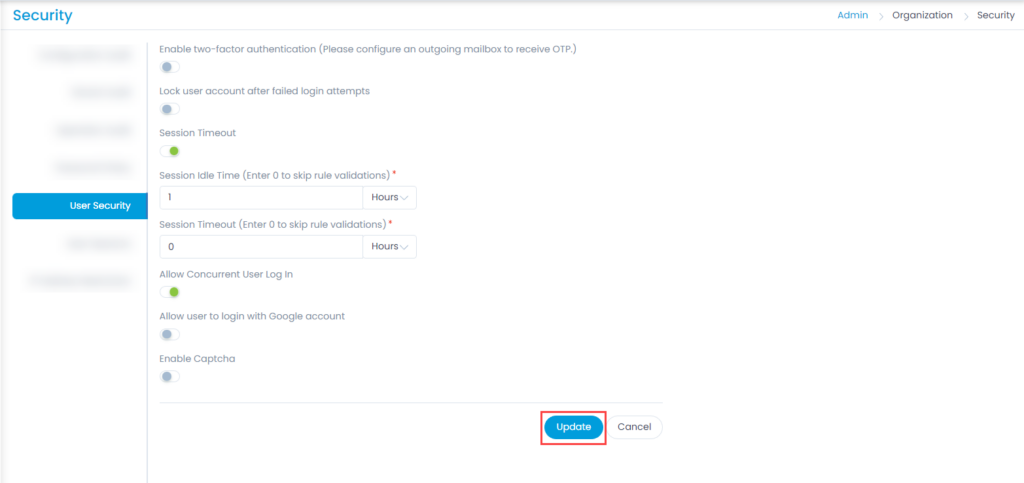
- User Security
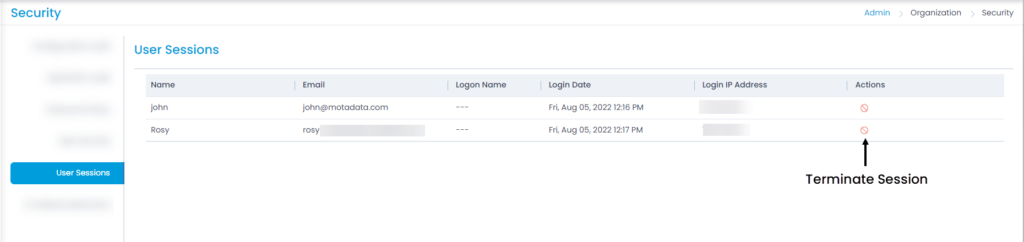
- User Sessions
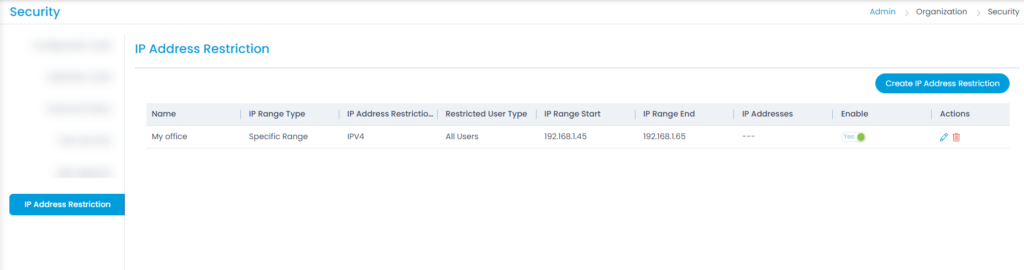
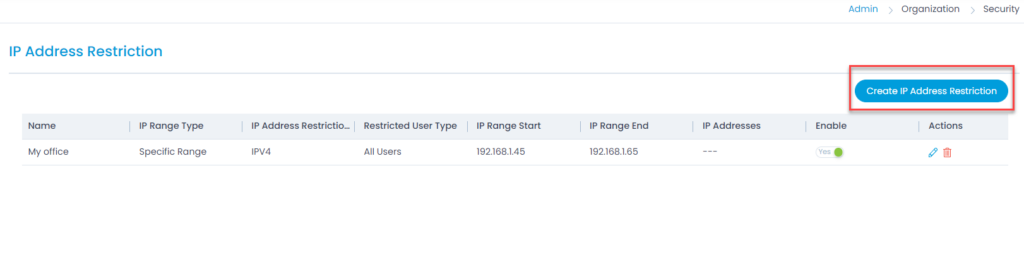
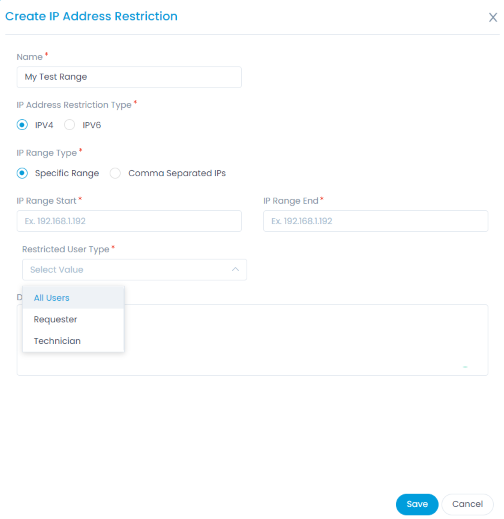
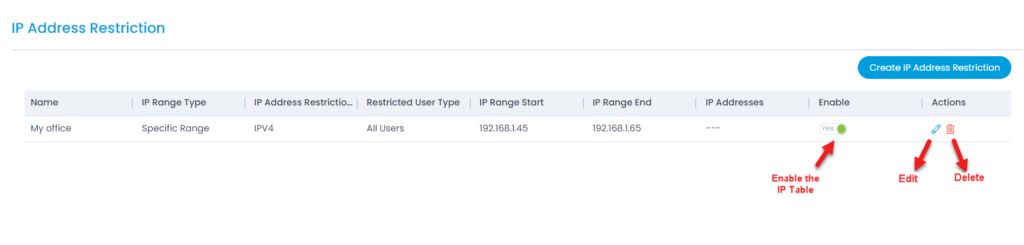
- IP Address Restriction
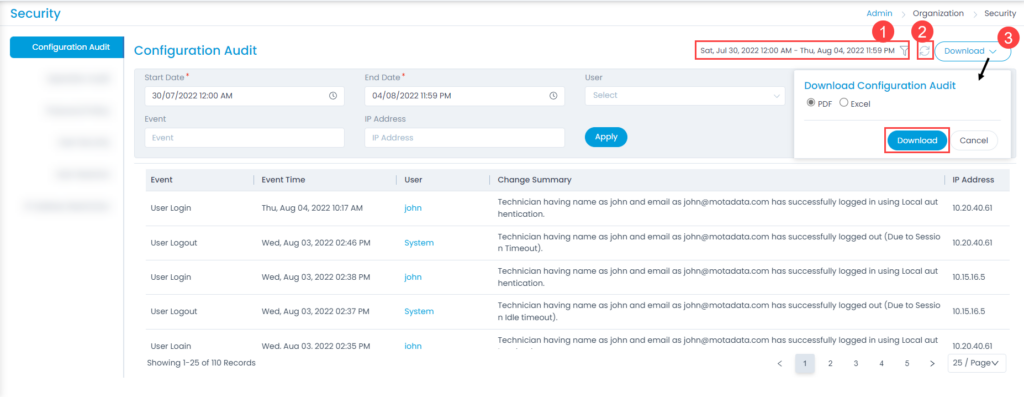
Configuration Audit
This tab displays the configuration summary along with the audit logs about all the technical changes. You can also download the summary in PDF or Excel format if required.