Adding an Asset
You can add a new asset directly into the system whenever required. To add an asset,
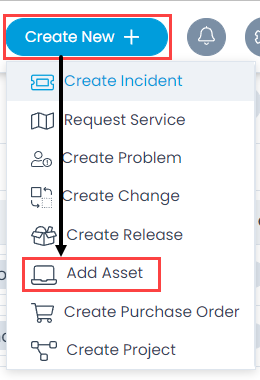
- Click Create New + button and select the Add Asset option. The following page appears.
A proprietary framework that incorporates AI and ML for IT operations to increase efficiency and reduce operations cost.
Gain the complete data control across multiple sources using AI powered analytics at any scale
Explore MoreAccelerate your service delivery and streamline internal processes to meet the rising expectations of your end-users.
You can add a new asset directly into the system whenever required. To add an asset,
| Parameter | Description |
|---|---|
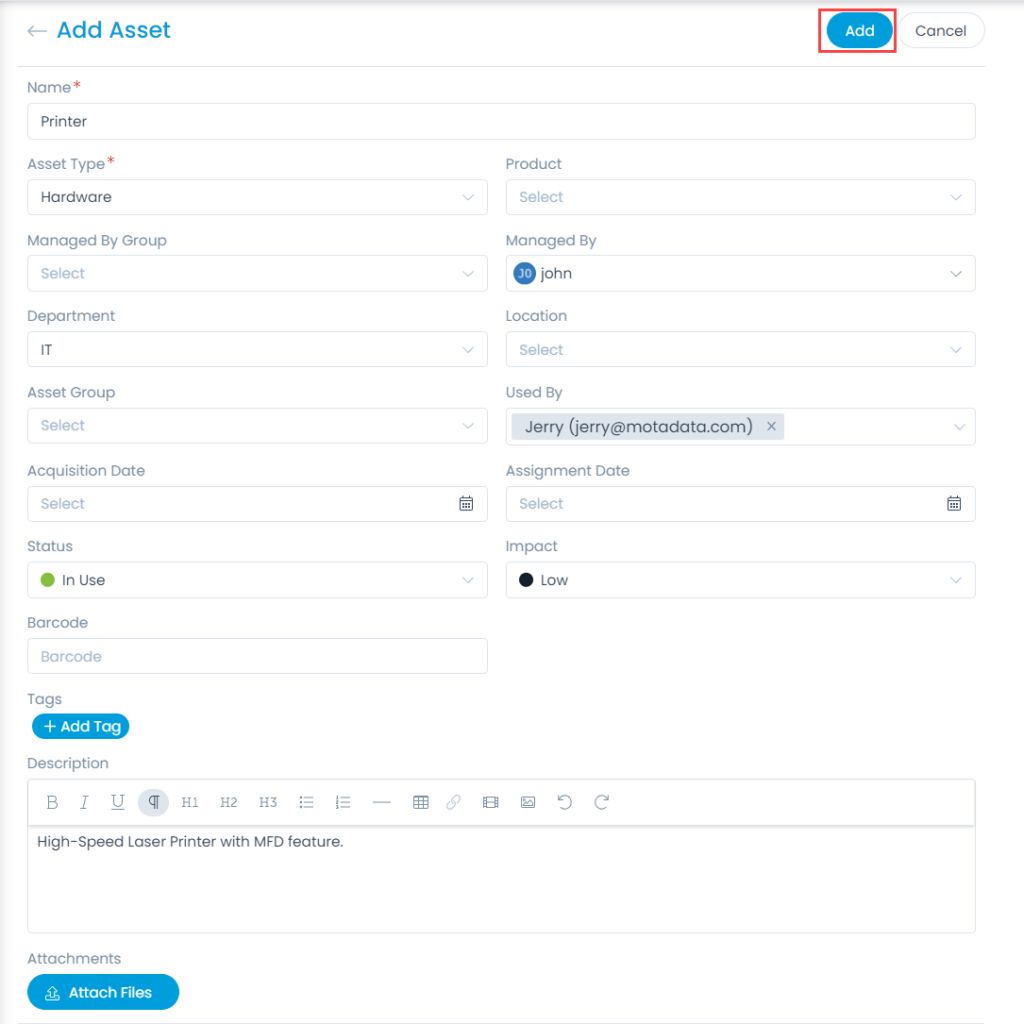
| Name | Enter the name of the asset. |
| Asset Type | Select the type of the Asset. Select Hardware, Software, or Non-IT. A sub-category is also available for all the particular categories of any asset. |
| Product | Select the desired product from the dropdown. Also, you can search your required products. |
| Managed By Group | Select the desired group which will manage the particular asset. |
| Managed By | Select the desired name of the technician who will manage the asset. |
| Department | Select the desired department to which the asset belongs. |
| Location | Select the location of the asset. |
| Asset Group | Select the group to which the asset belongs. |
| Used By | Select the name of the person who is going to use the asset. |
| Acquisition Date | Select the date when the asset is added. |
| Assignment Date | Select the date when the asset is handed over (assigned) to the user. |
| Status | Select the status of the asset. The options are: In Use, In Stock, Missing, and Retired. |
| Impact | Select the impact of the asset. The options are: Low, On Users, On Department, and On Business. |
| Barcode | Enter the barcode number if available or generate if required. This field can be updated later. |
| Tags | Enter the tags for the asset. |
| Description | Enter a brief description about the asset. |
| Attachments | Attach any required documents or proofs along with the addition of the asset. |
| Cookie | Duration | Description |
|---|---|---|
| cookielawinfo-checkbox-analytics | 11 months | This cookie is set by GDPR Cookie Consent plugin. The cookie is used to store the user consent for the cookies in the category "Analytics". |
| cookielawinfo-checkbox-functional | 11 months | The cookie is set by GDPR cookie consent to record the user consent for the cookies in the category "Functional". |
| cookielawinfo-checkbox-necessary | 11 months | This cookie is set by GDPR Cookie Consent plugin. The cookies is used to store the user consent for the cookies in the category "Necessary". |
| cookielawinfo-checkbox-others | 11 months | This cookie is set by GDPR Cookie Consent plugin. The cookie is used to store the user consent for the cookies in the category "Other. |
| cookielawinfo-checkbox-performance | 11 months | This cookie is set by GDPR Cookie Consent plugin. The cookie is used to store the user consent for the cookies in the category "Performance". |
| viewed_cookie_policy | 11 months | The cookie is set by the GDPR Cookie Consent plugin and is used to store whether or not user has consented to the use of cookies. It does not store any personal data. |